
Swerdna
Shoei X15 helmet
Review: Aerodynamic Advantage or Overpriced Hype?
The Shoei X-Fifteen helmet has taken the motorcycle world by storm, promising top-of-the-line performance and unparalleled comfort. But with a hefty price tag, is it all hype, or does it truly deliver a superior riding experience? We strapped one on and hit the road to find out.
First Impressions: Sleek Design, Lightweight Feel
Right out of the box, the X-Fifteen impresses with its aerodynamic design. The sculpted lines and integrated spoiler scream performance, hinting at the helmet’s potential for high-speed stability. Picking it up, you’re immediately struck by its surprising lightness. Shoei’s use of advanced materials, like their AIM+ shell construction, keeps weight to a minimum, reducing neck strain on long rides.
Ventilation: A Breath of Fresh Air (Literally)
One of the X-Fifteen’s most touted features is its ventilation system. Shoei boasts a total of seven intake vents and six exhaust vents, strategically placed to maximize airflow. During our testing, we found this to be true. Even on sweltering days, cool air readily circulated through the helmet, keeping our heads comfortable and sweat-free.
Visor Clarity and Pinlock Integration: A Clear Winner
The X-Fifteen’s visor offers exceptional clarity, providing a distortion-free view of the road. The included Pinlock anti-fog insert integrates seamlessly, preventing visor fogging even in the most humid conditions. This is a major plus for riders who encounter frequent weather changes.
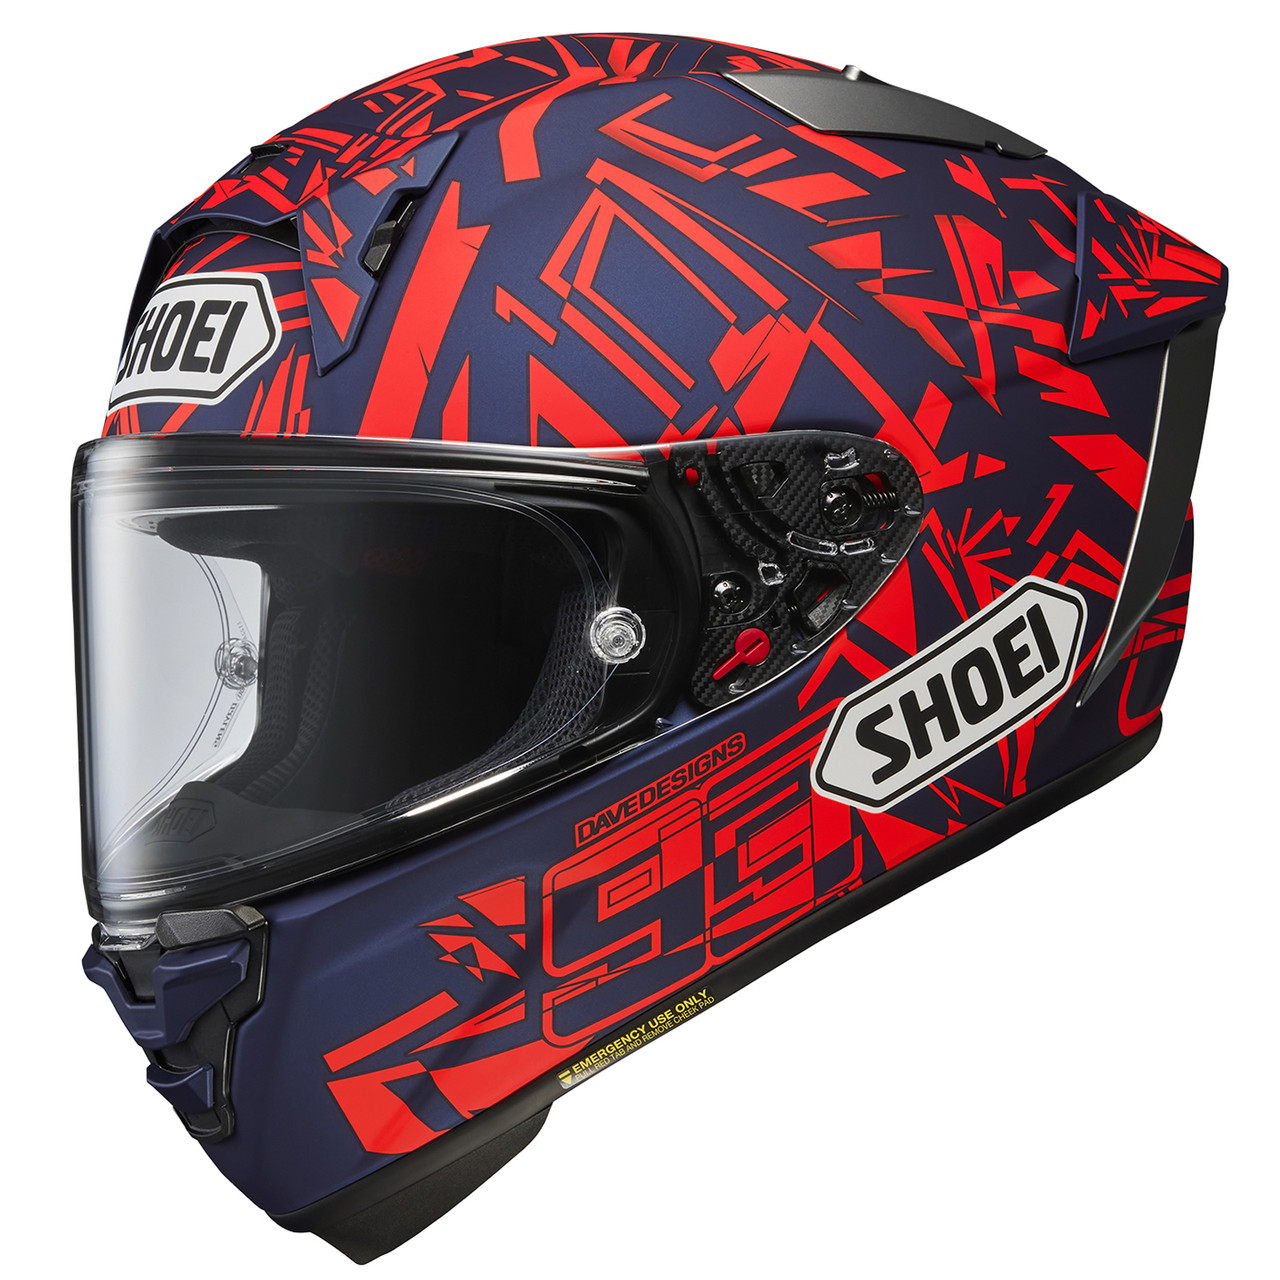
Shoei X-Fifteen Marquez Dazzle
Noise Control: A Quiet Ride (Mostly)
Shoei claims the X-Fifteen is quieter than its predecessor, the X-Fourteen. While wind noise is significantly reduced, it’s not entirely silent. At highway speeds, some wind noise is still noticeable, particularly around the chin vent. However, compared to other high-performance helmets, the X-Fifteen remains a quiet option.
Fit and Comfort: A Personalized Experience
The X-Fifteen utilizes Shoei’s E.Q.R.S. (Emergency Quick Release System) cheek pads, allowing for easy helmet removal in case of an accident. The interior liner is fully removable and washable, a major benefit for keeping your helmet fresh. Shoei also offers multiple cheek pad and crown pad sizes for a custom fit. However, achieving that perfect fit might require some trial and error, so be prepared to invest in additional padding if needed. Find more information on choosing a helmet here.
Safety: Meeting the Highest Standards
The X-Fifteen is DOT, ECE, and Snell M2020R certified, ensuring it meets the most stringent safety standards. The multi-layered AIM+ shell construction disperses impact energy in a crash, while the EPS liner provides additional protection. Safety should always be your top priority, and the X-Fifteen delivers in this crucial aspect.
The Verdict: A Top Performer, But Not Without Flaws
The Shoei X-Fifteen is undoubtedly a top-tier helmet, offering exceptional ventilation, a comfortable fit (with some potential customization needed), and excellent safety features. The aerodynamic design and surprisingly lightweight build make it a great choice for both track days and long-distance touring. However, the high price tag might deter some budget-conscious riders. Additionally, while wind noise is reduced, it’s not entirely eliminated.
Who Should Buy the Shoei X-Fifteen?
If you’re a serious rider who prioritizes performance, comfort, and safety, and are willing to invest in a premium helmet, the X-Fifteen is an excellent choice. However, if you’re on a tight budget or prioritize absolute silence, there might be better options available.
Ultimately, the decision comes down to your individual needs and priorities. The Shoei X-Fifteen is a top contender, but it’s not a one-size-fits-all solution.
Get it here on Amazon
Pros and Cons of the Shoei X-Fifteen Helmet
Pros:
- Excellent Ventilation: The strategically placed vents keep your head cool and comfortable, even on hot days.
- Lightweight Design: Advanced materials minimize weight, reducing neck strain on long rides.
- Exceptional Clarity and Anti-Fog: The visor offers a distortion-free view, and the Pinlock insert prevents fogging.
- Improved Aerodynamics: The aerodynamic design reduces wind buffeting and improves stability at high speeds.
- Safety Features: DOT, ECE, and Snell M2020R certified with a multi-layered shell and EPS liner for maximum protection.
- Customizable Fit: Removable and washable liner with multiple cheek pad and crown pad sizes for a personalized fit.
- Quiet Ride (Mostly): Significantly reduced wind noise compared to some competitors.
Cons:
- High Price Tag: The X-Fifteen is a premium helmet with a price to match.
- Not Completely Silent: Some wind noise is still noticeable, particularly around the chin vent.
- Fit Might Require Adjustment: Finding the perfect fit may involve purchasing additional cheek pads or crown pads.
- No Integrated Sun Visor: Requires a separately purchased pinlock-prepared sun shield.
FAQ
Q: How much does the Shoei X-Fifteen cost?
A: The price can vary depending on the retailer and graphics, but expect to pay around $[insert typical price range].
Q: Does the Shoei X-Fifteen come with a sun visor?
A: No, the X-Fifteen does not come with an integrated sun visor. However, it is compatible with Shoei’s CNS-1 pinlock-prepared sun shield which can be purchased separately.
Q: How easy is it to change the visor on the Shoei X-Fifteen?
A: The visor replacement system on the X-Fifteen is a toolless design, making it relatively easy to swap out visors.
Q: Is the Shoei X-Fifteen suitable for glasses wearers?
A: Yes, the X-Fifteen has ample space for most eyeglasses, and the cheek pads come with cutouts to accommodate glasses temples comfortably.
Q: How does the Shoei X-Fifteen compare to the Shoei RF-1400?
A: Both are excellent helmets, but the X-Fifteen has a more track-focused design with superior ventilation and a wider field of view. The RF-1400 might be a better choice for riders prioritizing a quieter, more touring-oriented experience.
Q: Where can I buy the Shoei X-Fifteen?
A: You can find the X-Fifteen at authorized Shoei retailers or online motorcycle gear stores.
Premium Cruiser Helmets for Stylish Safety
When it comes to cruiser helmets, nothing beats the feeling of freedom as you hit the open road, while having the peace of mind that you’re well protected. The right cruiser helmet can provide both style and safety, offering the perfect balance for your rides. Whether you’re a Harley enthusiast or a motorcycle rider, there are premium cruiser helmets available that cater to your specific needs.
We have done extensive research and review to bring you the best cruiser helmets on the market. From full-face designs to Harley-specific models, we have identified top-quality helmets that combine style, comfort, and safety. So, can a cruiser helmet truly deliver both the freedom of the open road and the peace of mind for a safe ride? Let’s find out!
Key Takeaways:
- Choosing a premium cruiser helmet ensures that you get the best combination of style and safety.
- There are various types of cruiser helmets available, including full-face designs and Harley-specific models.
- A properly fitting helmet is crucial for comfort and safety.
- When selecting a cruiser helmet, consider key features such as sturdy construction, ventilation, and compatibility with communication devices.
- Research, read reviews, and consult with knowledgeable staff to make an informed decision.
The Importance of a Properly Fitting Helmet
A properly fitting helmet is not only a matter of comfort but also a crucial safety consideration. When it comes to cruiser helmets, finding the right fit is essential to ensure optimal protection on the road.
Before purchasing a helmet, it is crucial to try it on and assess its fit. The helmet should provide an even pressure around your head without any tight spots or discomfort. Keep in mind that these discomforts can become more pronounced during prolonged rides.
To find the best fit, it is recommended to try on different models and brands. Each helmet may have subtle differences in shape and size, so exploring various options is key. Remember that a helmet that fits well is fundamental for your safety as it minimizes the risk of it coming off in the event of an accident.
“A properly fitting helmet is like a second skin that protects your head from potential injuries. It is not just about complying with regulations but also prioritizing your own safety.” – Helmet Safety Expert
In addition to safety, a properly fitting helmet enhances comfort during your rides. It should remain snugly in place, preventing excessive movement and wind noise. A comfortable helmet allows you to focus on the road ahead, enhancing your overall riding experience.
Helmet Safety Features
While finding a proper fit is important, it’s also crucial to consider the safety features of a cruiser helmet. Look for helmets that meet relevant safety standards, such as DOT (Department of Transportation) or ECE (Economic Commission for Europe) certifications.
Key safety features to look for include:
- Multi-layered construction for impact absorption
- Effective ventilation system to prevent overheating
- Secure fastening mechanism like a double-D ring or quick-release buckle
- Compatibility with communication devices for added convenience
Remember, investing in a helmet with the right fit and proper safety features is essential for your protection on the road. Prioritize your safety by choosing a comfortable and secure helmet that fits you perfectly.
| Helmet Fit Characteristics | Impact on Safety |
|---|---|
| A helmet that is too tight | Can cause headaches and discomfort during rides, potentially affecting focus and concentration. |
| A helmet that is too loose | May come off during an accident, resulting in reduced head protection. |
| An ill-fitting helmet | May shift or move while riding, causing distraction and compromising safety. |
Top Full-Face Cruiser Helmets
When it comes to full-face cruiser helmets, nothing beats the combination of style and protection they offer. Whether you’re on a short ride or embarking on a long journey, having a top-quality full-face helmet is essential for your safety and comfort on the open road. We’ve carefully curated a selection of the best full-face cruiser helmets available, ensuring that you get the maximum coverage and protection without compromising on style.
1. Shoei Neotec 2 Helmet
If you’re looking for the perfect blend of performance, comfort, and style, the Shoei Neotec 2 Helmet is a top choice. This premium full-face helmet features an advanced shell construction that provides excellent impact absorption while maintaining a lightweight design. The Neotec 2 also offers exceptional ventilation, with multiple intake and exhaust vents to keep you cool and dry even during long rides. With its sleek and aerodynamic profile, the Shoei Neotec 2 is the perfect companion for any cruiser rider.
2. Arai Regent-X Helmet
The Arai Regent-X Helmet is another top contender in the world of full-face cruiser helmets. Known for their superior craftsmanship and attention to detail, Arai has created a helmet that offers both style and safety. The Regent-X features a tri-composite shell construction that provides a perfect balance between strength and weight. The advanced ventilation system ensures optimal airflow, while the plush interior offers supreme comfort for hours of riding. With its classic design and reliable performance, the Arai Regent-X Helmet is a favorite among seasoned riders.
3. Shoei GT-Air II Helmet
The Shoei GT-Air II Helmet is a top-of-the-line choice for riders seeking a full-face cruiser helmet that excels in both safety and style. With its aerodynamic shape and sleek lines, this helmet not only looks great but also offers exceptional performance on the road. The GT-Air II features a multi-ply shell construction that provides enhanced impact protection, while the advanced ventilation system ensures maximum airflow during hot weather rides. Additionally, the helmet’s integrated sun visor is convenient for bright and sunny days, providing added protection and reducing glare.
Investing in a premium full-face cruiser helmet is a wise decision that prioritizes your safety and ensures an enjoyable ride. The Shoei Neotec 2 Helmet, Arai Regent-X Helmet, and Shoei GT-Air II Helmet are some of the best options available, offering the perfect combination of full coverage, comfort, and style for all your cruising adventures.
Harley-Specific Cruiser Helmets
If you’re a Harley enthusiast, there are specific cruiser helmets designed with the iconic brand in mind. Some top choices for Harley-specific helmets include the Shoei Neotec 2 Respect Helmet and the Bell Qualifier DLX Mips Devil May Care Helmet. These helmets not only provide safety and comfort but also showcase the style and spirit of Harley-Davidson.
| Helmet | Features | Price |
|---|---|---|
| Shoei Neotec 2 Respect Helmet | – Aerodynamic shell design – Integrated sun visor – Advanced ventilation system – Intercom compatibility |
$599 |
| Bell Qualifier DLX Mips Devil May Care Helmet | – Lightweight polycarbonate shell – MIPS technology for added safety – Velocity Flow Ventilation system – Anti-bacterial liner |
$249 |
Best Motorcycle Cruiser Helmets
When it comes to motorcycle cruiser helmets, you want nothing but the best for your safety and riding experience. We have compiled a list of the top-rated cruiser helmets that are ideal for motorcycle riders like you. These helmets offer a perfect combination of style, comfort, and unmatched protection.
Arai Regent-X Helmet
The Arai Regent-X Helmet is a popular choice among motorcycle enthusiasts. It features a lightweight yet strong shell construction, providing maximum protection without compromising comfort. The Regent-X also offers excellent ventilation and an advanced moisture-wicking interior for a cool and dry ride. With its sleek design and advanced safety features, the Arai Regent-X Helmet is a top pick for any cruiser rider.
Shoei GT-Air II Helmet
The Shoei GT-Air II Helmet is another top-rated option for motorcycle cruiser riders. This helmet combines style and safety with its aerodynamic design and enhanced shell construction. The GT-Air II also features a built-in sun visor, providing added convenience and protection against harsh sunlight. With its superior ventilation and noise reduction capabilities, the Shoei GT-Air II Helmet is a favorite among riders seeking both comfort and performance.
Bell Qualifier DLX Mips Helmet
The Bell Qualifier DLX Mips Helmet is a technologically advanced choice for motorcycle riders. It incorporates Multi-Directional Impact Protection System (MIPS) technology, which provides additional rotational impact protection. With its lightweight polycarbonate shell and ample ventilation, the Qualifier DLX Mips offers both comfort and safety. It also features a Transitions Adaptive Shield, automatically adjusting the tint based on light conditions. If you’re looking for cutting-edge technology and unmatched versatility, the Bell Qualifier DLX Mips Helmet is a top contender.
Investing in a high-quality motorcycle cruiser helmet is essential for your safety on the road. Choose from our top-rated selection of helmets, including the Arai Regent-X, Shoei GT-Air II, and Bell Qualifier DLX Mips. These helmets not only provide maximum protection but also deliver style and comfort for your enjoyable riding experience.
Key Features of Cruiser Helmets
Cruiser helmets offer a range of key features that prioritize your safety and comfort on the road. When selecting a cruiser helmet, it’s essential to consider the following:
1. Sturdy Shell Construction
A sturdy shell construction is a crucial feature of any cruiser helmet. Look for helmets made from high-quality materials such as fiberglass composite, polycarbonate, or carbon fiber. These materials provide excellent impact protection and durability.
2. Ample Ventilation
Proper ventilation is essential for keeping you cool and comfortable during your rides. Look for cruiser helmets with strategically placed vents that allow for superior airflow. This helps prevent overheating and ensures a more enjoyable riding experience.
3. Secure Fastening System
A secure fastening system is vital for keeping your helmet in place and ensuring a snug fit. Look for helmets with reliable chin straps and quick-release buckles. This feature will provide peace of mind and prevent your helmet from becoming loose or dislodged during rides.
4. Compatibility with Communication Devices
In today’s connected world, being able to stay in touch while riding is essential for many riders. Look for cruiser helmets that are compatible with communication devices, such as Bluetooth headsets. This allows you to stay connected without compromising your safety.
5. Integrated Sun Visors and Anti-Fog Capabilities
Some cruiser helmets offer integrated sun visors, which provide convenient sun protection without the need for separate sunglasses. Additionally, look for helmets with anti-fog capabilities to ensure clear visibility even in adverse weather conditions.
By considering these key features, you can select a cruiser helmet that meets your specific needs and enhances your safety and comfort on every ride.
| Key Features | Description |
|---|---|
| Sturdy Shell Construction | A strong and durable shell made from materials like fiberglass composite, polycarbonate, or carbon fiber. |
| Ample Ventilation | Strategically placed vents to provide optimal airflow and prevent overheating. |
| Secure Fastening System | A reliable chin strap and quick-release buckle to ensure a secure and snug fit. |
| Compatibility with Communication Devices | The ability to connect with Bluetooth headsets and other communication devices. |
| Integrated Sun Visors and Anti-Fog Capabilities | Convenient sun protection and clear visibility in all weather conditions. |
Tips for Choosing the Right Cruiser Helmet
Choosing a cruiser helmet that suits your needs and preferences can significantly enhance your riding experience. Here are some helpful tips to keep in mind when selecting the right helmet for you:
- Consider your riding style: Think about the type of riding you do most frequently. Are you a city commuter or an adventurous long-distance rider? Different riding styles may require different features in a helmet.
- Assess the demands of your motorcycle: Take into account the specific requirements of your motorcycle. Are you riding a Harley-Davidson or another brand? Some helmets are designed specifically for certain motorcycle types.
- Priority comfort and fit: A helmet that fits well and feels comfortable is crucial for your safety and overall enjoyment. Look for adjustable straps and padding that provides a snug yet comfortable fit.
- Pay attention to safety features: Ensure that the helmet you choose meets safety standards and offers essential features like impact resistance and durable construction.
- Do thorough research: Read reviews and seek advice from experienced riders and professionals to gain insights into the helmets you’re interested in. Their expertise can help you make an informed decision.
- Try on multiple helmets: Visit a reputable store and try on different helmets to find the one that fits your head shape and provides optimal comfort. Consult with knowledgeable staff to address any questions or concerns you may have.
By considering your riding style, assessing your motorcycle’s requirements, prioritizing comfort and safety, conducting thorough research, and trying on multiple helmets, you can make an informed choice when selecting the right cruiser helmet for your needs.
Top Budget-Friendly Cruiser Helmets
If you’re on a budget, there are still plenty of options for budget-friendly cruiser helmets that offer quality and safety without breaking the bank. You don’t have to compromise on protection and style just because you’re looking for an affordable option. Here are some top picks for budget-friendly cruiser helmets:
| Helmet Brand | Price |
|---|---|
| BILT Nomad Modular Helmet | $99.99 |
| HJC i90 Helmet | $169.99 |
| LS2 Advant X Solid Helmet | $179.98 |
These helmets provide excellent value for money while still meeting the necessary safety standards. Let’s take a closer look at each of these budget-friendly options:
BILT Nomad Modular Helmet
The BILT Nomad Modular Helmet offers versatility and convenience at an affordable price. With its modular design, you can easily switch between a full-face and open-face configuration, depending on your riding preferences. The helmet features a lightweight polycarbonate shell for enhanced comfort and protection. It also comes with an integrated sun visor to shield your eyes from the sun.
HJC i90 Helmet
The HJC i90 Helmet combines style, comfort, and affordability. It features an advanced polycarbonate shell for superior impact resistance. The helmet’s ACS ventilation system ensures optimal airflow, keeping you cool during long rides. The i90 also offers a removable and washable interior lining, making it easy to keep your helmet fresh and clean.
LS2 Advant X Solid Helmet
The LS2 Advant X Solid Helmet is a sleek and stylish option that doesn’t compromise on safety. It features a lightweight yet durable shell, constructed from a high-performance polycarbonate alloy. The helmet’s advanced ventilation system keeps airflow constant, providing excellent breathability. The Advant X also comes with a drop-down sun shield to protect your eyes from glare.
With these budget-friendly cruiser helmets, you can hit the road with confidence, knowing that you’ve made a smart investment in your safety. Remember to always prioritize fit and comfort when choosing a helmet, as a proper fit is essential for maximum protection. Ride safe!
Maintenance and Care for Cruiser Helmets
Proper maintenance and care are vital for extending the lifespan of your cruiser helmet and ensuring ongoing safety. Here are a few essential tips for helmet maintenance and care:
Regular Cleaning
Regularly clean both the interior and exterior of your helmet to maintain its cleanliness and functionality. Pay close attention to the visor and ventilation areas, as they tend to accumulate dust and debris. Use a mild soap or helmet cleaner and a soft cloth to gently wipe away dirt and grime. Avoid using harsh chemicals or abrasive materials that could damage the helmet’s surface.
Safe Storage
When not in use, store your helmet in a cool and dry place, away from direct sunlight. Extreme heat or prolonged exposure to sunlight can cause the helmet’s materials to degrade, impacting its protective capabilities. Additionally, avoid placing heavy objects on top of the helmet, as this could deform its shape.
Regular Inspection
Regularly inspect your helmet for any signs of wear or damage. Check the shell, visor, and straps for cracks, dents, or loose parts. If you notice any issues, it’s crucial to replace your helmet immediately, as compromised integrity could significantly reduce its effectiveness in an accident.
“Proper maintenance and care are vital for extending the lifespan of your cruiser helmet and ensuring ongoing safety.”
Replacement Schedule
Even with proper maintenance, helmets have an expiration date. It’s recommended to replace your helmet every 5 years, regardless of its condition. Over time, the materials and protective properties of the helmet may degrade, making it less effective in a crash. Also, if you’ve been in an accident or dropped your helmet, it’s crucial to replace it, even if there are no visible signs of damage.
Manufacturer’s Guidelines
Always consult the manufacturer’s guidelines for specific care instructions based on your helmet’s make and model. Different materials may require different cleaning agents or techniques. Following the manufacturer’s recommendations will help ensure that you maintain your helmet properly and maximize its lifespan.
By following these helmet care tips and regularly maintaining your cruiser helmet, you can ensure its ongoing safety and reliability, providing you with peace of mind on every ride.
Conclusion
When it comes to cruiser helmets, investing in a premium option is crucial for both style and safety. With a wide range of options available, from full-face designs to Harley-specific models, there is a helmet to suit every rider’s preference. However, choosing a helmet that not only looks good but also provides the right fit and safety features is essential for a safe and enjoyable riding experience.
Remember to prioritize quality, comfort, and fit when selecting your next cruiser helmet. A properly fitting helmet ensures that it stays securely in place during your ride, offering maximum protection in case of an accident. Look for helmets with sturdy shell constructions, sufficient ventilation, and secure fastening systems to enhance both safety and comfort.
Riding a motorcycle brings a certain sense of freedom, but it is important never to compromise on safety. By wearing a premium helmet tailored to your needs, you can ride with confidence and peace of mind. So, whether you’re embarking on a thrilling adventure or hitting the road for everyday commuting, choose a cruiser helmet that exemplifies the perfect blend of style and safety. Ride safe, and enjoy the open road to the fullest!
FAQ
Why is finding the right combination of style and safety important when it comes to cruiser helmets?
Finding the right combination of style and safety in a cruiser helmet is important because it not only enhances your overall look, but it also ensures that you are adequately protected while riding.
How important is a properly fitting helmet?
A properly fitting helmet is crucial for both comfort and safety. It should evenly distribute pressure around your head and should not have any tight spots or discomfort that can become more pronounced during prolonged use.
What are the top picks for full-face cruiser helmets?
Our top picks for full-face cruiser helmets include the Shoei Neotec 2 Helmet, Arai Regent-X Helmet, and Shoei GT-Air II Helmet. These helmets offer excellent ventilation, a comfortable fit, and exceptional safety features.
Are there cruiser helmets designed specifically for Harley enthusiasts?
Yes, there are cruiser helmets designed specifically for Harley enthusiasts. Some top choices for Harley-specific helmets include the Shoei Neotec 2 Respect Helmet and the Bell Qualifier DLX Mips Devil May Care Helmet.
What are the best motorcycle cruiser helmets?
Some of the best choices for motorcycle cruiser helmets include the Arai Regent-X Helmet, Shoei GT-Air II Helmet, and Bell Qualifier DLX Mips Helmet. These helmets offer a combination of safety, comfort, and style.
What are the key features to consider when selecting a cruiser helmet?
Some key features to consider when selecting a cruiser helmet include a sturdy shell construction, ample ventilation, a secure fastening system, compatibility with communication devices, integrated sun visors, and anti-fog capabilities.
What tips should I keep in mind when choosing a cruiser helmet?
When choosing a cruiser helmet, consider your riding style and the specific demands of your motorcycle. Prioritize comfort, fit, and safety features. Research and read reviews to gain insights from experienced riders and professionals. Try on multiple helmets and consult with knowledgeable staff before making a final decision.
Are there budget-friendly options for cruiser helmets?
Yes, there are budget-friendly options for cruiser helmets that offer quality and safety without breaking the bank. Some top picks for budget-friendly cruiser helmets include the BILT Nomad Modular Helmet, HJC i90 Helmet, and LS2 Advant X Solid Helmet.
How do I properly maintain and care for my cruiser helmet?
Proper maintenance and care are vital for extending the lifespan of your cruiser helmet and ensuring ongoing safety. Regularly clean the interior and exterior of the helmet, paying close attention to the visor and ventilation areas. Store your helmet in a cool and dry place, away from direct sunlight. Regularly check for any signs of wear or damage and replace your helmet when necessary.
Why is investing in a premium cruiser helmet important?
Investing in a premium cruiser helmet is important because it ensures a combination of style and safety. From full-face designs to Harley-specific models, premium helmets offer a wide range of options to choose from and provide the best protection for your riding needs.
Best Motorcycle Riding Glasses: Protect Your Eyes on the Road
As a motorcycle rider, nothing quite compares to the exhilaration and freedom of hitting the open road. But along with that sense of liberation comes the responsibility of ensuring your safety on every journey. Riding a motorcycle requires a heightened level of caution and attention to detail, and one of the most important areas to protect is your eyes. The wind, debris, and UV rays can all present serious hazards, making motorcycle glasses an essential piece of gear for both safety and comfort. Whether you’re a man looking for the perfect motorcycle glasses for men, contemplating the difference between motorcycle visors vs glasses, or simply in search of the best motorcycle glasses overall, this article has got you covered. So let’s dive into the world of motorcycle eyewear and explore the best options to protect your eyes on the road.
Importance of Eye Protection While Riding a Motorcycle
When it comes to riding a motorcycle, safety should always be a top priority. While helmets and protective clothing are essential, many riders often overlook the importance of eye protection. The truth is, our eyes are extremely vulnerable to debris, wind, and harmful UV rays while riding. That’s why investing in proper eye protection, such as photochromic lenses for motorcycles, is crucial.
Photochromic lenses, also known as transition lenses, are specially designed to adapt to changing light conditions. This means that whether you’re riding in bright sunlight or on a cloudy day, these lenses will automatically darken or lighten to provide optimal visibility. This not only reduces eye strain, but it also minimizes the risk of accidents caused by impaired vision.
However, simply owning a pair of photochromic lenses is not enough. Taking care of your motorcycle riding glasses is equally important. Regularly cleaning them with a mild soap solution and a soft cloth will ensure that they remain free from dirt, dust, and smudges. Additionally, storing them in a protective case will prevent scratches and damage when they’re not in use.
Ultimately, the importance of eye protection while riding a motorcycle should never be underestimated. By wearing photochromic lenses and taking care of your motorcycle riding glasses, you can significantly enhance your vision and avoid potential hazards on the road. So, before you hit the open road, remember to prioritize the safety of your eyes. After all, clear vision can make all the difference when it comes to enjoying a smooth and risk-free ride.
Choosing the Right Lens Color for Motorcycle Riding Glasses
When it comes to motorcycle riding, having the right gear is crucial for both safety and comfort. One often overlooked item is a good pair of riding glasses. Not only do they protect your eyes from debris, insects, and wind, but they also enhance your visibility on the road. But with so many lens colors available, how do you choose the right one for your needs?
First and foremost, consider the riding conditions you will mostly encounter. If you ride during the day, clear or yellow lenses are a popular choice. Clear lenses provide maximum visibility and are ideal for low-light conditions or night riding. On the other hand, yellow lenses enhance depth perception and contrast, making them perfect for overcast or foggy conditions.
If you frequently ride in bright sunlight, tinted or polarized lenses are the way to go. Tinted lenses come in various colors, such as gray, brown, or green, and help reduce glare and improve visibility in sunny conditions. Polarized lenses are particularly effective in reducing glare from reflective surfaces like water or glass. They also enhance clarity and reduce eye strain.
Lastly, don’t forget about taking care of your motorcycle riding glasses. Clean them regularly using a microfiber cloth or lens cleaning solution, and avoid using paper towels or clothing that may scratch the lenses. Store them in a protective case when not in use to prevent damage. Taking these simple steps will ensure that your glasses last longer and provide optimal clarity every time you hit the road.
In conclusion, selecting the right lens color for your motorcycle riding glasses depends on the riding conditions you typically face. From clear lenses for low-light conditions to tinted or polarized lenses for bright sunlight, there is a wide range of options to choose from. Just remember to take proper care of your glasses to maximize their lifespan and maintain clear vision on your rides. Ride safe and enjoy the open road!
Factors to Consider When Selecting Motorcycle Riding Glasses
Top Features to Look for in Motorcycle Riding Glasses
When it comes to riding a motorcycle, safety should always be a top priority. One essential piece of protective gear that often gets overlooked is a good pair of motorcycle riding glasses. Not only do they shield your eyes from debris and intense sunlight, but they also enhance visibility and reduce glare. However, selecting the right pair of riding glasses can be overwhelming, considering the vast array of options available in the market. To make the process easier, here are some factors to consider.
First and foremost, ensure that the glasses provide adequate eye protection. Look for lenses that have a high impact resistance and provide 100% UV protection. Additionally, consider the lens color that works best for your riding conditions. For bright, sunny days, darker lenses like smoke or grey may be suitable, whereas for low-light conditions, yellow lenses can enhance visibility. Another important factor to consider is the fit of the glasses. They should comfortably sit on your face and be snug enough to prevent them from sliding down or coming off when riding at higher speeds.
Taking care of motorcycle riding glasses is equally crucial to maximize their longevity. Many glasses come with a protective case, so be sure to use it when you are not wearing them. Avoid placing them face-down on surfaces, as this can cause scratches on the lenses. Additionally, clean your glasses regularly using a soft microfiber cloth, and avoid using any harsh chemicals that can damage the lens coatings. By taking proper care of your riding glasses, they will continue to provide optimal eye protection and enhance your riding experience for years to come.
Overall, selecting the right pair of motorcycle riding glasses is essential for both safety and comfort. By considering factors such as adequate eye protection, lens color, and fit, you can find the perfect pair that meets your riding needs. Additionally, ensure that you take proper care of your glasses to prolong their lifespan. Remember, investing in high-quality riding glasses is an investment in your safety every time you hop on your bike.
Best Brands for Motorcycle Riding Glasses
When it comes to motorcycle riding, safety should always be a top priority. And one essential accessory that every motorcyclist should invest in is a pair of high-quality riding glasses. Not only do they protect your eyes from wind, debris, and harmful UV rays, but they also enhance your visibility and overall riding experience. With that in mind, let’s explore some of the best brands for motorcycle riding glasses.
First on our list is Oakley. Known for their superior lens technology and durable frames, Oakley offers a wide range of motorcycle riding glasses that cater to different riding styles. Whether you prefer a sleek and sporty look or a more classic design, Oakley has you covered. Their lenses provide excellent clarity, while their frames are designed to withstand the rigors of the road. Additionally, Oakley offers various lens tints and finishes, allowing riders to choose the perfect pair to match their needs and personal style.
Another well-respected brand for motorcycle riding glasses is Wiley X. With their ANSI Z87.1 safety rating, Wiley X glasses are designed to provide maximum protection for your eyes. Their shatterproof lenses offer superior impact resistance, ensuring that your eyes are shielded from flying debris and insects while riding. Wiley X glasses also feature a secure and comfortable fit, thanks to their patented rubberized nose pads and temple gloves. Additionally, their lenses provide excellent optical clarity, reducing glare and enhancing visual acuity.
Lastly, we have 100% – a brand synonymous with quality and performance in the motorcycle industry. 100% offers a wide range of motorcycle riding glasses that are not only stylish but also highly functional. With their lightweight and durable frames, 100% glasses provide all-day comfort, even during long rides. Their lenses offer 100% UV protection and feature a hydrophobic coating, which repels water, oil, and dust. Whether you’re riding on the open road or tearing up the dirt track, 100% has a pair of riding glasses that will keep you safe and looking good.
In conclusion, investing in a quality pair of motorcycle riding glasses is crucial for every rider. Oakley, Wiley X, and 100% are just a few of the best brands that offer top-notch glasses for motorcycle enthusiasts. Remember to choose a pair that not only fits your style but also provides the necessary protection and functionality you need on the road. Ride safe, and keep your eyes protected!
Benefits of Polarized Lenses for Motorcycle Riding
Motorcycle riding is an exhilarating experience that offers a sense of freedom and adventure. However, it also exposes riders to unique challenges, such as intense sunlight, glare, and reflections. This is where polarized lenses for motorcycle riding glasses come to the rescue.
Polarized lenses are designed to reduce glare caused by light bouncing off different surfaces, including the road, other vehicles, and water. This type of lens contains a special filter that blocks out horizontal light waves, preventing them from entering the eyes. By doing so, they provide enhanced visual clarity and improve overall vision on the road.
One of the biggest advantages of polarized lenses for motorcycle riding glasses is the ability to reduce eye strain and fatigue. Riding for long hours under the sun can lead to uncomfortable and strained eyes, making it harder to concentrate on the road. Polarized lenses help to alleviate this by reducing the amount of light entering the eyes and providing more relaxed vision. This allows riders to stay focused and alert throughout their journey.
Additionally, polarized lenses can enhance safety on the road. Glare and reflections can hinder a rider’s ability to see obstacles, road signs, and other vehicles clearly. By reducing these distractions, polarized lenses provide better visibility, allowing riders to react quicker and make informed decisions, ultimately preventing accidents.
In conclusion, investing in motorcycle riding glasses with polarized lenses is a wise decision. These lenses offer a range of benefits including reduced glare, enhanced visual clarity, reduced eye strain, and improved safety. So, whether you’re planning a long road trip or a quick ride, don’t forget to equip yourself with these glasses to enjoy a safer and more enjoyable motorcycle riding experience.
How to Properly Fit Motorcycle Riding Glasses
When it comes to motorcycle riding, having the right gear is crucial for both safety and comfort. While a helmet is the most obvious necessity, another important accessory often overlooked is a pair of polarized lenses. Motorcycle riding glasses with polarized lenses offer a myriad of benefits that can greatly enhance your riding experience.
One of the main advantages of polarized lenses is their ability to reduce glare. Glare from the sun, road, or other reflective surfaces can be extremely distracting and even hazardous while riding. By filtering out this glare, polarized lenses not only improve visibility, but also reduce eye strain and fatigue. This is especially important when riding for long periods of time.
In addition to reducing glare, polarized lenses also enhance contrast and clarity. This means that you will be able to see your surroundings in greater detail, making it easier to spot any potential hazards on the road. Whether it’s a pothole, debris, or another vehicle, having clear vision can make all the difference in avoiding accidents. With increased contrast, you can ride with confidence, knowing that you’re able to see everything clearly.
Lastly, polarized lenses provide protection from harmful UV rays. Riding for hours under the sun can expose your eyes to potentially damaging radiation. Polarized lenses not only shield your eyes from these UV rays, but also act as a barrier against wind, dust, and other particles that can irritate your eyes while riding.
In conclusion, investing in a pair of motorcycle riding glasses with polarized lenses is a wise choice for any rider. The benefits of reduced glare, enhanced contrast and clarity, and UV protection make them an invaluable accessory. Not only will you have improved visibility and comfort, but you’ll be able to ride with peace of mind, knowing that your eyes are well-protected. So next time you hop on your bike, don’t forget to put on your polarized lenses for a safer and more enjoyable ride.
Maintenance Tips for Your Motorcycle Riding Glasses
When it comes to riding motorcycles, safety should always be a top priority. A crucial part of staying safe on the road is protecting your eyes from debris, dust, wind, and harmful UV rays. That’s where motorcycle riding glasses come in. These specialized glasses provide exceptional eye protection while ensuring clear visibility on your ride.
To keep your motorcycle riding glasses in top-notch condition, regular maintenance is essential. Start by cleaning your glasses properly. Avoid using harsh chemicals or abrasive materials that can damage the lenses. Instead, use a mild soap or lens cleaning solution with a soft microfiber cloth to wipe away dirt and smudges. Don’t forget to clean the nose pads and temples to prevent any discomfort or irritation during your ride.
Another crucial maintenance tip is to store your motorcycle riding glasses safely. Always keep them in a protective case when not in use. This will shield them from scratches, cracks, or any other damage that can occur when they’re not properly stored. Additionally, avoid placing the glasses face down to prevent any potential scratches on the lenses.
Lastly, regularly inspect your motorcycle riding glasses for any signs of wear and tear. Check for loose screws, damaged frames, or worn-out lenses. If you notice any issues, it’s important to address them promptly. Tighten screws, repair or replace damaged frames, and consider replacing lenses that may have become scratched or foggy over time.
By following these maintenance tips, you can ensure that your motorcycle riding glasses provide you with optimal eye protection and clear vision on the road. Take care of your glasses, and they will take care of you during your motorcycle adventures.
Enhance Your Riding Experience with Stylish Motorcycle Glasses
If you’re a motorcycle enthusiast, you know that safety should always be a top priority. And one essential safety gear that shouldn’t be overlooked is a good pair of motorcycle glasses. Not only do they protect your eyes from the wind, debris, and insects, but they also enhance your riding experience in style.
Motorcycle riding glasses come in a variety of styles, from classic aviators to sleek wraparound frames. They are designed to provide a snug fit, ensuring that they stay securely on your face even when you’re cruising at high speeds. Many of these glasses also feature shatterproof lenses that are scratch-resistant and offer UV protection, shielding your eyes from harmful sun rays.
But motorcycle glasses are not just about safety; they are a fashion statement too. With various frame colors and lens tints available, you can find a pair that matches your personal style and complements your motorcycle gear. Whether you prefer a sleek black frame or a bold reflective lens, there’s a style out there that will make you look cool and confident on the road.
In addition to style and protection, comfort is another crucial factor to consider when choosing motorcycle riding glasses. Look for glasses that have adjustable nose pads and temples, allowing you to customize the fit according to your face shape and size. Comfortable glasses will prevent discomfort and distraction, enabling you to fully focus on the joy of riding.
In conclusion, don’t underestimate the importance of motorcycle glasses in enhancing your riding experience. They not only provide crucial eye protection but also add style and comfort to your overall look. So, make sure to invest in a high-quality pair of motorcycle riding glasses and hit the road with confidence and style!
Stay Safe and Stylish with the Best Motorcycle Riding Glasses
Riding a motorcycle can be an exhilarating experience, but it also comes with certain risks. One of the most important things you can do to protect yourself while riding is to wear proper protective gear, including a good pair of motorcycle riding glasses. Not only do they shield your eyes from debris, dust, and UV rays, but they also enhance your overall riding experience.
When it comes to motorcycle riding glasses, safety should always be your top priority. Look for glasses that are shatterproof and offer UV protection to protect your eyes from harmful sunlight. Polycarbonate lenses are an excellent choice as they are impact-resistant and lightweight, reducing the risk of injury in case of an accident. Additionally, it’s crucial to find glasses that fit securely and comfortably, ensuring that they stay in place even during high speeds or rough terrain.
But who says motorcycle riding glasses have to be purely functional? With the wide range of styles and designs available, you can stay safe and stylish at the same time. From classic aviator frames to sleek sporty designs, there’s something for everyone’s taste. Consider features like interchangeable lenses or goggles that can easily transform into regular sunglasses, allowing for versatility on and off the bike.
Remember, the right motorcycle riding glasses not only protect your eyes but also enhance your vision on the road. Look for glasses with anti-fog coatings to minimize fogging during colder rides or vented frames to improve airflow and prevent lens condensation. Whether you’re a seasoned rider or a beginner, investing in high-quality motorcycle riding glasses is an essential step towards a safer and more enjoyable ride. So why compromise on safety or style when you can have both?
Kids Dirt Bike Motocross Goggles
Keeping Young Riders Safe: A Guide to Kids’ Dirt Bike Motocross Goggles
Picture this: your child, adorned in their gear, revving up their dirt bike, ready to conquer the rugged terrain ahead. It’s a scene that ignites a sense of pride and adventure in every parent. But in the heart-pounding excitement of motocross, safety is paramount. Enter the unsung hero of off-road riding: motocross goggles.
Welcome to our comprehensive guide, where we shed light on the vital role motocross goggles play in safeguarding our young riders. Beyond mere accessories, these goggles are the guardians of vision, shielding against dust, debris, and the unpredictable elements of the trail. Join us as we explore the features, benefits, and essential considerations for choosing the perfect pair of goggles, ensuring that every ride is not just thrilling, but safe and secure for our little daredevils.
Why Goggles Matter for Young Riders
When it comes to off-road adventures, young riders face a distinct set of challenges and risks. Unlike their adult counterparts, children may lack the physical strength and experience to navigate rough terrain effortlessly. This vulnerability underscores the critical importance of protective gear, with motocross goggles standing out as a non-negotiable necessity.
1.1 Understanding the Risks:
From loose gravel to flying debris, the trails pose an array of hazards for young riders. Children, still mastering the art of balance and control, are particularly susceptible to accidents and injuries. Even the most cautious rider can find themselves facing unexpected obstacles, making proactive safety measures imperative.
1.2 Shielding Against the Elements:
Enter the humble motocross goggles – the unsung heroes of every off-road escapade. Beyond their sleek design, these goggles serve as a formidable barrier against nature’s onslaught. Dust clouds, dirt sprays, and harmful UV rays are no match for the protective shield they provide. By keeping young riders’ eyes clear and unobstructed, goggles not only enhance visibility but also minimize the risk of accidents caused by impaired vision.
1.3 The Need for Specialized Protection:
While the market offers a plethora of eyewear options, not all goggles are created equal. For young riders, selecting goggles specifically tailored to their needs is paramount. Child-sized frames, adjustable straps, and lightweight materials ensure a snug yet comfortable fit, allowing young riders to focus on the thrill of the ride without distraction. Additionally, specialized features such as anti-fog coatings and impact-resistant lenses offer an added layer of protection, giving parents peace of mind as their little adventurers take on the trails.
Key Features to Look for in Kids’ Motocross Goggles
When it comes to outfitting young riders for their dirt bike adventures, not all goggles are created equal. To ensure optimal safety and performance, it’s essential to pay attention to key features that set quality goggles apart from the rest. Here’s a comprehensive guide to help you navigate the sea of options and select the perfect pair for your little daredevil.
2.1 Lens Material Matters:
The lens material plays a crucial role in determining the durability and clarity of your child’s goggles. Opt for lenses crafted from high-quality materials like polycarbonate, renowned for their impact resistance and optical clarity. These lenses provide reliable protection against flying debris and stray branches, safeguarding your child’s eyes during every ride.
2.2 Ventilation and Comfort:
Comfort is paramount when it comes to children’s goggles, especially during long rides under the sun. Look for goggles equipped with strategic ventilation channels that promote airflow while preventing fogging. Additionally, plush foam padding ensures a snug yet comfortable fit, preventing discomfort and chafing during extended wear.
2.3 Protection Against the Elements:
Unpredictable weather conditions shouldn’t hinder your child’s riding adventures. Seek out goggles with anti-fog and scratch-resistant coatings, which enhance visibility and prolong the lifespan of the lenses. These coatings repel moisture and debris, ensuring crystal-clear vision even in the most challenging terrain.
2.4 Finding the Perfect Fit:
One size does not fit all when it comes to children’s goggles. Ensure a proper fit by selecting goggles with adjustable straps and flexible frames. Measure your child’s head circumference and refer to sizing charts provided by manufacturers to find the ideal size. A snug yet comfortable fit prevents slippage and ensures maximum protection without compromising comfort.
2.5 Bonus Features to Consider:
While the basics are essential, don’t overlook additional features that can elevate your child’s riding experience. Look for goggles with UV protection to shield delicate eyes from harmful sun rays. Some models also feature tear-off or roll-off systems, allowing quick and hassle-free lens replacement during muddy rides.
By prioritizing these key features, you can equip your young rider with goggles that offer unbeatable protection, comfort, and performance on every dirt-filled adventure.
Choosing the Right Lens Tint for Your Child’s Riding Needs
When it comes to choosing the right goggles for your young rider, lens tint plays a crucial role in enhancing visibility and comfort in various riding conditions. Let’s dive into the different lens tint options available and how each can optimize your child’s dirt bike experience.
3.1 Clear Lenses:
Clear lenses are ideal for low-light conditions or riding at dusk or dawn. They provide maximum visibility without altering the perception of colors, making them perfect for evening rides or when visibility is limited.
3.2 Tinted Lenses:
Tinted lenses come in various shades, from light to dark, and are designed to reduce glare and bright light. These lenses enhance contrast and depth perception, making them suitable for sunny days or riding in open, exposed terrain where sunlight can be intense.
3.3 Mirrored Lenses:
Mirrored lenses feature a reflective coating on the outer surface, which reduces glare and reflects excess light away from the eyes. These lenses excel in bright, sunny conditions, offering superior protection against harsh sunlight and glare from reflective surfaces like water or snow.
3.4 Photochromic Lenses:
Photochromic lenses adapt to changing light conditions, automatically adjusting their tint level based on the intensity of sunlight. This versatility makes them an excellent choice for riders who frequently transition between sunny and shaded areas, ensuring optimal visibility at all times.
3.5 Polarized Lenses:
Polarized lenses are specially designed to reduce glare from horizontal surfaces like water, snow, or pavement. They enhance clarity and definition by filtering out scattered light, resulting in improved visual comfort and reduced eye strain, particularly in bright, sunny conditions.
3.6 Recommendations for Riding Environments:
- For versatile performance in varying light conditions, consider goggles with photochromic or tinted lenses that offer adjustable tint levels.
- In bright, sunny environments with intense glare, opt for mirrored or polarized lenses to minimize eye strain and enhance contrast.
- For low-light or overcast conditions, clear lenses provide maximum visibility without compromising color perception.
By understanding the benefits of different lens tints and selecting the appropriate option based on riding environments, you can ensure that your child’s goggles optimize visibility and comfort for a safer and more enjoyable riding experience.
Maintaining and Caring for Your Child’s Goggles
Ensuring the longevity and optimal performance of your child’s motocross goggles requires proper maintenance and care. Here are some essential tips to keep their goggles in top condition:
4.1 Cleaning Goggles:
Regularly clean goggles using a mild soap and water solution to remove dirt, sweat, and debris from the lens and frame. Avoid using harsh chemicals or abrasive materials that could damage the lens coatings or foam padding. Use a soft microfiber cloth to gently wipe the lens surface, taking care not to scratch or smear it. Rinse the goggles thoroughly with clean water to remove any soap residue, and allow them to air dry completely before storage.
4.2 Removing Dirt and Debris:
After each ride, inspect the goggles for any accumulated dirt, mud, or debris. Use a soft brush or compressed air to gently remove dirt particles from the foam padding, vents, and lens grooves. Avoid excessive scrubbing, as it may cause damage to the lens or frame. For stubborn stains or residue, soak the goggles in warm, soapy water for a few minutes to loosen the debris before gently scrubbing with a soft brush. Rinse thoroughly and allow the goggles to dry completely before use.
4.3 Proper Storage Techniques:
Store goggles in a clean, dry place away from direct sunlight and extreme temperatures to prevent damage to the lens and frame. Use a protective goggle case or pouch to shield them from dust, moisture, and impacts during transport or storage. Avoid placing goggles face-down on rough surfaces or exposing them to sharp objects that could scratch or puncture the lens. Ensure that the straps are properly adjusted and secured to maintain the shape and integrity of the goggles over time.
4.4 Regular Inspections:
Perform regular inspections of the goggles for signs of wear and tear, including frayed straps, damaged foam padding, or scratched lenses. Replace any worn or damaged parts immediately to maintain the goggles’ effectiveness and safety. Check the lens for any cracks, chips, or distortion that may impair visibility, and replace it if necessary. Inspect the foam padding for compression or deterioration, as compromised padding may compromise comfort and seal against debris.
By following these maintenance and care tips, you can prolong the lifespan of your child’s motocross goggles and ensure they provide reliable protection and clarity ride after ride.
Equipping Your Young Rider for Success: Top Goggle Brands and Popular Models
Equipping your little ripper with the right goggles is crucial for their safety and a successful ride. Here, we’ll explore some of the top brands known for their quality kids’ motocross goggles, highlighting popular models with positive reviews and features that’ll keep your young shredder protected and comfortable.
Reputable Brands for Kids’ Moto Goggles:
-
100%: A leading force in motocross gear, 100% offers a fantastic selection of kids’ goggles built for performance and durability. Their goggles are known for wide fields of view, excellent ventilation, and tear-off compatibility for dealing with mud and debris.
-
Fox Racing: A household name in motocross, Fox Racing provides a wide range of goggles for young riders. Their kids’ models prioritize comfort and protection, often featuring softer frames, anti-fog lenses, and adjustable straps for a snug fit.
-
Scott Sports: Renowned for their high-quality gear, Scott Sports creates goggles designed to withstand the demands of off-road riding. Their kids’ goggles boast impact-resistant lenses, breathable foam padding, and easy-to-use replacement systems for lenses.
-
Fly Racing: Committed to offering exceptional value, Fly Racing produces kids’ goggles that are both affordable and functional. Their goggles often come with features like multi-layered foam padding, scratch-resistant lenses, and a variety of vibrant colors to match your child’s personality.
-
Thor MX: A trusted brand in the motocross world, Thor MX offers a variety of kids’ goggles that prioritize safety and a clear view. Their goggles are known for their comfortable fit, effective ventilation systems, and a variety of lens tints to suit different lighting conditions.
Popular Models with Great Reviews:
-
100% Accuri 2 Youth: This goggle boasts a wide field of view, excellent tear-off compatibility, and a comfortable fit for young riders. Parents appreciate its easy-to-use replacement lens system and the variety of colors available. (Check local retailers or online stores like Amazon)
-
Fox Racing Main Stray Youth: This popular model offers a comfortable fit with a soft frame, anti-fog coated lens, and excellent ventilation. Parents love the adjustable strap for a secure fit and the variety of graphic designs to match any gear set. (Find them at motocross stores or online retailers like Amazon)
-
Scott Prospect Youth: These goggles feature Scott’s NoFog™ anti-fog treatment for a clear view, a comfortable fit, and impact-resistant lenses. Parents appreciate the easy-to-clean design and the option for different colored lenses depending on light conditions. (Available at authorized Scott dealers or online stores like Amazon)
-
Fly Racing Zone Pro Youth: This budget-friendly option provides excellent value with its comfortable fit, multi-layered foam padding, and scratch-resistant lens. Parents appreciate the simple design and the various color options to personalize your child’s gear. (Look for them at motorsport stores or online retailers like Amazon)
Purchasing Considerations:
When choosing goggles, consider your child’s age, riding style, and budget. Here are some additional tips:
- Fit: The goggles should sit comfortably on your child’s face without being too loose or restrictive.
- Ventilation: Proper ventilation helps prevent fogging and keeps your child cool.
- Lens: Choose a scratch-resistant lens with a tint suitable for the riding conditions.
- Tear-offs (optional): If your child rides in muddy or dusty conditions, tear-offs can be a lifesaver.
- Try before you buy: Whenever possible, try on goggles before purchasing to ensure a proper fit. Many online retailers offer hassle-free return policies, so you can order with confidence.
Disclaimer: The brands and models mentioned are for informational purposes only. It’s recommended to research and compare products before making a purchase.
Conclusion: Gearing Up for Safe and Fun Rides
In this comprehensive guide, we’ve explored the importance of choosing the right motocross goggles for young riders and outlined key considerations for parents. From understanding the unique risks children face while riding to selecting goggles with essential features and proper maintenance tips, ensuring your child’s safety on the track or trail has never been easier.
It’s crucial for parents
to prioritize safety without hindering the joy of off-road adventures. By equipping their young riders with the right goggles, parents can instill confidence and encourage a love for the sport. Remember, a happy and safe rider is one who will keep coming back for more!
Here are some final takeaways to keep in mind:
- Invest in Quality: Goggles are not an area to cut corners. Opt for well-known brands that prioritize safety and performance.
- Embrace Comfort: A comfortable fit is essential. Look for goggles with adjustable straps and soft padding to prevent irritation during long rides.
- Match the Conditions: Choose the appropriate lens tint based on your child’s typical riding environment.
- Lead by Example: Always wear your own goggles when riding with your child, setting a positive example for safety practices.
- Make it Fun: Let your child choose the design or color of their goggles, allowing them to personalize their gear and feel excited to hit the trails.
By following these tips and utilizing the valuable information in this guide, you can ensure that your child’s off-road adventures are not only thrilling but also safe and enjoyable. So, gear up, hit the trails, and create lasting memories with your little rider!
Ride Safe
What should I do if I drop my motorcycle
Did you know that dropping a motorcycle is a relatively common occurrence among riders? In fact, it is estimated that nearly 3 out of 5 motorcyclists have dropped their bikes at least once during their riding journey. Whether it’s due to a momentary lapse in balance, unfavorable road conditions, or other unforeseen circumstances, knowing how to safely pick up your bike is essential as a rider.
Key Takeaways:
- Approximately 60% of motorcyclists have experienced dropping their bike.
- Knowing how to properly pick up your motorcycle is crucial for rider safety and bike maintenance.
- Understanding the potential impact of dropping a motorcycle will help you assess any potential damage.
- Following the correct technique and taking necessary precautions can prevent injuries and further damage.
- Conduct a thorough inspection of your bike after picking it up to identify any visible damage.

Understanding the impact of dropping a motorcycle
Before we dive into the techniques of picking up a dropped motorcycle, it’s essential to understand the potential consequences of such an incident. Many riders often wonder, does dropping a motorcycle ruin it? While dropping a motorcycle can be disheartening, the extent of damage depends on various factors.
When a motorcycle hits the ground, the impact can potentially cause damage to specific areas. The most vulnerable components include:
- Tank: The gas tank, being one of the prominent features, is at risk of dents and scratches.
- Fairings: The fairings, designed to protect the engine and other internal parts, may crack or shatter upon impact.
- Handlebars and Controls: Handlebars, brake levers, and other controls can endure damage, affecting the motorcycle’s maneuverability.
- Exhaust System: The exhaust system, located on the lower side of the bike, may suffer scratches or even bends.
It’s important to note that the severity of damage can vary depending on the bike’s make and model, the force of impact, and other factors such as speed and angle of the fall.
While some motorcycles may survive a drop unscathed, others might exhibit visible damage or require immediate attention. It’s crucial to assess your bike thoroughly after a drop to determine any necessary repairs or maintenance.
Proper technique for picking up a motorcycle
When faced with the unfortunate situation of dropping your motorcycle, it’s important to know the proper technique for picking it up safely. By following these step-by-step instructions and key points, you can handle your bike with care and avoid any potential injuries or further damage.
- Assess the situation: Before attempting to pick up your motorcycle, assess the surroundings and ensure it is safe to do so. Remove any obstacles or hazards that may hinder the process.
- Position yourself: Stand facing the motorcycle, with your back against the bike. Plant your feet firmly on the ground, shoulder-width apart, to maintain stability throughout the lifting process.
- Get a good grip: Reach down and grab the handlebars of the motorcycle. Ensure you have a firm grip, keeping your wrists straight and your fingers securely wrapped around the handles.
- Engage your leg muscles: Bend your knees and use the strength in your legs to lift the bike. Maintain good posture by keeping your back straight and using your legs as the primary force for lifting.
- Lift with control: Slowly raise the motorcycle by straightening your legs, using controlled movements. Keep the bike as close to your body as possible to maintain balance and prevent strain on your back.
- Find your footing: Once the bike is upright, reposition your feet for stability. Stand with one foot slightly forward and the other back, ensuring you have a solid base to support the weight of the motorcycle.
Remember, the proper technique for picking up a motorcycle may vary depending on the size and weight of your bike. It’s crucial to practice this technique in a safe and controlled environment to build confidence and muscle memory.
“Proper technique and body positioning are essential when picking up a dropped motorcycle. Using your leg muscles and maintaining a controlled lift will help minimize the risk of injury and prevent further damage to the bike.”
Once you have successfully picked up your motorcycle, take a moment to assess the bike for any visible damage. Inspect the handlebars, mirrors, fairings, and exhaust pipes for any signs of impact. If you notice any issues or concerns, consult a professional mechanic to ensure your motorcycle is in optimal condition before riding again.
By following the proper technique for picking up a motorcycle, you can confidently handle an unfortunate drop while minimizing the potential for injuries or additional damage. Remember to always prioritize safety and seek professional assistance when needed.
Assessing the bike after a drop
After successfully picking up your motorcycle, it’s crucial to assess its condition. Conducting a thorough inspection of your bike is essential to identify any potential damage and determine if maintenance or repairs are necessary.
1. Visual Examination:
- Inspect the entire bike, paying close attention to the areas that are most likely to be affected by a drop, such as the handlebars, mirrors, fairings, and exhaust.
- Look for any visible cracks, scratches, or dents on the bodywork.
- Check the levers, pedals, and footpegs for any signs of bending or misalignment.
2. Functional Assessment:
- Test the brakes to ensure they are functioning properly.
- Check the suspension by compressing it and listening for any strange noises.
- Examine the wheels and tires for any signs of damage, such as bent rims or punctures.
3. Fluid Inspection:
- Check the oil level and condition. Look for any signs of leakage.
- Inspect the coolant level and color. Abnormal colors or low levels may indicate a problem.
- Verify the brake fluid level and examine its color. Contaminated or low brake fluid can impact braking performance.
In the words of veteran rider Mark Johnson, “A drop may not always cause significant damage, but it’s important to thoroughly assess your bike after such an incident to catch any potential issues early.”
4. Documenting the Damage:
- Take clear pictures of any visible damage or areas of concern. This documentation can be useful for insurance claims or discussions with a mechanic.
- Make detailed notes of any abnormalities or changes in the bike’s performance.
Remember, even if there doesn’t appear to be any immediate visual or functional damage, it’s still recommended to have your motorcycle inspected by a qualified mechanic. They can provide a more in-depth assessment and ensure that no hidden issues are present.
Tips for preventing future drops
Now that you’ve learned how to pick up a dropped motorcycle, it’s crucial to take proactive steps to minimize the risk of future incidents. By following these useful tips and strategies, you can ensure a safe and enjoyable riding experience while avoiding the frustration of dropping your bike again.
1. Improve Your Riding Skills
Enhancing your riding skills is one of the most effective ways to prevent motorcycle drops. Consider taking advanced riding courses or participating in training programs that focus on balance, control, and maneuverability. These courses can help you build confidence and develop the necessary skills to handle unexpected situations on the road.
2. Use Appropriate Footwear
Wearing sturdy and non-slip footwear is crucial when riding a motorcycle. Invest in proper motorcycle boots that provide ample ankle support and have anti-skid soles. This will ensure a secure grip on the ground, reducing the chances of slipping or losing balance while coming to a stop or parking.
3. Be Mindful of Your Parking Spot
Choose your parking spot wisely. Look for level ground or designated motorcycle parking spots to minimize the risk of your bike tipping over. Avoid parking on uneven surfaces, gravel, or grassy areas, as these can make it challenging to maintain stability.
4. Use a Kickstand Plate
A kickstand plate acts as an additional support under your motorcycle’s kickstand, preventing it from sinking into softer surfaces like hot asphalt or loose dirt. This simple accessory can provide extra stability, reducing the chances of your bike tipping over while parked.
5. Practice Slow-Speed Maneuvers
Practice slow-speed maneuvers regularly in a safe and controlled environment. Slow-speed turns, U-turns, and figure eights will help you gain better control over your bike, improve your balance, and enhance your overall handling skills. With practice, you’ll feel more confident and comfortable when navigating tight spaces or congested areas.
“Prevention is always better than cure. By adopting these preventive measures, you can significantly reduce the risk of dropping your motorcycle and enjoy a worry-free riding experience,” says Brian Thompson, a seasoned motorcycle enthusiast.
6. Maintain Proper Tire Pressure
Regularly check and maintain the correct tire pressure on your motorcycle. Underinflated or overinflated tires can adversely affect your bike’s stability and handling, increasing the chances of a drop. Refer to your motorcycle’s owner manual or consult with a professional to determine the proper tire pressure for your specific model.
7. Stay Alert and Focused
One of the simplest yet most crucial tips is to stay alert and focused while riding. Avoid distractions, such as using your mobile phone or listening to loud music, that can divert your attention from the road. Stay aware of your surroundings, anticipate potential hazards, and maintain a safe speed to prevent sudden or unexpected drops.
- Improve your riding skills through advanced training
- Use appropriate footwear for better grip
- Choose a suitable parking spot
- Use a kickstand plate for added stability
- Practice slow-speed maneuvers regularly
- Maintain proper tire pressure
- Stay alert and focused while riding
By implementing these tips and making them a part of your riding routine, you can significantly minimize the risk of dropping your motorcycle and enjoy a safe and enjoyable journey on the open road.
Conclusion
In conclusion, dropping a motorcycle can be a distressing experience, but with the right knowledge and technique, you can safely pick up your bike and assess any potential damage. By following the tips provided in this article, you can prepare yourself for such situations and reduce the likelihood of future drops.
Remember, when faced with a dropped motorcycle, it’s important to remain calm. Assess the situation and prioritize your safety first. Once you’re ready, use the proper technique to lift your bike, ensuring that you protect both yourself and the motorcycle from further harm.
Regular maintenance is crucial for keeping your motorcycle in optimal condition. By regularly inspecting your bike, addressing any visible damage, and promptly attending to any necessary maintenance or repairs, you can prevent potential issues that may arise from a drop.
Lastly, adopting a cautious riding style can significantly reduce the risk of dropping your motorcycle. Being mindful of road conditions, maintaining a proper distance from other vehicles, and practicing defensive driving techniques can all contribute to a safer riding experience, minimizing the chances of accidents and drops.
FAQ
What should I do if I drop my motorcycle?
If you accidentally drop your motorcycle, remain calm and follow these steps to safely pick it up. First, make sure the engine is off. Then, ensure you have a firm grip on the handlebars and use your legs to push the bike upright. Finally, check for any visible damage and assess if any repairs or maintenance are required.
Does dropping a motorcycle ruin it?
While dropping a motorcycle can be alarming, it doesn’t necessarily mean your bike is ruined. The extent of the damage depends on various factors such as the speed of the drop, the surface it lands on, and the specific bike model. In most cases, cosmetic damages such as scratches or scuffs are more common, but it’s essential to assess the bike thoroughly for any other issues.
How should I pick up a motorcycle when it’s dropped?
To pick up a dropped motorcycle safely, follow these steps: 1. Ensure the engine is off. 2. Stand with your feet shoulder-width apart and your back straight. 3. Bend your knees and use your legs to lift the bike. 4. Grab the handlebars firmly and, using your leg strength, slowly bring the motorcycle upright. 5. Once the bike is balanced, check for any visible damage or leaks before attempting to start it.
What should I do after picking up my dropped motorcycle?
After successfully picking up your motorcycle, take the time to assess its condition. Carefully inspect the bike for any visible damage, such as broken mirrors, bent handlebars, or leaks. Additionally, check the controls, lights, and brakes to ensure they are functioning correctly. If you notice any issues, consult a professional motorcycle mechanic to address the problem.
How can I prevent future drops?
To minimize the risk of dropping your motorcycle in the future, consider the following tips: 1. Practice slow-speed maneuvers in a controlled environment. 2. Always be aware of your surroundings, including road conditions and traffic. 3. Avoid sudden braking or acceleration. 4. Use proper riding gear and ensure your bike is properly maintained. 5. Seek additional training or attend motorcycle safety courses to improve your riding skills.
How do I corner safely on a motorcycle
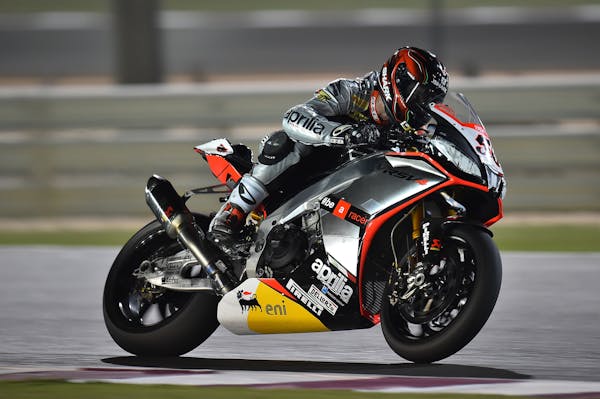
Did you know that mastering motorcycle cornering techniques can significantly reduce the risk of accidents and enhance the thrill of your rides? Whether you’re a novice rider or have years of experience, understanding the fundamentals of safe cornering is essential for every motorcyclist.
In this article, we will guide you through the techniques and skills you need to corner safely on your motorcycle. From mastering body positioning to polishing advanced cornering techniques, we’ll provide you with valuable insights to help you navigate corners efficiently and with confidence.
Key Takeaways:
- Mastering motorcycle cornering techniques enhances your riding experience and reduces the risk of accidents.
- Understanding the basics of motorcycle cornering is crucial for all riders.
- Proper body positioning contributes to optimal control and stability while cornering.
- Polishing your cornering technique involves understanding lean angles and utilizing braking techniques.
- Practicing cornering on different road conditions improves adaptability and overall cornering skills.
Understanding the Basics of Motorcycle Cornering
Before we delve into advanced cornering techniques, it’s crucial to understand the basics. By mastering fundamental tips, you’ll be able to navigate corners with confidence, whether you’re a beginner or an experienced rider. These simple yet essential cornering tips will serve as a solid foundation for your motorcycle cornering skills.
- Look Ahead: When approaching a corner, look ahead in the direction you want to go. Your eyes should be focused on the exit of the corner rather than on the immediate surroundings. This helps create a smooth line and improves your overall cornering technique.
- Slow Down: Reduce your speed before entering a corner. Gradually ease off the throttle and apply gentle, progressive braking to maintain control. Remember, it’s crucial to find the right balance between speed and control.
- Position Yourself: Position your body and motorcycle in the correct posture for cornering. Lean your body slightly towards the inside of the corner, keeping your head and eyes level. This helps maintain balance and control throughout the turn.
- Use Smooth Inputs: Apply throttle, braking, and steering inputs smoothly and progressively. Abrupt or sudden maneuvers can disrupt the balance of your bike, making it less stable and increasing the risk of losing control.
- Choose the Right Line: Select the appropriate line through the corner, taking into account factors such as the radius of the turn, road conditions, and visibility. The ideal line should allow for a smooth and efficient entry, apex, and exit.
Remember, mastering the basics of motorcycle cornering is essential for developing advanced techniques and skills. By implementing these fundamental tips, you’ll be able to approach corners with greater confidence and control. Let’s move on to the next section where we’ll explore the importance of mastering motorcycle cornering body position.
Mastering Motorcycle Cornering Body Position
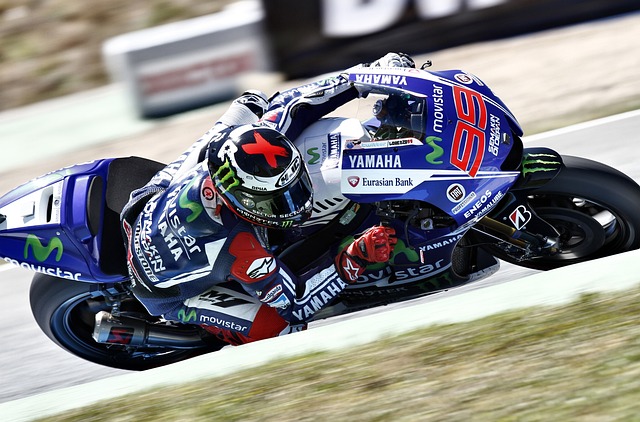
When it comes to cornering on a motorcycle, body positioning is paramount. By mastering the correct body position techniques, you can significantly improve your control, stability, and overall riding experience. Let’s delve into the importance of body position and how it contributes to safer and more efficient cornering.
Proper body position allows you to lean and turn smoothly through corners, reducing the risk of losing control. By shifting your weight and aligning your body with the bike, you can maintain balance and maximize traction.
The Correct Body Position Techniques
1. Hang off: When approaching a corner, position your body slightly off-center towards the inside of the turn. This technique, known as hanging off, helps to counterbalance the bike’s lean and maintain stability. Keep your torso relaxed and perpendicular to the bike, while extending your inside leg towards the tank for additional support.
2. Grip the tank: Maintain a firm grip on the motorcycle’s tank with your knees. This helps stabilize your body and allows you to control the bike through subtle shifts in weight distribution.
3. Relax your upper body: Avoid tensing your upper body, as it can hinder your ability to make smooth and precise movements. Keep your arms relaxed and slightly bent, allowing for fluid steering inputs.
“By positioning your body correctly, you create a symbiotic relationship with your motorcycle, enhancing your control and stability.”
4. Look through the corner: As you enter a corner, focus your gaze on the exit point rather than fixating on the immediate roadway in front of you. This visual technique helps you anticipate and react to any potential hazards or changes in the road surface.
Benefits of Proper Body Position
- Enhanced control and stability
- Improved weight distribution
- Maximized traction
- Reduced risk of loss of control
- Smoother and more efficient cornering
- Increased confidence in your riding abilities

Mastering motorcycle cornering body position is essential for riders looking to take their skills to the next level. Practice these techniques consistently to become more comfortable and proficient in your cornering abilities. Remember, advanced motorcycle cornering is a continuous learning process, and refining your body position skills will contribute to safer and more enjoyable rides.
Polishing Your Cornering Technique
Now that you have a solid understanding of the basics and the correct body position, it’s time to take your cornering technique to the next level. In this section, we will explore advanced motorcycle cornering techniques that will help you navigate corners with precision and confidence. By mastering these techniques, you’ll enhance your riding experience and become a more skilled and versatile rider.
Understanding Lean Angles
One of the key elements to master in advanced cornering is understanding lean angles. As you approach a corner, gradually lean your body and your bike into the turn. The more you lean, the sharper your cornering ability. However, it’s essential to find the right balance and avoid over-leaning, which can lead to instability. Practice finding your optimal lean angle to maintain control and stability throughout the corner.
Utilizing Braking Techniques
Braking is a crucial aspect of cornering technique. Knowing how and when to apply the brakes can make all the difference in a smooth and controlled corner. Before entering a turn, apply gentle and smooth brakes to adjust your speed and stabilize your bike. Remember to release the brakes smoothly as you initiate the lean, allowing the bike to naturally settle into the corner. Avoid harsh or sudden braking, as it can upset the balance of the bike and diminish your control.
Trail Braking for Advanced Riders
For more experienced riders seeking to refine their cornering technique, trail braking is a valuable skill to master. It involves maintaining gentle pressure on the brakes while leaning into the corner. Trail braking allows for greater control and stability throughout the corner and can help you maintain an optimal line. However, it requires precise throttle and brake control, so practice in a controlled environment before attempting it on the road.
Looking Through the Corner
Where you look while cornering greatly influences your line and overall technique. Rather than fixating on the immediate path ahead, focus on looking through the corner to anticipate your line and navigate it smoothly. Looking ahead allows your body and bike to naturally follow the intended path, enhancing your control and reducing the chances of over-correction. Practice scanning through corners and maintaining a steady gaze for improved cornering.
Remember to Practice
Mastering advanced motorcycle cornering techniques takes time and practice. Find a controlled environment, such as a racetrack or an empty parking lot, to practice these techniques before attempting them on public roads. Start with gradual, low-speed corners and progressively work up to higher speeds and tighter turns as you gain confidence and proficiency.
The key to polishing your cornering technique lies in refining your skills and continuously challenging yourself. With practice and dedication, you’ll become a proficient rider capable of confidently taking on any corner. Stay focused, stay safe, and enjoy the exhilaration that advanced cornering techniques bring to your motorcycle journey.
Practicing Cornering on Different Road Conditions
When it comes to motorcycle cornering, it’s crucial to adapt to different road conditions and understand the unique challenges they present. From wet roads to gravel surfaces, each environment requires a specific approach to ensure your safety and maintain control. In this section, we’ll explore how to handle corners on various road conditions and provide valuable tips to sharpen your motorcycle cornering techniques.
1. Cornering on Wet Roads

Motorcycle cornering on wet roads demands extra caution due to reduced traction and increased risk of sliding. To navigate corners safely in wet conditions:
- Reduce your speed and approach corners with a wider path to allow for smoother turns.
- Apply gentle and gradual braking before entering the corner to avoid skidding.
- Keep a relaxed grip on the handlebars to maintain stability.
- Avoid sudden throttle inputs and maintain a steady speed through the corner.
2. Handling Gravel Surfaces

Gravel roads can be particularly challenging for motorcycle cornering due to their loose and unpredictable surface. Here’s how to tackle corners on gravel:
- Approach corners at a controlled speed, keeping in mind that braking distance may be longer on gravel.
- Maintain a higher body position to handle potential slips and maintain stability.
- Use gentle and gradual throttle inputs to avoid wheel spin.
- Avoid sudden changes in direction and strive for smooth, fluid movements.
Remember, adaptability is key when cornering on different road conditions. Understanding how each surface affects your motorcycle’s traction and adjusting your technique accordingly will help you navigate corners with confidence.
3. Tips for Different Corner Types
While the approach to cornering remains consistent across most corners, certain types require specific techniques to ensure optimal control and stability. Let’s explore a few:
- Hairpin turns: These tight, U-shaped corners demand precise control and smooth execution. Brake and slow down before entering the turn, keeping your body position upright to maintain balance. Gradually lean into the corner, modulating throttle to maintain control throughout.
- Sweeping curves: These long, flowing corners allow for higher speeds. Practice proper body position and initiate the lean gradually, gradually increasing speed through the turn while maintaining control and stability.
By developing your skills to handle different corner types, you’ll be ready to tackle any road layout with confidence.
Conclusion
Investing time in mastering motorcycle cornering techniques can greatly enhance your riding experience. By understanding the fundamentals, perfecting your body position, and continuously practicing, you’ll be able to navigate corners with ease and confidence.
Remember, cornering safely is a skill that requires ongoing practice and refinement. Don’t be discouraged if it takes time to perfect your techniques. With patience and perseverance, you’ll gradually see improvements in your cornering skills.
So, get out there, apply what you’ve learned, and enjoy the thrill of motorcycle cornering. Whether it’s on city streets or winding country roads, mastering the art of cornering will not only make your rides safer but also more exciting. Keep pushing your limits, always prioritizing safety, and revel in the freedom of the open road.
FAQ
How can I corner safely on a motorcycle?
Cornering safely on a motorcycle requires mastering specific techniques and skills. It’s essential to understand the basics, such as maintaining proper speed, looking ahead, and using smooth throttle control. Additionally, body positioning plays a crucial role in achieving optimal control and stability. By practicing and perfecting these techniques, you can enhance your cornering skills and ensure a safer riding experience.
What are some motorcycle cornering tips for beginners?
If you’re a beginner, there are several tips to keep in mind when cornering on a motorcycle. Firstly, always approach corners at a controlled speed, allowing you to have better control of the bike. Look through the corner and focus on the road ahead, rather than directly in front of you. Be smooth with your throttle and brake inputs to maintain stability. Lastly, practice in a controlled environment, gradually building up your skills and confidence.
How does body position affect motorcycle cornering?
Body positioning is crucial for optimizing control and stability while cornering. By leaning your body slightly towards the inside of the turn, you can counterbalance the bike’s leaning angle and maintain balance. This position allows for smoother and more precise cornering. It’s important to keep your elbows bent, with your inside knee pressed against the fuel tank. Mastering proper body position techniques will enhance your cornering capabilities.
What are some advanced motorcycle cornering techniques?
Advanced cornering techniques include understanding lean angles, trail braking, and throttle control. Lean angles refer to the angle at which the motorcycle leans while taking a corner. Trail braking involves lightly applying the brakes while still cornering, helping to adjust speed and weight distribution. Throttle control allows you to modulate power smoothly, ensuring stability and control throughout the corner. Mastering these techniques will elevate your cornering skills.
How can I adapt my cornering technique to different road conditions?
Adapting your cornering technique to different road conditions is crucial for safe riding. On wet roads, for example, reduce your speed, be smooth with your inputs, and avoid sudden maneuvers. On gravel or uneven surfaces, maintain a stable body position and be gentle with your throttle and brake inputs. Additionally, hairpin turns and sweeping curves require different approaches. Practice and experience will help you adjust your technique accordingly.
If you found this helpful, please share it with friends, and if you are in need of parts and accesories for your biking adventures, you can Shop Here and get Free Shipping on all orders over $100 U.S. customers only.
Master advanced motorcycle braking
Did you know that the average braking time for a motorcycle traveling at 60 mph is a mere 3 seconds? That’s right, in just 3 seconds, a motorcycle can go from full speed to a complete stop. This surprising statistic highlights the crucial importance of mastering the art of braking on a motorcycle.
Whether you’re a seasoned rider or a beginner, understanding the proper motorcycle braking technique is essential for your safety on the road. In this article, we will explore everything you need to know about braking on a motorcycle. From the different braking techniques to use in various scenarios to the intricacies of braking while cornering, we’ve got you covered.
Key Takeaways:
- Mastering motorcycle braking is crucial for rider safety.
- There are various techniques to consider for effective braking.
- Braking while cornering requires specific skills and strategies.
- Understanding motorcycle braking percentage and distance is vital for control and safety.
- Practice regularly to become a skilled and confident motorcycle rider.
Choosing the Right Braking Technique
When it comes to braking on a motorcycle, there are several techniques to consider. Each technique has its own benefits and is suited for different situations. In this section, we will explore these different braking techniques and explain when and how to use them effectively. Understanding the right braking technique for each scenario can greatly improve your motorcycle braking performance and overall safety.
1. Squeeze, Don’t Grab: One of the fundamental techniques is gently squeezing the brakes instead of grabbing them abruptly. This allows for better control and prevents the wheels from locking up, especially in slippery conditions.
2. Front and Rear Combination: Using both the front and rear brakes together provides optimal stopping power. The front brake contributes to the majority of the stopping force, while the rear brake helps to stabilize the motorcycle.
3. Progressive Braking: Progressive braking involves gradually increasing the pressure on the brakes as you approach your desired stopping point. This technique helps distribute the weight of the motorcycle more evenly and maintains stability.
4. Trail Braking: Trail braking is a technique used while cornering. It involves gradually releasing the brakes as you enter a corner and continuously modulating them throughout the turn. This technique enhances your control over the motorcycle’s trajectory and allows you to maintain a smooth cornering line.
Remember, always practice these techniques in a controlled environment before applying them on the road. Consult with a professional rider or take a motorcycle safety course to improve your braking skills and gain confidence.
By mastering these different motorcycle braking techniques, you will be equipped to handle various riding scenarios with precision and control. It’s crucial to adapt your braking technique based on the road conditions, weather, and traffic situations. Effective braking is a fundamental skill that every motorcycle rider should continuously develop and refine.
Braking while Cornering: Mastering the Skill
Braking while cornering on a motorcycle requires a specific set of skills to maintain control and stability. It is crucial to understand the techniques and strategies that can help you navigate safely through curves while decelerating. In this section, we will provide valuable insights on how to maintain traction, balance, and control while braking while cornering.
When approaching a corner, it’s important to apply the brakes smoothly and progressively, avoiding any sudden or aggressive movements. By gradually reducing your speed, you can maintain stability and ensure proper weight transfer between the front and rear tires.
One technique to master while braking in a curve is trail braking. This technique involves lightly applying the brakes while simultaneously leaning into the corner. By doing so, you can reduce speed while maintaining control and stability. It’s important to note that trail braking requires finesse and practice to avoid overpowering the front tire and causing a loss of traction.
- Ensure you are in the correct gear for the corner before applying the brakes.
- Begin applying the brakes gently, using both the front and rear brakes simultaneously.
- Gradually increase the brake pressure as you lean into the corner.
- Release the brakes smoothly as you exit the corner and accelerate.
Remember, while braking while cornering, maintaining a proper body position is crucial. By shifting your body weight towards the inside of the corner, you can improve stability and reduce the risk of losing traction.
“Braking while cornering is a skill that requires practice and experience. Trust your bike’s capabilities and gradually build confidence in your braking abilities. Always prioritize safety and be aware of the road conditions and traffic around you.” – Robert Johnson, Motorcycle Enthusiast
By mastering the skill of braking while cornering, you can enhance your overall riding experience and confidently navigate through curves. Practice these techniques in controlled environments such as parking lots or empty roads before applying them on challenging roads. Remember, safety should always be your top priority while riding a motorcycle.
Understanding Motorcycle Braking Percentage and Distance
Knowing the ideal motorcycle braking percentage and distance is crucial for safe and effective braking. It allows riders to have better control and reduces the risk of accidents on the road.
The Concept of Braking Percentage
The braking percentage is a measurement that indicates how much pressure the rider applies to the brakes compared to the maximum braking capacity of the motorcycle. It is calculated by dividing the actual braking force by the maximum braking force and multiplying the result by 100.
An example of the calculation:
If the maximum braking force of your motorcycle is 1000 Newtons and you apply a braking force of 800 Newtons, the braking percentage would be (800/1000) * 100 = 80%.
By understanding the braking percentage, riders can gauge the intensity of their braking and adjust it accordingly to avoid skidding or losing control of the motorcycle.
The Factors Affecting Braking Distance
Motorcycle braking distance is influenced by various factors that riders should be aware of:
- Speed: The higher the speed, the longer the braking distance.
- Weight: Heavier motorcycles require a longer distance to come to a complete stop.
- Road Conditions: Wet or slippery roads increase braking distance.
- Tire Grip: Worn-out or improperly inflated tires reduce traction and increase braking distance.
It is important to consider these factors and adjust your braking accordingly to ensure a safe stopping distance.
Tips to Reduce Braking Distance
Here are some tips to help you reduce your motorcycle’s braking distance:
- Anticipate: Look ahead and be aware of potential hazards to allow yourself more time to brake.
- Maintain Proper Tire Condition: Check your tires regularly for wear and tear and ensure they are inflated to the recommended pressure.
- Practice Progressive Braking: Gradually apply the brakes, starting with lighter pressure and increasing as needed, to distribute the braking force more evenly.
- Upgrade Braking System: Consider upgrading your motorcycle’s braking system to improve its performance and reduce stopping distance.
By following these tips, you can enhance your braking efficiency and reduce the risk of accidents on the road.
Conclusion
In conclusion, mastering motorcycle braking is essential for every rider. By understanding the proper techniques, including braking while cornering, and being aware of the braking percentage and distance, you can enhance your riding skills and ensure a safe and enjoyable experience on your motorcycle. Remember to always prioritize safety and practice these techniques regularly to become a confident and skilled rider on two wheels.
Proper motorcycle braking techniques are crucial for maintaining control and stability while riding. Whether you are navigating sharp corners or riding in straight lines, knowing the right braking technique can make all the difference. Take the time to familiarize yourself with the different techniques and practice them in various scenarios to improve your braking performance.
Additionally, understanding the concepts of motorcycle braking percentage and distance can greatly contribute to your overall safety on the road. Knowing how much brake pressure to apply and how far you need to stop in different situations can prevent accidents and ensure smooth deceleration. Keep in mind that factors such as speed, road conditions, and weight distribution can influence these values, so always adjust accordingly.
FAQ
How do I brake properly on a motorcycle?
Proper braking on a motorcycle involves using the right technique and understanding certain factors. Start by applying the brakes gradually and evenly, rather than grabbing them suddenly. Additionally, it is important to distribute the braking force evenly between the front and rear brakes. Remember to also keep your body upright and maintain a firm grip on the handlebars to ensure stability while braking.
What are the different braking techniques for motorcycles?
There are various techniques for braking on a motorcycle, depending on the situation. The two primary techniques are known as the progressive braking method and the squeeze braking method. The progressive braking method involves gradually increasing the pressure on the brakes, while the squeeze braking method requires squeezing both the front and rear brakes simultaneously. It is important to practice and become proficient in both techniques to adapt to different scenarios.
How should I brake while cornering on a motorcycle?
Braking while cornering on a motorcycle requires skill and control. It is recommended to complete the majority of your braking before entering the corner. Apply the brakes smoothly and gradually to maintain stability and prevent any sudden loss of traction. Avoid excessive braking while leaning, as it can unsettle the bike and lead to a loss of control. Practice proper cornering techniques and gradually increase your speed and confidence when braking in corners.
What is motorcycle braking percentage and distance?
Motorcycle braking percentage refers to the distribution of braking force between the front and rear brakes. It is commonly recommended to use approximately 70% of your braking force on the front brake and 30% on the rear brake for optimal braking performance. Motorcycle braking distance, on the other hand, is the distance covered by the motorcycle from the moment the brakes are applied until it comes to a complete stop. Various factors such as speed, road conditions, and bike characteristics can affect the braking distance.
How do I shift gears on a motorcycle
When it comes to riding a motorcycle, knowing how to shift gears is not just a matter of convenience, it’s a matter of safety. Whether you’re a novice or an experienced rider, understanding the art of gear shifting is essential for optimizing your speed, maneuverability, and control on the road.
But don’t worry, we’ve got you covered. In this article, we’ll provide you with a step-by-step guide on how to shift gears on a motorcycle. From understanding the transmission system to mastering the technique, you’ll be equipped with all the knowledge you need to enhance your riding skills.
Key Takeaways:
- Shifting gears on a motorcycle is crucial for a smooth and controlled ride.
- Understanding the transmission system and its components is essential.
- Engaging the clutch and mastering the timing are key steps in shifting gears.
- Matching engine speed, anticipating gear changes, and avoiding common mistakes can ensure smooth transitions.
- By following our guide and implementing our tips, you’ll be able to shift gears confidently and enjoy the thrill of the ride.
Understanding the Motorcycle Transmission System
In this section, we will delve into the intricacies of the motorcycle transmission system and explore its various components. Understanding how the transmission system works is essential for any motorcycle rider who wants to have a smooth and efficient riding experience.
The Clutch: Enabling Smooth Gear Changes
One of the key components of the motorcycle transmission system is the clutch. The clutch is responsible for disconnecting and connecting the engine power to the transmission. When the clutch lever is squeezed, the clutch plates separate, disengaging the power flow. Releasing the clutch lever allows the plates to come together again, transmitting power to the transmission.
Gear Shifter: Selecting the Right Gear
The gear shifter, usually located on the left side of the motorcycle, allows you to change gears. By using your left foot to control the gear shifter, you can shift up or down through the gears. Each shift changes the gear ratio, altering the speed and power delivery of the motorcycle.
“The gear shifter is a vital tool for controlling the motorcycle’s speed and acceleration. Understanding how to use it effectively will enhance your riding experience.” – Motorcycle Enthusiast Magazine
Gear Ratios: Enhancing Performance
Gear ratios play a crucial role in the motorcycle transmission system. Each gear has a specific ratio that determines the relationship between the speed of the engine and the speed of the wheels. Lower gears provide more torque for acceleration, while higher gears allow for increased speed. The selection of the appropriate gear ratio depends on the riding conditions and the desired performance.
- First gear: Offers the highest torque and lowest top speed, suitable for starting from a standstill or climbing steep inclines.
- Second and third gears: Provide a balance between torque and speed, ideal for city riding and moderate acceleration.
- Higher gears: Reaching fourth, fifth, and possibly sixth gears maximizes speed and fuel efficiency, great for highway cruising.
Understanding the motorcycle transmission system and its components empowers riders to make informed gear choices, optimizing performance and ensuring a smooth ride. In the next section, we will provide a step-by-step guide on how to effectively shift gears on a motorcycle.
Step-by-Step Guide for Shifting Gears
Shifting gears on a motorcycle is a crucial skill that every rider must master. Whether you’re a beginner or an experienced rider, understanding the correct process for changing gears is essential for smooth and efficient motorcycle riding. In this section, we will provide a step-by-step guide to help you navigate through the gears with ease.
1. Engaging the Clutch
Before shifting gears, it’s important to engage the clutch. Use your left hand to pull the clutch lever towards the handlebars, disengaging the engine’s power from the wheels. This allows you to shift gears without causing any damage to the transmission system.
2. Shifting Up
Once the clutch is engaged, you can shift up to a higher gear. Apply gentle pressure to the gear shifter lever with the front part of your left foot. Gradually release the clutch lever while gently rolling on the throttle to match the engine speed with the higher gear. Remember to shift up at the appropriate engine RPM to ensure smooth gear transitions.
- First Gear to Second Gear: Shift up when the engine reaches around 3,000 to 4,000 RPM.
- Second Gear to Third Gear: Shift up when the engine reaches around 5,000 to 6,000 RPM.
- Third Gear to Fourth Gear: Shift up when the engine reaches around 7,000 to 8,000 RPM.
3. Shifting Down
When you need to slow down or come to a stop, shifting down to lower gears is necessary. Start by gently applying pressure to the gear shifter lever with the front part of your left foot. Simultaneously, use your left hand to slowly release the clutch lever while slightly rolling off the throttle. This will help match the engine speed with the lower gear, allowing for a smooth gear change.
4. Practicing Smooth Gear Transitions
Smooth gear transitions require practice and fine-tuning your technique. As you gain more experience, you’ll develop a feel for the engine sound, ensuring the right timing for shifting gears. Remember to always anticipate gear changes based on the road conditions and your speed, allowing for seamless transitions.
Furthermore, it’s important to avoid common gear shifting mistakes such as forcefully slamming the gear shifter or hesitating when shifting. Gradually and confidently shift gears, maintaining control and stability throughout the process. With practice, you’ll be able to shift gears seamlessly, enhancing your overall riding experience.
Remember, shifting gears on a motorcycle is all about precision and control. By following these step-by-step instructions and practicing regularly, you’ll master the art of gear shifting, ensuring a smooth and enjoyable ride every time.
Tips for Smooth Gear Transitions
When it comes to shifting gears on a motorcycle, smooth transitions are key for a seamless riding experience. Here are some valuable tips to help you master the art of gear shifting:
- Match engine speed: Before changing gears, ensure that the engine speed matches the desired gear. As you shift up, increase the engine throttle gradually to prevent any jerky movements. Similarly, when shifting down, decrease the throttle to match the lower gear.
- Anticipate gear changes: Pay attention to your speed and anticipate when you’ll need to shift gears. By being proactive, you can smoothly transition to the appropriate gear before the engine starts to strain or lose power.
- Avoid common shifting mistakes: One common mistake is shifting gears when you’re in the middle of a turn. It’s best to wait until you’re in a straight line, as shifting during a turn can affect your balance and stability. Additionally, avoid downshifting multiple gears at once, as this can cause the rear wheel to lock up.
Pro tip: Practice shifting gears in a controlled environment, such as an empty parking lot, before hitting the road. This will help you build muscle memory and develop a smoother gear shifting technique.
By implementing these tips, you’ll be able to shift gears on your motorcycle with confidence and finesse. Remember, practice makes perfect, so take the time to familiarize yourself with your bike’s gear shifting mechanism and enjoy the thrill of a well-coordinated ride!
Conclusion
Mastering the art of shifting gears on a motorcycle is crucial for enhancing your riding experience. Understanding the transmission system and following a step-by-step guide can help you shift gears smoothly and confidently. By implementing our tips, you’ll be ready to hit the road and embrace the thrilling adventure that awaits.
Shifting gears on a motorcycle requires coordination and practice. Remember to engage the clutch, time your shifts correctly, and maintain control over your motorcycle’s engine speed. By doing so, you’ll ensure a seamless transition and avoid gear shifting mistakes that could compromise your safety.
As you gain more experience, anticipate gear changes to stay ahead of the curve. This involves reading the road, adjusting your speed, and gearing up or down accordingly. In time, shifting gears on a motorcycle will become second nature, allowing you to focus more on the journey and less on the mechanics.
FAQ
How do I shift gears on a motorcycle?
To shift gears on a motorcycle, start by squeezing the clutch lever near the left handlebar to disengage the clutch. Next, use your left foot to shift the gear lever located in front of the left footpeg. To shift up, lift the lever with your toe, and to shift down, press it down with your heel. Release the clutch lever slowly while simultaneously throttling the engine for a smooth gear transition.
What is the motorcycle transmission system?
The motorcycle transmission system consists of the clutch, gear shifter, and gear ratios. The clutch is responsible for engaging and disengaging power from the engine to the transmission. The gear shifter allows you to change between gears, which control the speed and torque delivered to the wheels. Gear ratios determine the relationship between engine speed and wheel speed depending on the selected gear.
How do I change gears on a motorcycle?
To change gears on a motorcycle, follow these steps:
1. Squeeze the clutch lever to disengage the clutch.
2. Use the gear lever to shift up or down.
3. Release the clutch lever slowly while throttling the engine for a smooth transition.
It’s important to practice shifting at different speeds to become comfortable with gear changes.
What are some tips for smooth gear transitions while riding a motorcycle?
Here are some tips for smooth gear transitions:
– Anticipate gear changes: Plan ahead and shift gears before you need them, especially when approaching corners or overtaking.
– Match engine speed: Adjust the throttle to match the engine speed with the gear you’re shifting into.
– Don’t force it: Avoid using excessive force when shifting gears. Instead, apply gentle pressure on the gear lever.
– Practice throttle control: Smoothly throttle the engine while releasing the clutch for seamless gear changes.
– Avoid half-clutching: Fully release the clutch after shifting gears to prevent clutch wear and ensure proper power transmission.
Mastering Motorcycle Braking Techniques: Tips for Stopping with Confidence (and Avoiding Accidents)
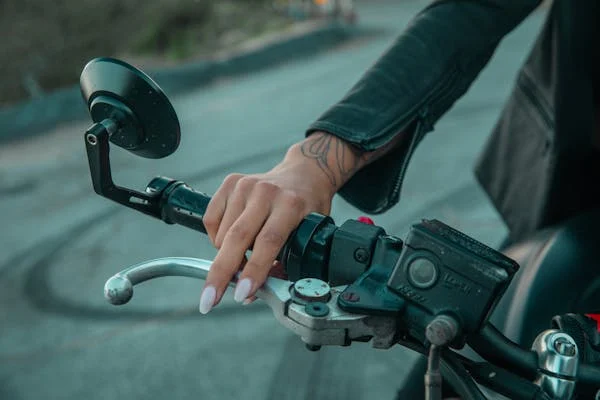
Mastering Motorcycle Braking Techniques: Tips for Stopping with Confidence (and Avoiding Accidents)
As an experienced motorcyclist and enthusiast, I understand the common concerns new riders face when it comes to mastering braking techniques. The fear of coming into corners too hard and running out of road, or having to avoid the blind man driving a car.
In this comprehensive guide, you will learn the knowledge and techniques to transform braking from a nerve-wracking experience into a smooth, controlled maneuver. Let’s dive in and explore the physics behind braking, the essential equipment involved, and most importantly, techniques that will make you a more confident and safe rider.
Why Braking is Important
Motorcycle braking techniques are the cornerstone of motorcycle safety amd play a crucial role in accident prevention. Understanding the physics behind how to brake on a motorcycle, including weight transfer and friction, is fundamental to mastering this skill. When you’re riding a motorcycle, you rely on your brakes to bring you to a safe stop in various situations. Whether you’re approaching a red light, navigating through traffic, or encountering unexpected obstacles on the road, your ability for stopping a motorcycles safely and effectively can mean the difference between a close call and a collision.
The Science Behind Stopping
Braking for beginners can be a scarey task, but understanding how to brake on a motorcycle means understanding some basic science. Braking relies on the principle of friction. When you squeeze the brake levers, calipers clamp down on discs (front) or a drum (rear), creating friction that slows down the wheels. Here’s the breakdown:
- Weight Transfer: As you apply the brakes, your weight shifts forward, putting more pressure on the front tire and increasing its grip. This is why the front brake is more powerful than the rear.
- Friction: The friction between the brake pads/shoes and the discs/drum slows down the wheel rotation. This, in turn, slows down the motorcycle.
- Stopping Distance: The distance it takes for your motorcycle to come to a complete stop depends on several factors like speed, road surface, tire condition, and braking technique.
Essential Braking Equipment
Now, let’s get familiar with the key players in your motorcycle’s braking system:
- Front Brake Lever: Located on the right handlebar, this controls the front brakes, responsible for most of your stopping power.
- Rear Brake Pedal: Located on the right foot peg, this controls the rear brake, offering additional stopping power and stability.
- Anti-lock Braking System (ABS): If your motorcycle has ABS, it prevents wheel lockup during hard braking, giving you more control and preventing skids.
Maintaining Your Brakes
Regularly checking your brake fluid levels and pad wear is crucial. Low fluid levels can reduce braking effectiveness, while worn-out pads can compromise stopping power. Refer to your owner’s manual for specific maintenance intervals.
Body Positioning & Control
Before mastering the mechanics of braking, let’s focus on your body position. Here’s how to set yourself up for effective braking:
- Upright Posture: Sit tall with your back straight and shoulders relaxed.Proper body positioning is essential for maximizing braking effectiveness. Maintaining an upright posture and distributing your weight evenly can help you maintain control and stability during braking maneuvers.
- Relaxed Grip: Don’t death grip the handlebars!Keep your arms relaxed and your grip firm but not too tight on the handlebars. This allows you to maintain control of the bike while applying the necessary braking force.
- Weight Distribution: Keep your weight centered over the motorcycle. When you apply the brakes, you want to ensure that your body weight is distributed evenly over the bike. This helps to stabilize the motorcycle and prevents it from tipping over during sudden stops.
Mastering Braking Techniques
- Gradual Braking: Gradually applying brakes allows for smoother deceleration, particularly beneficial for new riders who may be prone to panic braking. Practice applying the brakes gently and progressively to get a feel for how your motorcycle responds. Start by squeezing the brake lever or pressing the brake pedal lightly and gradually increase pressure as needed.
- Front vs. Rear Brake: While both brakes are important, the front brake provides the majority of stopping power and should make up about 70% of your braking depending on weather conditions. Learning to use it effectively is essential for safe braking. Remember to apply both brakes together for maximum stopping power, but rely primarily on the front brake for quick stops. The front brake is more effective than the rear brake at slowing down the motorcycle, especially in emergency situations. However, it’s essential to use both brakes in conjunction with each other to achieve optimal braking performance.
- Engine Braking: Engine braking can assist with slowing down, especially when approaching a stop. Understanding how to use this technique can enhance your braking capabilities. Engine braking involves downshifting to a lower gear and letting the engine slow down the motorcycle instead of relying solely on the brakes. This can be particularly useful when riding downhill or in slippery conditions where applying the brakes too aggressively could cause the wheels to lock up.
- Emergency Braking: In emergency situations, knowing how to perform emergency braking can mean the difference between a close call and a collision. Remember to apply firm pressure to the front brake while maintaining a straight line. Avoid locking up the wheels by modulating the brake pressure and keeping the motorcycle balanced. Practice emergency braking in a controlled environment to build confidence and muscle memory for when you need it most.
- Cornering and Braking: Braking should ideally be done before entering a corner to avoid unsettling the bike mid-turn. However, if you find yourself needing to brake while cornering, it’s essential to do so smoothly and progressively to maintain control. Avoid grabbing the brakes or making sudden movements that could cause the motorcycle to lose traction and slide out from under you. Practice braking while cornering at low speeds to get a feel for how your motorcycle responds and build confidence in your abilities.
Cornering and Braking
A common mistake is braking while turning a corner. This can lead to loss of control. Here’s the golden rule: brake before entering a corner, not while turning. Slow down to a safe speed before leaning into the corner, then focus on maintaining a smooth throttle and body position throughout the turn.Trouble is we all find ourselves going too fast at some stage. Avoiding motorcycle accidents is what this is about so learn from this…..
Cornering and Braking: Mastering the Art of Smooth Transitions
While the golden rule is to brake before entering a corner, there are situations where you might need to apply a touch of brake even while leaned into a turn. The key is understanding the proper technique and applying minimal, controlled braking to avoid compromising your balance and grip. Here’s how to navigate this scenario safely:
- Trail Braking: This advanced technique involves applying the front brake progressively while still leaned into the corner. The key is to gradually release brake pressure as you transition from braking to a steady throttle throughout the corner. This maintains weight transfer on the front tire, maximizing grip and stability while allowing you to tighten your line (turning radius) slightly.
Here’s a breakdown of the steps for trail braking
- Approach the corner at a safe speed: This is crucial. You shouldn’t rely on braking to adjust your speed significantly mid-corner.
- Brake and downshift (if applicable) before entering the corner: Apply the front brake smoothly and progressively to slow down before you start leaning. If riding a geared motorcycle, downshift smoothly to match your engine speed to the corner’s exit speed.
- Initiate your lean and apply minimal trail braking: As you start turning the handlebars and leaning the motorcycle, gently squeeze the front brake lever. This maintains some weight transfer on the front wheel for better grip while turning.
- Focus on a smooth throttle roll-on: As you continue through the corner, gradually release pressure on the front brake lever and progressively open the throttle. This smooth transition ensures the motorcycle remains balanced and allows you to accelerate out of the corner smoothly.
Important points to remember
- Trail braking is an advanced technique. Practice it at slow speeds in a safe environment before attempting it on the road.
- Use minimal brake pressure. A light touch is key to maintaining control. Overuse of the brakes mid-corner can lead to wheel lockup and a loss of traction.
- Focus on smooth throttle control. A jerky throttle application can upset the motorcycle’s balance.
- Don’t trail brake in slippery conditions. Reduced grip levels make this technique much riskier.
- Mastering trail braking is one of the motorcycle braking techniques that takes time and practice. Start by focusing on smooth braking before entering corners and gradually introduce minimal trail braking as you gain confidence. Remember, prioritize a safe speed and smooth transitions for a controlled and enjoyable cornering experience.
- Wear the right safety gear. A helmet, jacket , pants, boots and gloves are all recommended not just when you are learning how to brake on a motorcycles but every time you ride. Learn more about that here.
Tips for Practice
Mastering motorcycle braking techniques takes time and practice. Here are some tips to help you hone your skills:
- Braking for beginners: Find a safe space, Locate a large, empty parking lot or open area free of traffic.
- Start Slow: Begin practicing at low speeds, gradually increasing your speed as you gain confidence helps greatly with stopping a motorcycle safely.
- Practice Different Conditions: Once comfortable on dry pavement, try practicing these motorcycle braking techniques on wet surfaces (in a controlled environment) to understand how braking distance changes.
- Take a Motorcycle Safety Course: A safety course offers professional instruction on how to brake on a motorcycle and gives a safe environment to practice advanced braking techniques, including emergency braking.
By following these tips and dedicating time to practice, you can improve your braking skills and ride with confidence on any road or terrain. Remember that mastering braking is a continuous process, so don’t hesitate to seek further instruction or practice opportunities to enhance your abilities. Safe riding!
Share the Knowledge: Share this post with other new riders to help them conquer their fear of braking!
Ultimate Guide to Staying Warm on Your Motorcycle in Winter
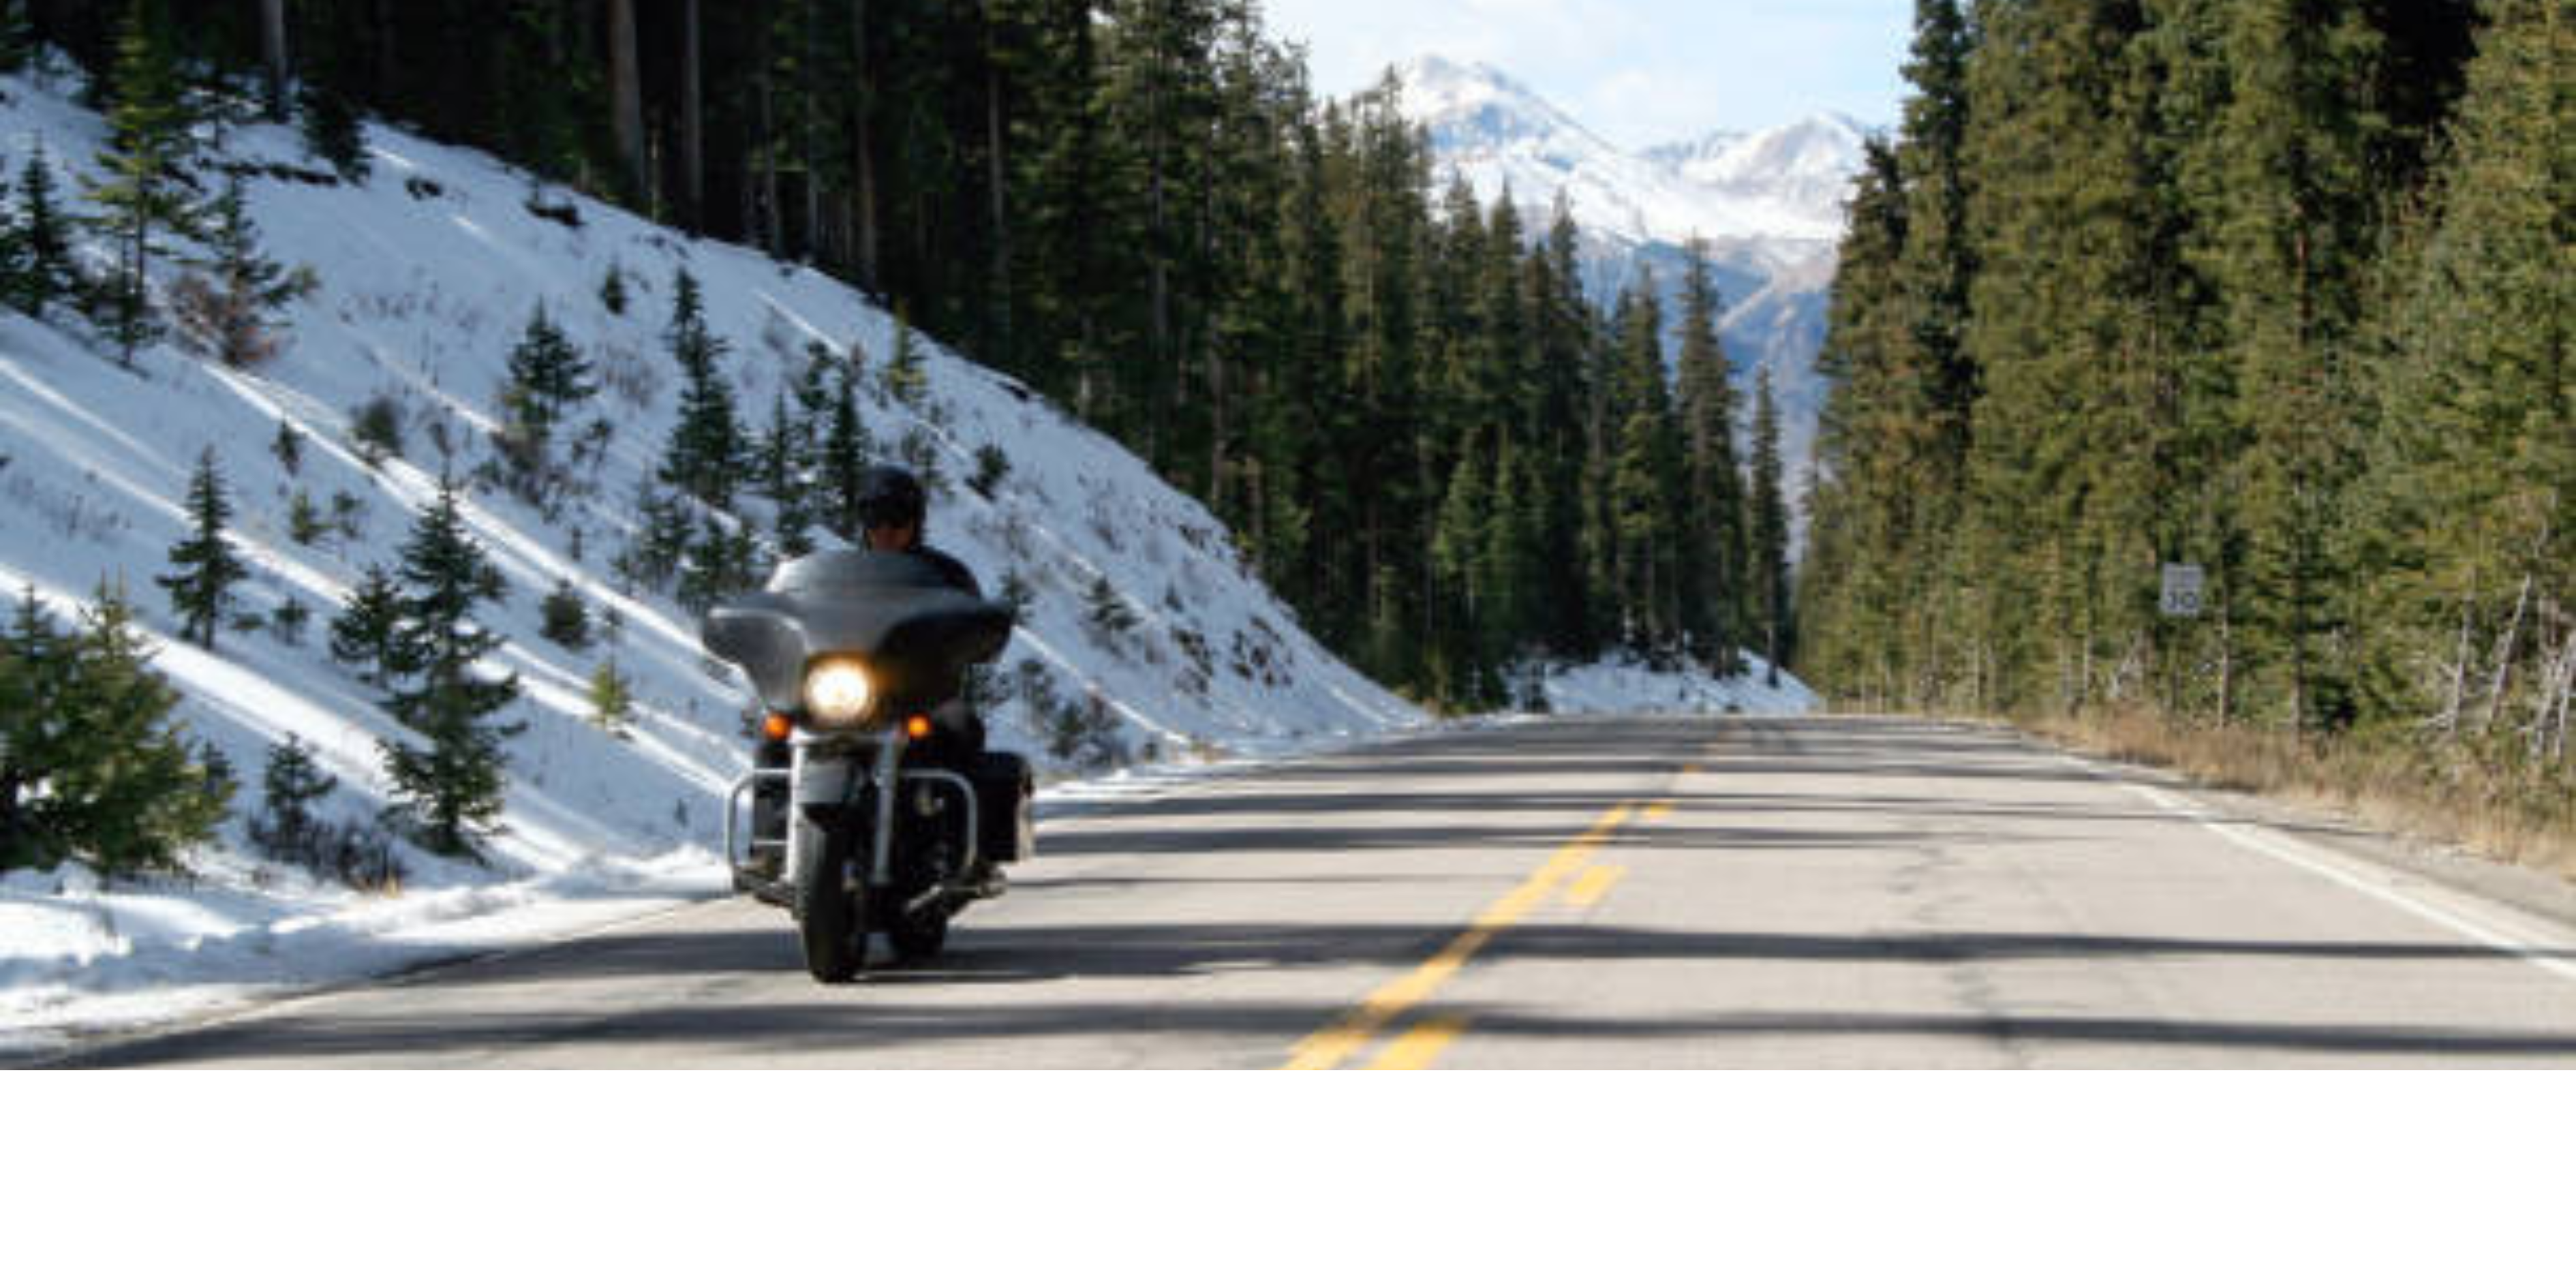
The Ultimate Guide to Staying Warm on Your Motorcycle in Winter
1. Introduction
Winter motorcycle riding can be a thrilling and exhilarating experience, but it also comes with its challenges. The plummeting temperatures and biting winds can make it extremely difficult to stay warm and comfortable or even see on your motorcycle. That’s why it’s essential to have the right gear and equipment to take on the cold weather conditions. In this ultimate guide, we will explore the winter motorcycle gear essentials, tips for staying warm on your motorcycle, and everything you need to know to make your cold weather motorcycle riding a cozy and enjoyable experience. So gear up and get ready to stay warm on your motorcycle this winter!
2. Understanding the importance of staying warm while riding in winter
Understanding the importance of staying warm while riding in winter is crucial for your safety and comfort. When your body is exposed to freezing temperatures, it can lead to frostbite and hypothermia, which can be extremely dangerous. Additionally, when your body is cold, your muscles become tense, reducing your reaction time and impairing your ability to control your motorcycle.
By staying warm, you not only protect yourself from potential health risks but also ensure that you can ride safely and confidently. Proper insulation and layering are key to retaining heat and regulating your body temperature. Invest in thermal base layers, heated gear, and windproof outerwear to keep the cold at bay. Don’t forget to cover your extremities with thermal gloves, socks, and boots to maintain circulation and prevent frostbite.
In the next section, we will delve into the essential winter riding gear you need to stay warm and safe on your motorcycle. Stay tuned for expert recommendations and tips to make your winter riding adventures enjoyable and comfortable.
3. Dressing appropriately for winter riding
When it comes to dressing appropriately for winter riding, there are a few key considerations to keep in mind. First and foremost, layering is essential for trapping heat and regulating your body temperature. Start with a thermal base layer to wick away moisture and provide insulation. Follow this with a mid-layer that provides additional warmth, such as a fleece or insulated jacket.
For the outer layer, opt for windproof and waterproof gear to protect yourself from the elements. Look for motorcycle-specific jackets and pants that are designed to keep you warm while still providing mobility and protection. Don’t forget to invest in thermal gloves, socks, and boots to keep your extremities warm and maintain blood circulation. Additionally, consider wearing a balaclava or neck gaiter to protect your face and neck from the biting cold.
In the following section, we will discuss the importance of proper headgear and eye protection for winter riding. Stay tuned for valuable insights and recommendations to keep you safe and comfortable on your motorcycle in winter
4. Investing in heated gear for added warmth
While layering and choosing the right outerwear are crucial for staying warm on your motorcycle in winter, sometimes it just isn’t enough. That’s where heated gear comes in. Investing in heated gear can provide an extra level of comfort and warmth during those frigid rides.
Heated jackets and vests are designed with built-in heating elements that distribute warmth evenly across your body. These garments often come with adjustable temperature settings, allowing you to control the level of heat based on your preference. Some heated gear even includes heated gloves and socks to ensure that your hands and feet stay toasty as well.
One of the significant advantages of heated gear is its versatility. Whether you’re commuting to work or embarking on a long-distance journey, heated gear can make all the difference in keeping you comfortable and focused on the road. With advancements in technology, these garments are now more lightweight, durable, and battery-efficient than ever before.
In the next section, we will explore the importance of properly maintaining your motorcycle in the winter months. Stay tuned for expert tips on winterizing your bike to ensure optimal performance and longevity.
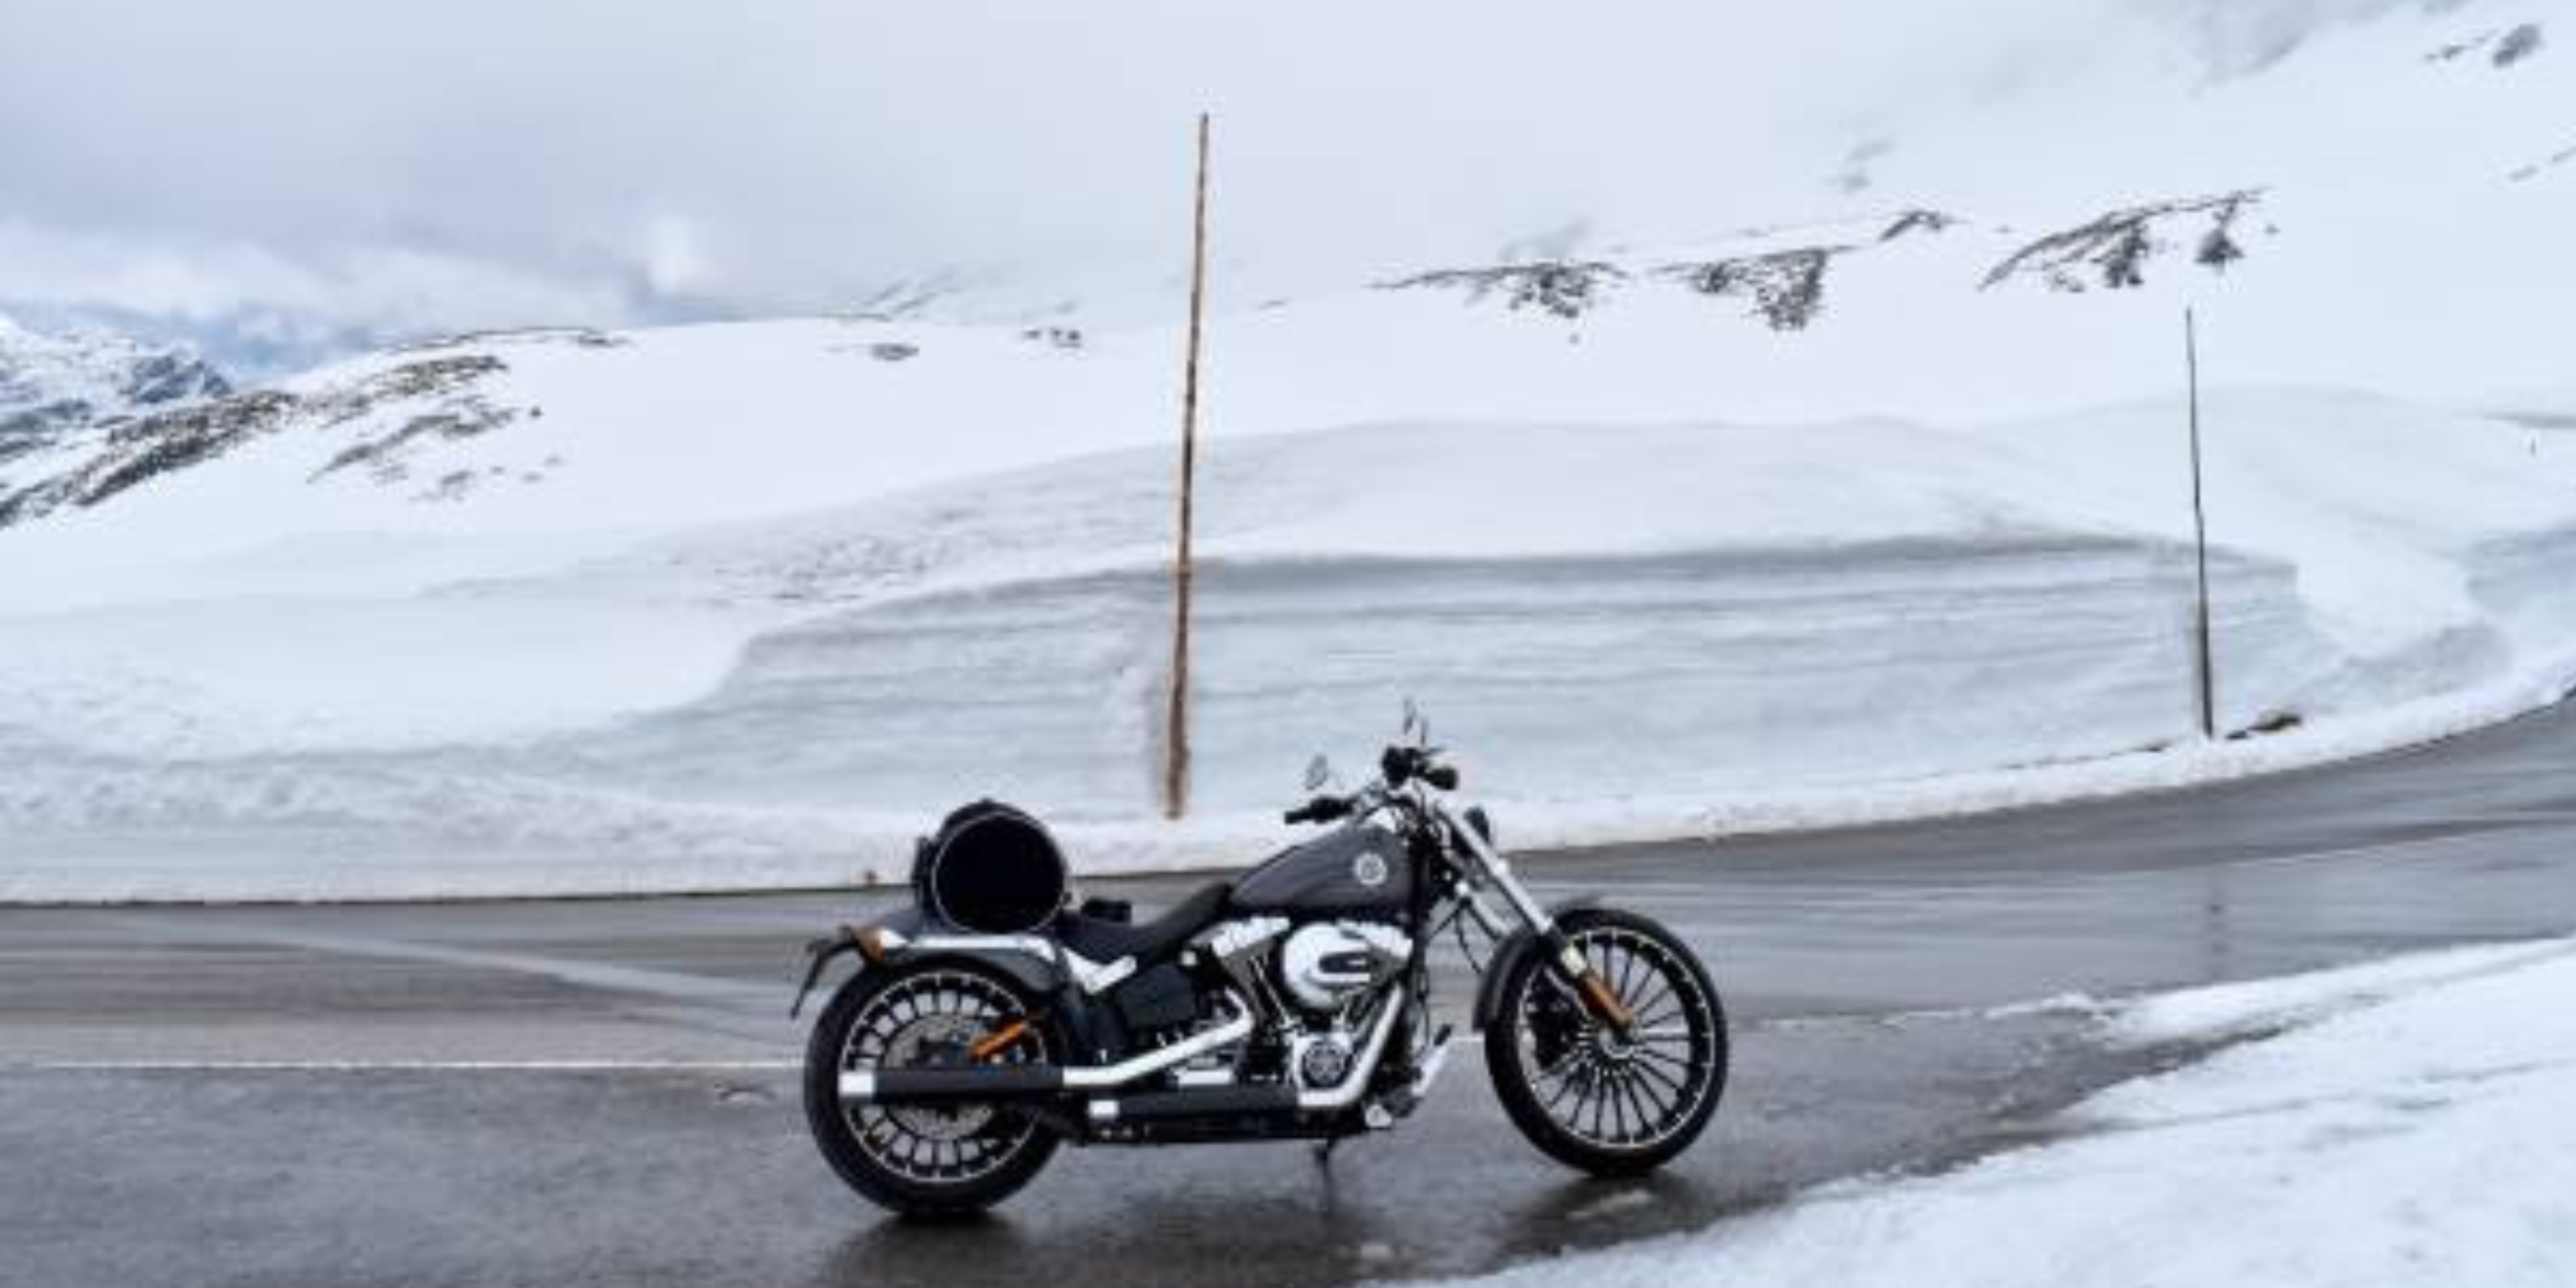
5. Tips and tricks for staying warm on your motorcycle
Now that we’ve covered the benefits of heated gear, let’s dive into some additional tips and tricks to help you stay warm on your motorcycle during the winter months. While heated gear can provide significant comfort, it’s always smart to have a few backup strategies to keep you cozy when facing extreme temperatures.
First and foremost, layering is key. Start with a moisture-wicking base layer that will keep sweat away from your body and help regulate your temperature. Next, add an insulating mid-layer, such as a fleece or thermal sweater. Finally, top it off with a windproof and waterproof outer layer to protect against the elements.
Another helpful tip is to invest in a windshield or fairing for your motorcycle. These accessories can provide some protection from the wind, reducing the chill factor as you ride. Additionally, consider wearing a balaclava or neck gaiter to keep your face and neck warm, and don’t forget to wear a helmet that fits properly and covers your head fully.
Lastly, pay attention to your extremities. Along with heated gloves and socks, consider using hand warmers and foot warmers or utilizing heated grips to keep your hands and feet toasty. And don’t forget to wear warm, insulated boots and thick, thermal socks for added insulation.
By following these tips and combining them with heated gear, you’ll be well-prepared to tackle the winter months on your motorcycle. Stay tuned for more expert advice on winterizing your bike in the next section.
6. Preparing your motorcycle for winter riding
Now that we’ve covered how to ensure your own comfort and warmth during winter riding, it’s important to also focus on preparing your motorcycle for the colder months. Taking a few extra steps to winterize your bike can help prevent damage and ensure its performance throughout the season.
Firstly, consider using winter-grade oil. The cold temperatures can thicken standard oil, making it less effective in lubricating your engine. Opt for an oil specifically designed for colder climates to ensure smooth operation.
Next, check your tire pressure regularly. Cold weather can cause tire pressure to drop, affecting your bike’s handling and stability. Maintain proper tire pressure to enhance grip on slippery surfaces and ensure optimal performance.
Another key aspect of winterizing your motorcycle is protecting the battery. Cold temperatures can drain the battery faster, so it’s essential to keep it fully charged. Consider using a battery tender or trickle charger to maintain its charge during periods of inactivity.
Lastly, it’s crucial to inspect your brakes and ensure they are in good condition. Wet and icy road conditions can significantly impact braking distance and control. Replace worn brake pads and ensure proper brake fluid levels for safe riding.
Taking these steps to prepare your motorcycle for winter will not only keep you safe, but also extend the lifespan of your bike. Stay tuned for the next section, where we’ll discuss essential safety precautions for winter riding on your motorcycle.
7. Safety considerations for winter riding
While riding your motorcycle in the winter can be exhilarating, it’s important to take extra precautions to ensure your safety on the roads. Here are some essential safety considerations to keep in mind:
- Wear appropriate gear: Layer up with thermal underclothes and invest in a good-quality winter motorcycle jacket and pants that are both waterproof and windproof. Don’t forget to wear thermal gloves, boots, and a balaclava to keep your extremities warm.
- Be visible: Winter weather often means reduced visibility, so make sure you have reflective gear or high-visibility clothing. Consider adding reflective tape to your motorcycle or installing additional lights to increase your visibility to other road users.
- Adjust your riding style: Winter riding requires a more cautious approach. Reduce your speed and increase your following distance to allow for longer braking distances on slippery surfaces. Avoid sudden movements, and be prepared for unexpected road conditions.
- Check road conditions: Before heading out, check the weather forecast and road conditions in your area. Be cautious of black ice, which is difficult to spot and highly slippery. Consider using online tools and apps to get real-time updates on road conditions.
By following these safety considerations, you can have a safe and enjoyable ride on your motorcycle during the winter season. Stay tuned for the next section, where we’ll explore some essential maintenance tips to keep your motorcycle running smoothly throughout the winter months.
8. Wrapping up – enjoy the winter riding season with these tips
Riding your motorcycle in winter can be an enjoyable and exhilarating experience, but it’s crucial to prioritize your safety. In the previous section, we discussed essential safety considerations, such as wearing appropriate gear, being visible, adjusting your riding style, and checking road conditions. By following these tips, you can ensure a safe winter ride.
Now, let’s wrap up with a few additional suggestions to help you fully enjoy the winter riding season. Firstly, stay updated with local weather forecasts and road conditions. Be flexible with your plans and avoid riding in severe weather conditions. If the roads are too icy or covered in snow, it’s better to wait for safer conditions.
Secondly, regularly maintain your motorcycle during the winter months to prevent any mechanical issues. Ensure that your tires, brakes, and lights are in good working condition. Give your motorcycle a thorough clean to remove any salt or debris that may cause corrosion.
Lastly, embrace the beauty of winter riding by adjusting your mindset. Dress warmly and consider adding heated grips or seat covers to enhance your comfort. Take breaks to warm up and enjoy the scenic winter landscapes. Don’t forget to always have a backup plan in case of emergencies, such as carrying a fully charged phone and emergency supplies.
With these tips in mind, you’re ready to embrace the winter riding season! Stay safe, stay warm, and enjoy the thrill of the open road.

Complete Guide of all Types of Helmets

From Vikings to Astronauts: A Beginner’s Guide to Every Helmet Ever Made
Forget hats, step into the mind-boggling world of helmets! It’s true, these aren’t just your basic, everyday domestics. From Astronaut helmets to viking helmets, the helmet kingdom spans around a hundred species, each with a unique story to tell. Feeling overwhelmed? Don’t sweat it, rookie adventurer! This guide is your trusty map, ready to navigate you through the visor-clad landscape. Whether you’re a motorcycle maverick, a construction crusader, or simply curious about the coolest headwear on the planet, we’ve got you covered. Buckle up (metaphorically, helmets first!) and prepare to dive deep into the fascinating world of helmets, where safety, style, and sometimes even superpowers collide!
Embark on a thrilling journey through the fascinating universe of helmets – a realm where safety meets style, and the extraordinary becomes commonplace. In the vast landscape of motorcycle enthusiasts, California, Florida, and Texas stand as the undisputed leaders, registering a symphony of roaring engines echoing across the nation. But this isn’t your average helmet narrative; it’s a tale that spans beyond the traditional. From the iconic astronaut helmets that have ventured into the cosmos to the avant-garde designs of brands like Ruroc and the battle-ready Viking headgear, our guide is set to unveil the mysteries of over 100 helmet species.
Prepare to broaden your horizons beyond the familiar realms of motorcycle and construction helmets. If you believed the options were limited, brace yourself as we unveil an exhaustive list, a panorama of helmet varieties that extend far beyond the ordinary. This exploration promises to redefine your understanding of head protection, offering a comprehensive look at the diverse universe of helmets. So, fasten your seatbelt – or helmet strap – for a journey that transcends expectations and introduces you to the vast spectrum of headgear waiting to be discovered.
Here is the amazing list of what we found
ACH Helmet (Advanced Combat Helmet):
The ACH Helmet, or Advanced Combat Helmet, is a specialized ballistic headgear designed for military use. Its primary purpose is to provide advanced protection to the wearer’s head during combat situations. ACH Helmets are constructed with advanced ballistic materials, often incorporating layers of Kevlar or similar aramid fibers. These materials are chosen for their high tensile strength and ability to absorb and disperse impact energy, reducing the risk of head injuries from ballistic threats.
Adventure Helmets are a versatile choice for riders engaging in both on-road and off-road motorcycling adventures. These helmets typically feature a distinctive design with extended chin bars and integrated sun visors. Constructed with a focus on durability and protection, Adventure Helmets often use materials such as fiberglass or polycarbonate. The design provides riders with comfort during long rides and protection against impacts and environmental elements, making them suitable for dual-sport and adventure touring.
Astronaut Helmet:
Astronaut Helmets are a critical component of a space suit, designed explicitly for astronauts during space missions. These helmets serve the vital function of creating a sealed environment, protecting astronauts from the vacuum of space and potential exposure to harsh solar radiation. Constructed with materials like polycarbonate, astronaut helmets are engineered to withstand the extreme conditions of spacewalks and extravehicular activities (EVAs).
ATV Helmets are tailored for riders of all-terrain vehicles, providing essential protection during off-road excursions. Featuring a sturdy design with a solid chin guard and visor, ATV Helmets aim to safeguard riders from impacts, debris, and branches encountered in off-road environments. Constructed with a robust outer shell, these helmets often utilize composite materials for durability and inner padding for effective impact absorption.
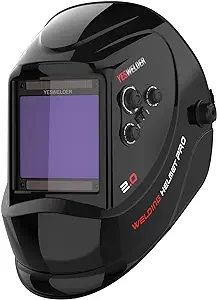 Auto Darkening Welding Helmet:
Auto Darkening Welding Helmets are specialized headgear designed for welders. These helmets incorporate an auto-darkening lens, a crucial feature that automatically adjusts its shading in response to the brightness of the welding arc. The primary purpose of these helmets is to protect welders’ eyes and face from the intense light, sparks, and debris generated during welding processes. Constructed with heat-resistant polymers, Auto Darkening Welding Helmets ensure both visibility and safety for welders during their work.
Baby Helmets, also known as infant helmets or baby headgear, are specialized helmets designed for infants and young children. These helmets are typically recommended in cases where a baby has plagiocephaly or flat head syndrome. The helmets are crafted with lightweight yet supportive materials to gently reshape the baby’s skull as they grow. The purpose is to provide a non-invasive solution to correct head shape abnormalities during the crucial developmental stages.
Baseball Helmets are essential protective gear for baseball players, specifically batters and base runners. These helmets are designed to shield the head from impact injuries caused by pitched or batted balls. Constructed with a hard outer shell and inner padding, baseball helmets aim to absorb and dissipate the force of impact. They often feature a faceguard or extended ear flaps to provide additional protection for the face and ears.
The Best Motorcycle Helmet is a broad category encompassing various helmet types tailored for motorcycle riders. These helmets prioritize safety, comfort, and style. Depending on the type, they may include full-face helmets, open-face helmets, modular helmets, or half helmets. The construction materials can vary, with options like fiberglass, carbon fiber, or polycarbonate. The best motorcycle helmets offer a balance between impact protection, aerodynamics, and ventilation, catering to the diverse preferences of riders.
The Best Welding Helmet is a critical piece of safety equipment for welders, providing protection against arc flashes, sparks, and UV radiation. These helmets typically feature auto-darkening lenses, enabling seamless transitions between light and dark states to protect the welder’s eyes. Constructed with durable materials like thermoplastic or composite polymers, the best welding helmets prioritize optical clarity, adjustable settings, and comfort for prolonged use.
Bicycle Helmets (Road, Mountain, BMX):
Bicycle Helmets come in various types, including those designed for road cycling, mountain biking, and BMX riding. The primary purpose of these helmets is to protect cyclists from head injuries during accidents or falls. Road cycling helmets are aerodynamic and lightweight, while mountain biking helmets often provide extended coverage. BMX helmets are robust, featuring a hard outer shell and ample padding to withstand the rigors of BMX stunts and tricks.
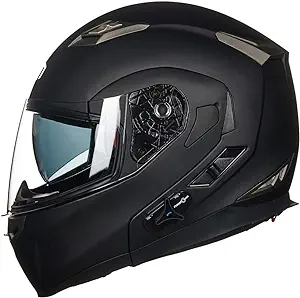
Say hello to hands-free adventure! The Bluetooth motorcycle helmet seamlessly integrates your ride with the digital world. Blast your favorite tunes, chat with fellow riders on the intercom, and navigate winding roads with turn-by-turn directions – all without ever lifting a finger from the handlebars. But don’t be fooled by its techy bells and whistles, it’s still a helmet at its core, meticulously crafted for safety and protection. So, crank up the volume, connect with your crew, and experience the open road like never before – safely and seamlessly connected.
The Boba Fett Helmet is an iconic and recognizable helmet design from the Star Wars franchise. Worn by the bounty hunter Boba Fett, this Mandalorian-inspired helmet features a T-shaped visor, distinctive markings, and a sleek design. While originally fictional, the Boba Fett Helmet has gained popularity as a collector’s item and in the cosplay community.
Bontrager Helmet (Cycling Brand):
Bontrager Helmets are a product line from the cycling brand Bontrager. Known for their commitment to cyclist safety and performance, Bontrager Helmets come in various styles, including road helmets, mountain bike helmets, and commuter helmets. Constructed with advanced materials, Bontrager Helmets focus on providing optimal protection, comfort, and aerodynamics for cyclists of all levels.
Bucket Helmets in football refer to the traditional football helmets with a classic bucket-like shape. Historically used in football, these helmets have evolved over time to incorporate advanced materials for impact absorption. While modern football helmets have a more streamlined design, the term “bucket helmet” may be used nostalgically or informally to describe traditional football headgear.
Construction Helmets, also known as hard hats, are designed for workers in construction and industrial settings. These helmets protect against falling objects, electrical hazards, and impacts. Constructed with a rigid outer shell made of materials like high-density polyethylene (HDPE) or fiberglass, construction helmets often feature a suspension system inside for shock absorption. They are a vital safety accessory for construction professionals to prevent head injuries on the job.
Crusader Helmets are historical helmets inspired by medieval armor. These helmets were worn by knights during the Crusades and feature a distinctive design with a full-face visor and often a cross or heraldic symbols. While the historical Crusader Helmets were made of metal, modern interpretations may use materials like fiberglass or other lightweight composites for reenactments or as decorative pieces.

The Darth Vader Helmet is an iconic helmet design worn by the character Darth Vader in the Star Wars franchise. Recognizable by its sinister black appearance, polished finish, and a distinctively shaped face mask, the Darth Vader Helmet is a symbol of the dark side of the Force. Often used in Star Wars-related merchandise and cosplay, this helmet has become one of the most iconic in cinematic history.
The Daft Punk Helmet is a futuristic and stylized helmet worn by the electronic music duo Daft Punk. These helmets are an integral part of their on-stage persona, concealing their identities and adding an enigmatic visual element to their performances. Crafted with attention to detail, the Daft Punk Helmets feature LED lights, intricate designs, and a sleek, robotic aesthetic.

Dirt Bike Helmets are specialized helmets designed for off-road motorcycling and dirt biking. These helmets prioritize lightweight construction, ventilation, and impact protection. They typically have a visor to shield the eyes from dirt and debris. Dirt Bike Helmets are essential for riders who navigate challenging terrain, providing safety and comfort during off-road adventures.
Diving Helmets, also known as dive helmets or underwater helmets, are part of traditional diving equipment used in underwater exploration. These helmets create a sealed environment for the diver, allowing them to breathe while submerged. Constructed with materials like brass or copper, historical diving helmets were heavy and had a porthole for visibility. Modern versions use advanced materials for improved safety and comfort.
Division 2 Helmet:
Division 2 Helmets may refer to helmets featured in the video game “Tom Clancy’s The Division 2.” In the game, characters wear various tactical helmets for protection in a post-apocalyptic setting. These helmets often have a military-inspired design, incorporating elements like goggles, communication devices, and camouflage patterns. While fictional, they add a realistic touch to the game’s immersive world.
Driving Helmets used in race car driving are specialized headgear designed to protect drivers during high-speed racing. These helmets meet stringent safety standards and often feature fire-resistant materials. They come equipped with a face shield or visor to enhance visibility and protect against debris. Driving Helmets are crucial for the safety of race car drivers, providing impact protection in the event of accidents.
Dual-Sport Helmets are versatile helmets designed for both on-road and off-road motorcycling. These helmets combine features of street helmets and dirt bike helmets, offering a balance of comfort, aerodynamics, and protection. Dual-Sport Helmets are popular among adventure riders who enjoy a mix of highway cruising and off-road exploration. They typically have a visor and offer good ventilation for varied riding conditions.

Eagles Helmet may refer to the football helmet worn by the Philadelphia Eagles, a professional football team. These helmets, featuring the iconic eagle logo, are standard equipment for players in the National Football League (NFL). Football helmets are crucial in providing protection against head injuries during games, and team-specific designs contribute to the identity and branding of each franchise.
The F7 Football Helmet is a modern football helmet known for its advanced safety features. Manufactured by Schutt Sports, the F7 helmet incorporates innovative technologies such as the Tektonic Plate system, designed to enhance impact absorption. Football helmets like the F7 play a crucial role in protecting players from head injuries on the field, contributing to the safety of the game.
The Firefighter Helmet is a critical piece of personal protective equipment used by firefighters during firefighting operations. These helmets are designed to provide head protection against falling debris, heat, and other hazards encountered in firefighting scenarios. Typically made of durable and heat-resistant materials, firefighter helmets may also include a face shield and communication systems for effective coordination during emergencies.
The Football Helmet is an essential piece of equipment worn by football players for head protection during games. These helmets are designed to absorb and disperse impact forces, reducing the risk of head injuries. They feature a hard outer shell and an inner padding system. Football helmets are customized with team logos and colors, contributing to the overall identity of each football team.
The Full Face Helmet is a type of motorcycle helmet that provides full coverage, protecting the entire face, including the chin and jaw. It features a sturdy outer shell, impact-absorbing liner, and a face shield to shield the rider from wind, debris, and potential impacts. Full Face Helmets are popular among motorcyclists for their comprehensive protection and aerodynamic design.
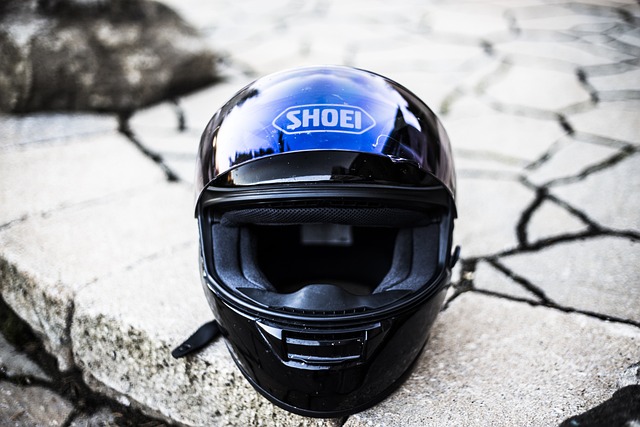
Similar to the full face helmet, the Full Face Motorcycle Helmet is designed specifically for motorcycle riders. It offers complete coverage, extending from the head to the chin and face. These helmets prioritize safety by providing impact protection and minimizing exposure to external elements. Full Face Motorcycle Helmets are widely used in various riding disciplines, including street, sport, and touring.
George Kittle Helmet (San Francisco 49ers player):
The George Kittle Helmet refers to the football helmet worn by George Kittle, a prominent player for the San Francisco 49ers in the National Football League (NFL). Football helmets worn by professional players adhere to safety standards and often feature team-specific designs and logos. George Kittle’s helmet is a symbol of his association with the team and his contributions to the sport.
Giro Helmets are a popular brand of helmets known for their presence in various outdoor activities, including cycling, skiing, and snowboarding. Giro produces helmets with a focus on safety, comfort, and style. Whether it’s a cycling helmet for road biking or a snow sports helmet for skiing, Giro Helmets are designed to meet the specific needs of athletes and outdoor enthusiasts.
The Gladiator Helmet is a historical helmet associated with ancient Roman gladiators. Characterized by its distinctive design, including a face mask with a grille and a crest on top, the gladiator helmet provided some protection to the head and face during combat in the Roman arena. It has become an iconic symbol of Roman gladiatorial contests and is often depicted in films, art, and cultural representations.
The GoPro Helmet Mount is an accessory designed for attaching GoPro cameras to various types of helmets. It allows users to capture first-person perspective footage during activities such as cycling, skiing, motorcycling, and more. The mount is typically adjustable, offering flexibility in camera positioning to capture immersive and dynamic video footage.
Green Ranger Helmet:
The Green Ranger Helmet is a fictional helmet associated with the Power Rangers series, particularly the Mighty Morphin Power Rangers. Worn by the Green Ranger, this helmet is a distinctive part of the superhero costume. Each Power Ranger helmet corresponds to a specific color and serves as a symbol of the character’s identity and role within the team.
The Half-Shell Helmet, also known as an open-face helmet, provides head protection while leaving the face exposed. It features a hard outer shell and padding for impact absorption, covering the top and sides of the head. Half-shell helmets are commonly used in activities like cycling and skateboarding, offering a balance between protection and ventilation.
A Helmet Band is a strap or band designed to secure a helmet in place during various activities. It helps prevent the helmet from shifting or falling off, ensuring a secure fit on the wearer’s head. Helmet bands are often adjustable and may feature fastening mechanisms to enhance stability, making them a practical accessory for sports and safety helmets.
The Hockey Helmet is a crucial piece of protective equipment worn by ice hockey and field hockey players. It is designed to safeguard the head from impact injuries caused by collisions, falls, or flying objects. Hockey helmets feature a hard outer shell, a cage or visor for facial protection, and interior padding for comfort and shock absorption.
The horse riding helmet, unlike its medieval ancestors, is a sleek guardian for modern equestrians. This essential safety gear shields your head with a tough outer shell, absorbing impacts from falls or bumps. Inside, a soft liner cushions your head for comfort, while adjustable straps ensure a secure fit during your adventurous trots or spirited gallops. Some helmets even offer bonus features like ventilation, visors, and removable liners, making your rides even more enjoyable and protected.

The Iron Man Helmet is a fictional superhero helmet associated with the iconic Marvel Comics character Iron Man, also known as Tony Stark. The helmet is a high-tech, powered exoskeleton that provides Tony Stark with enhanced abilities and a heads-up display. It is a symbol of Iron Man’s superhero identity and technological prowess.
The Iron Man Welding Helmet is a welding safety helmet inspired by the design of Iron Man’s helmet. Beyond its aesthetic appeal, it serves the practical purpose of protecting welders’ eyes and face from sparks, intense light, and debris during welding operations. Welding helmets like this often incorporate auto-darkening technology for optimal visibility.
Kevlar Helmet:
The Kevlar Helmet is a type of helmet reinforced with Kevlar, a synthetic aramid fiber known for its strength and durability. Kevlar helmets are commonly used by military and law enforcement personnel as ballistic helmets, providing protection against projectiles and fragments. The lightweight yet robust nature of Kevlar makes it a preferred material for enhancing head safety in challenging environments.
The Knight Helmet is a historical helmet associated with medieval knights. It typically features a full-face design with a visor, providing comprehensive protection for the head during battle. Knight helmets were crafted from various materials, including metal, and often displayed elaborate crests or decorations, symbolizing the status and identity of the wearer.
The Lacrosse Helmet is a specialized piece of protective gear worn by lacrosse players. It is designed to shield the head and face from impact during the fast-paced and physically demanding game of lacrosse. Lacrosse helmets typically feature a hard outer shell, a facemask, and interior padding to absorb and distribute the force of impacts.
The LS2 Helmet is a brand of motorcycle helmet known for its commitment to safety and style. LS2 helmets are designed with features such as aerodynamic shaping, ventilation systems, and comfort padding. They cater to motorcyclists seeking a balance between protection and a sleek, modern appearance.
Magneto Helmet (Marvel Comics):
The Magneto Helmet is a fictional helmet associated with the Marvel Comics character Magneto. Worn by the mutant Magneto, it serves to protect him from psychic attacks and influences. The helmet is a key element of Magneto’s iconic look and plays a significant role in his storyline as a mutant with magnetic abilities.
The Master Chief Helmet is a fictional helmet worn by the character Master Chief in the popular video game series Halo. It is part of the powered armor suit known as MJOLNIR, providing protection, augmented reality displays, and life support. The Master Chief Helmet has become an iconic symbol within the gaming community.

The Medieval Helmet encompasses various historical helmet designs used by knights and warriors during the medieval period. Examples include the great helm, bascinet, and sallet. These helmets varied in design but shared the common purpose of providing head protection in battle. They often featured visors, aventails, and distinctive shapes based on regional styles.
A MIPS (Multi-Directional Impact Protection System) Helmet incorporates a specialized technology designed to reduce rotational forces during an impact. It features a low-friction layer inside the helmet that allows a slight movement of the outer shell, reducing the rotational forces transmitted to the brain. MIPS helmets are commonly used in cycling, skiing, and other sports where head protection is crucial.
The Miller Welding Helmet is a protective headgear used in welding applications. It shields the welder’s face and eyes from sparks, heat, and harmful ultraviolet and infrared radiation. Miller welding helmets often feature auto-darkening lenses that automatically adjust to different light conditions, providing clear visibility during welding tasks.
The Military Helmet is a headgear designed for military personnel to provide protection in combat situations. These helmets vary in design and materials but generally aim to safeguard the wearer from ballistic threats, shrapnel, and impact. Military helmets may include features like ballistic visors, communication systems, and camouflage patterns.
The Modular Helmet, also known as a flip-up or convertible helmet, combines features of both full-face and open-face helmets. It has a hinged chin bar that can be flipped up, allowing the rider to easily switch between full-face protection and an open-face design. Modular helmets offer versatility and convenience for riders who prefer different riding conditions.
Forget the wind in your hair, think about keeping your head on your shoulders! The motorcycle helmet: a paradox of thrill-seeking and safety. Crafted from top-notch materials and packed with impact-absorbing tech, it’s your shield against rogue pebbles, kamikaze butterflies, and even the occasional bee with a grudge. It might mess up your hair, but hey, at least you’ll have hair to mess up later. So if you are a crazy thrill seeking bike rider, embrace the crazy, but do it safely. Tighten your chin strap, and hit the road with your trusty helmet – your ticket to the wildest, fun filled and safest adventure yet! Look at more on Motorcycle Helmets here.
The Open-Face Helmet, also known as a 3/4 helmet, covers the top, back, and sides of the head, leaving the face exposed. It offers less coverage than a full-face helmet but provides better ventilation and a more open feel. Open-face helmets are popular among cruiser and scooter riders for their classic style and comfort.
The Ops Core Helmet is a tactical helmet designed for military and law enforcement use. It features a lightweight and modular design, allowing the attachment of accessories like night vision devices, communication systems, and visors. Ops Core helmets provide ballistic protection while offering customization for specific mission requirements.

The Pith Helmet, also known as the safari helmet, is a lightweight helmet made of pith (cork or other plant material). Originally designed for tropical climates, it became associated with explorers and adventurers. The distinctive shape and ventilation holes make the pith helmet recognizable and iconic.
POC Helmets are known for their high-performance and safety features in the cycling and snow sports industries. POC focuses on innovative designs and materials to enhance protection and comfort. POC helmets often incorporate technologies like MIPS and offer a range of styles for various outdoor activities.
The Power Ranger Helmet is a fictional helmet worn by the characters in the Power Rangers franchise. Each Power Ranger has a unique helmet representing their respective color and power. These helmets are a crucial part of the Power Rangers’ iconic superhero suits, contributing to their distinct identities.
The Predator Helmet draws inspiration from the iconic alien creature in the “Predator” film franchise. These helmets feature a distinctive design with predator-like elements such as extended jawlines, dreadlocks, and unique patterns. While primarily used for novelty or cosplay purposes, some versions may offer basic head protection.
A Rugby Helmet is worn by rugby players to provide protection during the physical and high-impact sport of rugby. It typically features a more open design than American football helmets, focusing on safeguarding the head from impacts and abrasions. Rugby helmets prioritize player safety while allowing for better visibility and communication on the field.
The Skateboard Helmet is designed for skateboarders, providing protection against head injuries during falls or collisions. It features a hard outer shell and foam interior to absorb impact energy. Skateboard helmets often have a stylish and streamlined design, reflecting the skateboarding culture while ensuring safety on ramps, streets, and skate parks.
Ski Helmets are specialized headgear designed for skiers and snowboarders. They offer protection against head injuries resulting from falls or collisions on the slopes. Ski helmets typically include features like adjustable vents, ear protection, and compatibility with goggles, enhancing safety and comfort during winter sports activities.
Smith Helmets are a brand of protective headgear known for their performance in various outdoor activities, including skiing, snowboarding, and cycling. Smith focuses on integrating advanced technologies like MIPS and Aerocore into their helmets, providing enhanced protection and ventilation. Smith Helmets often combine style with functionality for outdoor enthusiasts.
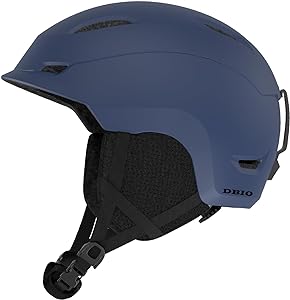
Similar to ski helmets, Snowboarding Helmets are designed specifically for snowboarders. They prioritize head protection in the snowboarding environment, featuring durable shells, impact-absorbing foam, and adjustable fit systems. Snowboarding helmets often integrate with goggles and offer insulation for cold weather conditions.
Space Helmet:
A Space Helmet is a term encompassing helmets designed for astronauts and cosmonauts during space missions. These helmets provide life support systems, including oxygen supply, communication devices, and a protective visor. Space helmets are crucial components of space suits, ensuring the safety and survival of astronauts in the vacuum of space.
The Spartan Helmet is inspired by the headgear worn by ancient Greek warriors known as Spartans. These helmets feature a distinctive crest, cheek guards, and a nose guard. While historically used in battle, modern interpretations of Spartan helmets are often used for decorative or symbolic purposes, representing strength and warrior spirit.
The Speed Flex Helmet is a type of football helmet known for its innovative design, incorporating flexibility and shock absorption. It features a flexible shell, a unique face mask attachment system, and enhanced padding to reduce impact forces. Speed Flex Helmets aim to provide optimal protection for football players while maintaining flexibility and comfort.
The Steelers Helmet refers to the helmet worn by players of the Pittsburgh Steelers, a professional American football team. The helmet features the team’s iconic logo, colors, and design. It serves as a symbol of team identity and is an essential part of the player’s uniform during games.

The Storm Trooper Helmet is an iconic piece of armor worn by the soldiers of the Galactic Empire in the “Star Wars” universe. Recognizable by its white color, sleek design, and black visor, the helmet serves as protective gear for Storm Troopers during combat. It has become a symbol of the “Star Wars” franchise and is often replicated for cosplay and collectibles.
The Tactical Helmet is designed for military and law enforcement purposes, emphasizing functionality and versatility. It often includes features like a mount for accessories, such as night vision devices or cameras, and a durable shell for protection. Tactical helmets are crucial for ensuring the safety and readiness of personnel in tactical operations.
The Thousand Helmet is a brand known for its stylish and safety-focused bicycle helmets. These helmets combine a vintage aesthetic with modern safety standards, featuring a round, minimalistic design. Thousand Helmets often include unique details like vegan leather straps and magnetic buckles, catering to cyclists who prioritize both safety and fashion.

The Viking Helmet is inspired by the headgear worn by warriors during the Viking Age. Typically featuring a horned or winged design, Viking helmets have become iconic symbols in popular culture. However, historical accuracy suggests that Viking helmets did not actually have horns. Modern interpretations are often used in costumes, events, or as decorative pieces, reflecting Norse mythology and history.
From spacesuit domes to jousting visors, we’ve explored a diverse range of helmets that have protected and defined heads throughout history.
Whether crafted from leather, metal, or the latest composite materials, these headwear marvels offer a fascinating glimpse into human ingenuity and adaptation.
But the world of helmets is vast, and new innovations emerge constantly. If you have a favorite helmet I missed, or a unique type I haven’t mentioned, please share it in the comments below! I’m always eager to learn more about these captivating cranial coverings, and I’d love to add your insights to expand this exploration.
Your Ultimate Guide to Finding the Perfect Motorcycle Match
Revving engines, wind in your face, the open road—there’s something undeniably thrilling about riding a motorcycle. Whether you’re a seasoned rider or just about to hop onto your first bike, choosing the right motorcycle is crucial for a fantastic riding experience. But fear not! This comprehensive guide is here to help you navigate the exciting world of motorcycles and find the perfect ride that suits you like a glove.

Our website contains affiliate links to products. We may receive a small commission for purchases made through these links at no extra cost to you. However, this does not impact the integrity of our reviews and comparisons. We are committed to providing our audience with unbiased and informative content. Learn more here.
Understanding Your Needs and Preferences
Before you dive headfirst into the motorcycle market, take a moment to ponder your riding purpose. Are you commuting daily, planning long road trips, or seeking off-road adventures? Knowing your intended use is the compass guiding your choice. Also, consider your experience level and comfort preferences. Feeling at ease on your bike is key to enjoying the ride.
A. Identifying Riding Purpose
Picture yourself on the open road—what comes to mind? Are you commuting through city streets, cruising along coastal highways, or tackling off-road trails? Identifying your riding purpose is the first step in finding a motorcycle that matches your adventures. Whether it’s daily commuting, long-distance touring, or seeking off-road escapades, knowing how you’ll primarily use your bike helps narrow down your options.
B. Assessing Skill Level and Experience
Are you a beginner eager to feel the wind in your face for the first time, or an experienced rider looking for a new thrill? Your skill level and experience significantly influence the kind of motorcycle that suits you best. Novices might prefer bikes with manageable power and easy handling, while seasoned riders may crave more power and specialized features. Assessing your skill level helps find a bike that matches your expertise, ensuring a safe and enjoyable ride.
C. Consider Comfort and Ergonomics
Imagine spending hours on your motorcycle—how comfortable would you want it to be? Consider ergonomics: the seat height, handlebar reach, footpeg position, and overall riding posture. Comfort plays a crucial role, especially on long rides. A bike that fits you well ensures less fatigue and more enjoyment on your journeys. Take note of how the bike feels while sitting on it and imagine yourself riding for extended periods to gauge its comfort level.
Identifying your riding purpose, assessing your skill level, and considering comfort and ergonomics are foundational steps in choosing a motorcycle tailored to your needs and preferences. By understanding these aspects, you’ll be well on your way to finding the perfect ride for your adventures!
Exploring Types and Models
Motorcycles come in various flavors, each designed for specific purposes. From the relaxed cruising style to the adrenaline-pumping sport bikes or the adventure-ready off-roaders, there’s a bike for every rider out there. Explore these types and match them to your lifestyle and needs.
A. Different Types of Motorcycles
- Cruisers: These bikes exude a relaxed, laid-back style with low seat heights, V-twin engines, and classic designs. Ideal for casual cruising and shorter trips.
- Sport Bikes:
 Known for their speed and agility, sport bikes feature powerful engines, aggressive riding positions, and nimble handling. They’re designed for high performance and are commonly used for track racing or spirited riding on paved roads.
- Touring Bikes: Built for long-haul journeys, touring bikes prioritize comfort and convenience. They boast spacious seats, luggage compartments, windshields, and enhanced riding comfort features for extended rides.
- Adventure Bikes: Versatile and rugged, adventure bikes are designed for both on-road and off-road adventures. They typically feature robust suspensions, larger fuel tanks, and ergonomic designs suitable for various terrains and longer trips.
- Off-Road and Dual-Sport Bikes: These bikes are tailor-made for off-road escapades, offering lightweight frames, knobby tires, and higher ground clearance. Dual-sport models blend off-road capabilities with street legality, allowing riders to transition between on and off-road riding.
B. Matching Models to Purpose and Lifestyle
Choosing the right type of motorcycle involves aligning the model with your intended use and lifestyle. Consider factors such as:
- Daily Use: For everyday commuting or short rides, cruisers or standard bikes might be more suitable due to their comfort and ease of handling in urban settings.
- Long-Distance Touring: Opt for touring or adventure bikes if you plan on embarking on extended journeys. These bikes offer comfort features and storage space to accommodate long rides.

- Speed and Performance: Sport bikes cater to those seeking exhilarating speed and sharp handling, ideal for spirited rides or track days.
- Off-Road Adventures: Dual-sport or dedicated off-road bikes are perfect for riders who crave adventure beyond paved roads, offering the necessary ruggedness and agility for various terrains.
- Personal Preferences: Consider your riding style, comfort requirements, and the kind of experiences you envision while on your motorcycle. Matching a bike to your lifestyle ensures a more fulfilling riding experience.
By understanding the distinct characteristics of each motorcycle type and aligning them with your purpose and lifestyle, you can make an informed choice that complements your riding aspirations and preferences.
Key Factors to Consider
Now, let’s dive into the nitty-gritty! Engine size, weight, maintenance costs, and safety features—all these factors play a crucial role. A bike’s performance, handling, and maintenance requirements directly impact your riding experience and overall satisfaction. Paying attention to these details can save you headaches down the road.
A. Engine Size and Performance
Engine size significantly influences a motorcycle’s power and performance. Consider the engine’s displacement, measured in cubic centimeters (cc) or liters. Larger engines generally offer more power but might not be suitable for beginners. Assess your needs; a smaller engine might suffice for city commuting, while a larger one might be preferable for highway cruising or off-road adventures. Balance the desire for power with your skill level and intended use.
B. Weight and Handling
The weight of a motorcycle affects its maneuverability and ease of handling. Heavier bikes might be stable on highways but could be challenging in tight spaces or at lower speeds. Lighter bikes are more agile and maneuverable, especially in urban settings or off-road terrain. Consider your comfort level in handling different weights and how it aligns with your riding environment.
C. Maintenance Costs and Reliability
Every bike comes with maintenance needs and associated costs. Research and gather information on a bike’s maintenance schedule, required service intervals, and the availability of parts. Reliable motorcycles with good track records tend to have lower maintenance costs over time. Consider user reviews and expert opinions regarding a bike’s reliability to ensure fewer unexpected repair costs.
D. Fuel Efficiency and Range
Efficiency matters, especially if you plan on covering long distances. Consider a bike’s fuel consumption and its tank capacity to gauge its range. While some bikes may have impressive power, they might compromise on fuel efficiency. Evaluate the balance between power and fuel consumption based on your riding habits and the distances you plan to cover.
E. Safety Features and Technology
Safety should always be a priority. Look for motorcycles equipped with advanced safety features such as anti-lock braking systems (ABS), traction control, and stability control. These technologies enhance your riding experience by providing added safety on different road conditions. Consider additional features like LED lighting, advanced braking systems, or rider-assist modes available in modern bikes for enhanced safety.
Assessing engine size and performance, weight and handling, maintenance costs and reliability, fuel efficiency and range, along with safety features and technology, ensures a comprehensive evaluation when choosing a motorcycle. Balancing these factors according to your preferences and requirements leads to a more satisfying and safe riding experience.
Budgeting and Cost Considerations
Riding isn’t just about the bike itself; it involves budgeting for insurance, registration, maintenance, and protective gear. Being financially prepared ensures a smoother journey ahead.
A. Initial Purchase Costs
When purchasing a motorcycle, the initial cost involves more than just the price tag of the bike itself. Consider additional expenses like dealer fees, taxes, and potential add-ons (such as extended warranties or customization options). Determine a budget that encompasses these costs while keeping in mind your financial comfort zone.
B. Insurance and Registration
Insurance is a mandatory aspect of motorcycle ownership in most places. The cost of insurance can vary widely based on factors like the type of bike, your riding experience, and where you live. Research insurance options and get quotes for different models to estimate ongoing insurance expenses. Additionally, factor in registration fees and any local taxes or licensing requirements.
C. Ongoing Maintenance and Repairs
Regular maintenance is key to keeping your motorcycle running smoothly. Account for periodic servicing costs, such as oil changes, tire replacements, brake inspections, and general upkeep. Some bikes might have higher maintenance costs due to specialized parts or complex systems, so consider these factors when budgeting for ongoing expenses.
D. Additional Gear and Accessories
Investing in proper riding gear is essential for safety and comfort. Helmets, jackets, gloves, boots, and riding pants are crucial items that ensure your protection on the road. Budget for high-quality gear that meets safety standards and suits your riding style. Additionally, consider accessories like saddlebags, GPS systems, or upgraded parts that enhance your riding experience.
Budgeting for the initial purchase costs, insurance and registration fees, ongoing maintenance and repairs, as well as necessary gear and accessories, is crucial for responsible motorcycle ownership. Ensuring that you allocate funds for both the bike and the associated expenses helps in managing your finances and enjoying a fulfilling riding experience.
Test Ride and Evaluation
It’s time to get hands-on! Test riding different models is like trying on shoes—you’ll know when one fits just right. Pay attention to comfort, handling, and how the bike responds to your touch.
A. Importance of Test Riding
Test riding a motorcycle is akin to trying on shoes before buying them. It allows you to experience firsthand how the bike feels, handles, and responds to your inputs. Test riding provides valuable insights into the ergonomics, comfort, and overall compatibility with your riding style. It’s an opportunity to ensure that the bike you’re considering aligns with your expectations and preferences.
B. Assessing Comfort and Fit
Comfort is paramount during extended rides. When test riding, pay attention to how the bike fits you. Check if the seat height is comfortable, the handlebars are within reach without straining, and the footpeg positioning feels natural. Consider whether the riding posture suits your body type and allows for a relaxed riding experience. Assessing these aspects ensures that the motorcycle doesn’t cause discomfort or fatigue over time.
C. Evaluating Handling and Performance
During the test ride, gauge the bike’s handling and performance characteristics. Test its maneuverability in different situations—turning, braking, and acceleration. Feel how the bike responds to your inputs, assess its stability on various road surfaces, and determine if it meets your expectations regarding speed and agility. Evaluating these aspects gives you a sense of confidence and control while riding.
Additionally, consider factors like suspension comfort, braking responsiveness, and how the bike handles at different speeds and cornering angles. Testing these elements ensures that the motorcycle meets your performance expectations and suits your riding style.
Overall, the importance of test riding lies in the opportunity it provides to personally experience the bike’s comfort, fit, handling, and performance. It allows you to make a well-informed decision based on your direct experience rather than relying solely on specifications or recommendations.
Making the Informed Decision
After all the exploration, evaluations, and research, it’s decision time! Consider long-term goals, weigh the pros and cons, and listen to your gut feeling—it’s your ultimate guide.
Considering Long-Term Goals
When choosing a motorcycle, consider your long-term aspirations and how they align with your choice. Are you looking for a bike that will grow with you as you gain riding experience? Do you plan to use it primarily for commuting or for adventurous long-distance trips? Thinking about your future riding goals ensures that the motorcycle you select remains suitable and fulfilling for the long haul.
Weighing Pros and Cons
List down the pros and cons of each motorcycle you’re considering. Reflect on the features you liked during test rides, the maintenance costs, reliability, resale value, and how well each bike matches your needs and preferences. Weighing these aspects against each other helps in making a more informed decision. Consider factors like performance, comfort, cost, and overall suitability to narrow down your choices.
Finalizing Your Choice
Once you’ve weighed the various aspects and considered your long-term goals, it’s time to make the final decision. Take into account all the information gathered—your riding purpose, comfort preferences, handling, performance, maintenance costs, and more. Choose the motorcycle that ticks the most boxes and aligns closest with your priorities and future aspirations.
Remember, it’s essential to trust your instincts and choose the bike that resonates with you the most. Each person’s preferences and needs are unique, so the perfect choice ultimately depends on what feels right for you. Finalizing your decision marks the exciting beginning of your motorcycle journey—one that matches your aspirations and sets the stage for countless memorable rides ahead.
In conclusion, choosing a motorcycle is an exhilarating experience that involves a blend of personal preference, practical considerations, and a touch of excitement. This friendly guide aims to equip you with the tools and insights needed to make an informed decision. Happy riding!
Gear Up & Ride Safe: The Ultimate Street Jacket Guide
Revving up the engine, feeling the wind rush past, the thrill of hitting the open road—it’s the exhilaration of motorcycle riding. But amidst this freedom, there’s a key ally every rider should have: the street motorcycle jacket. It’s not just a piece of gear; it’s your shield, your comfort, and your style statement rolled into one.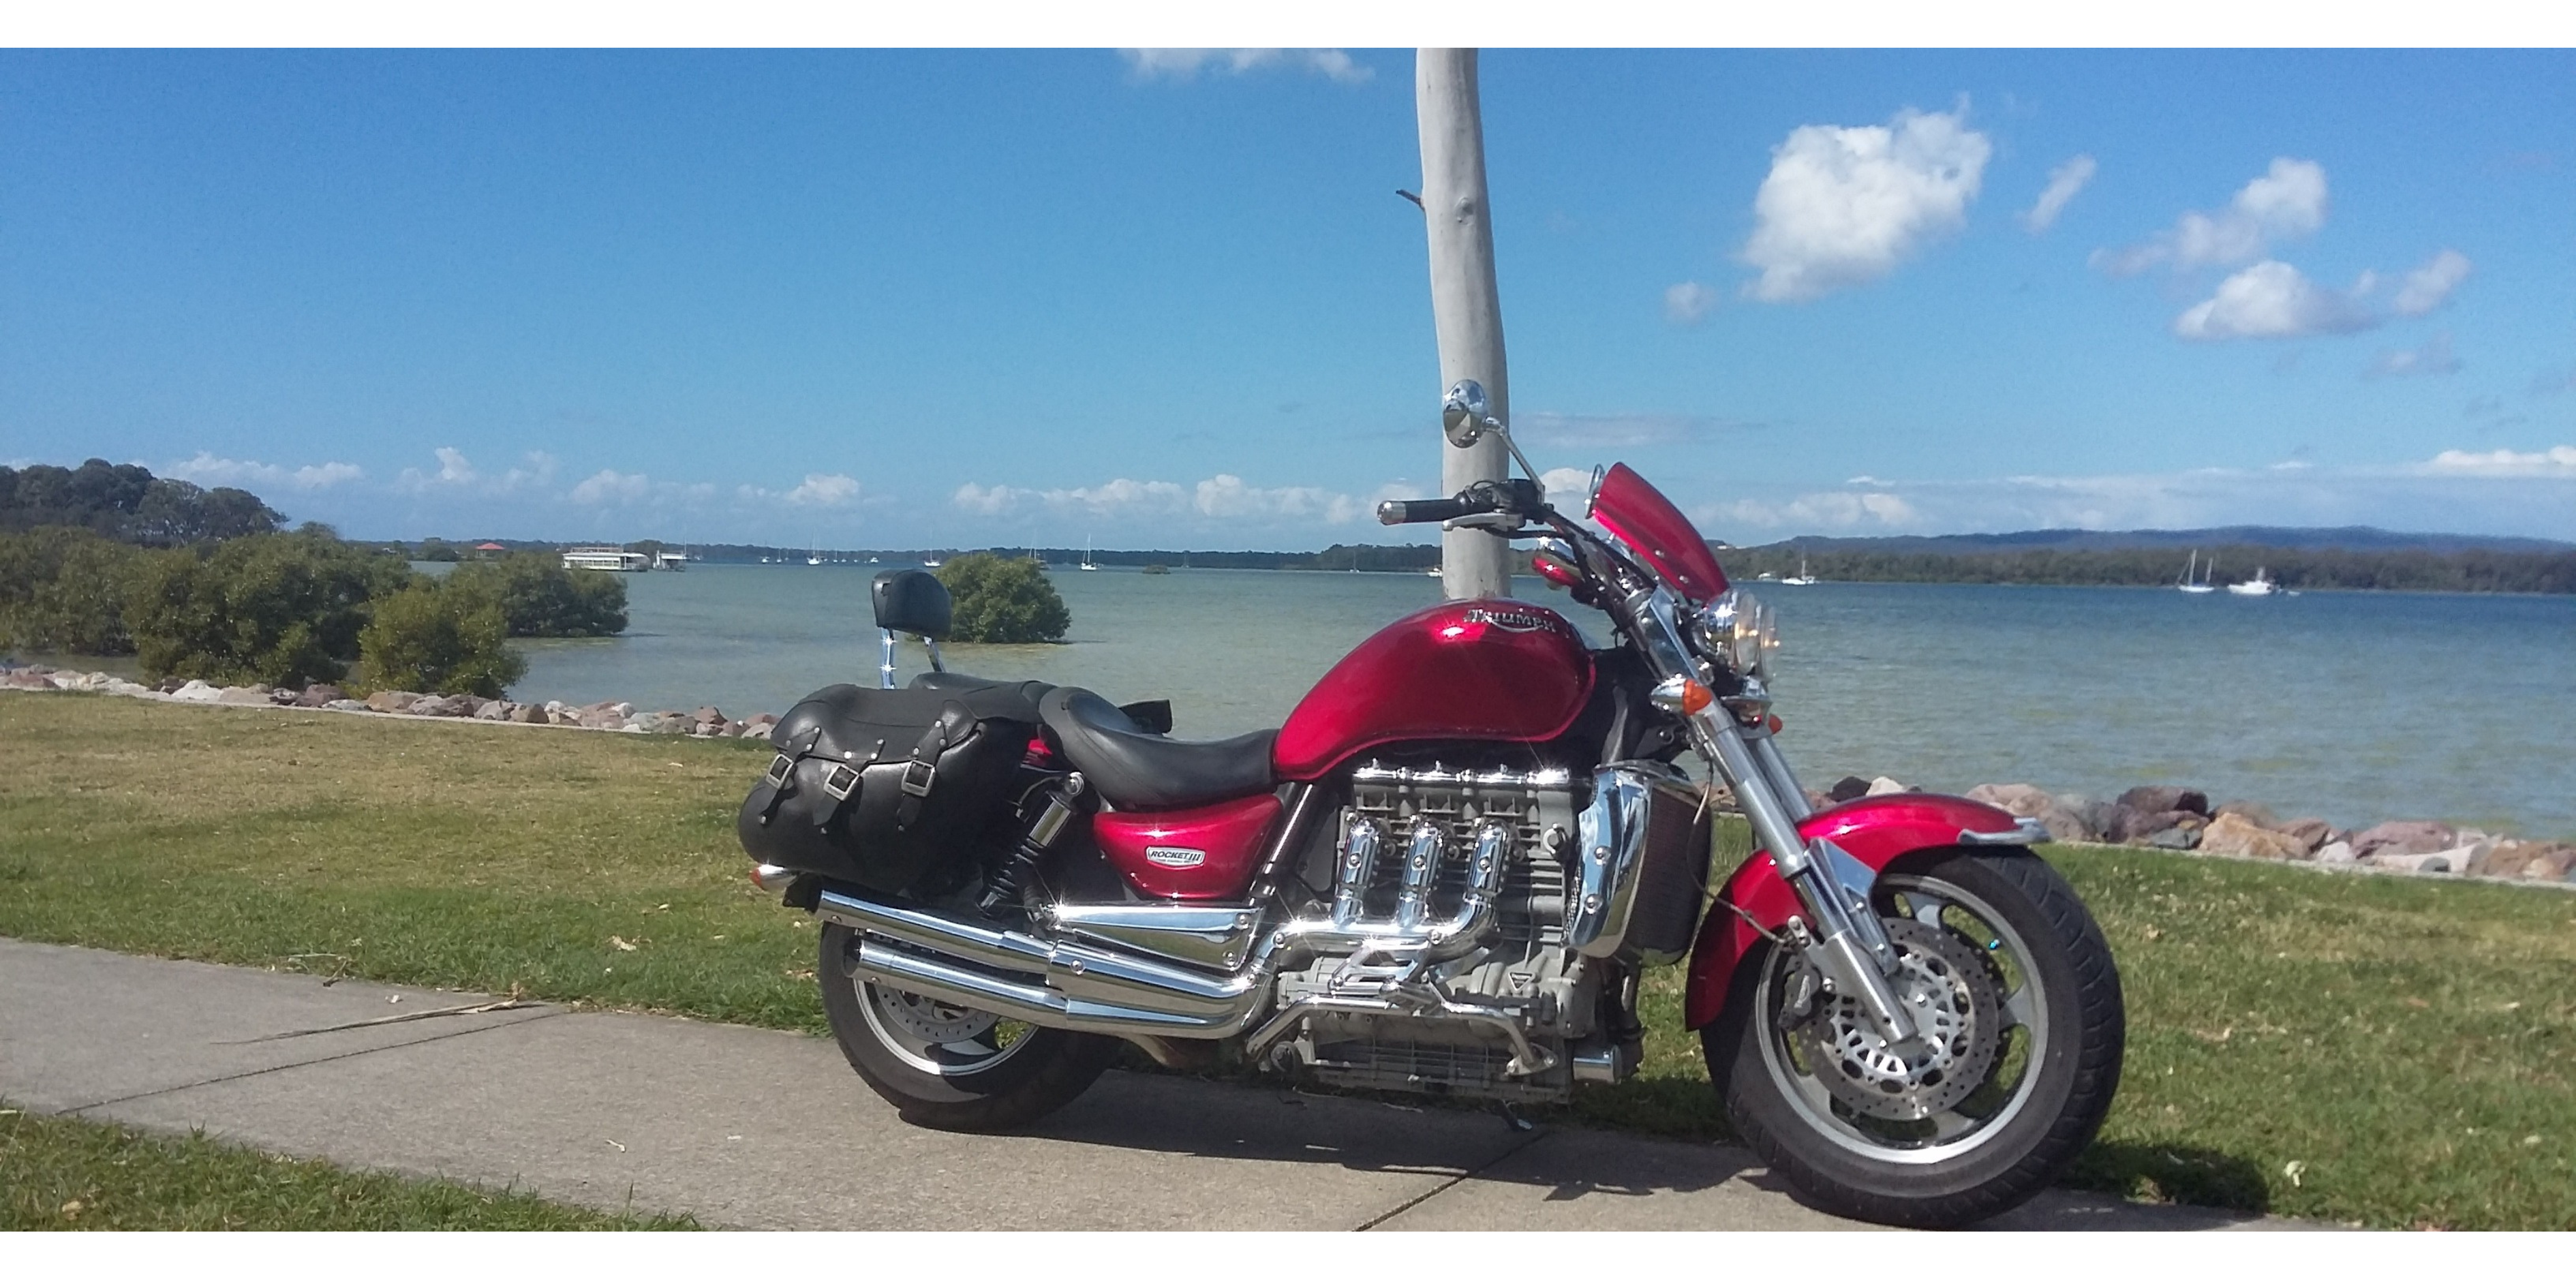
Our website contains affiliate links to products. We may receive a small commission for purchases made through these links at no extra cost to you. However, this does not impact the integrity of our reviews and comparisons. We are committed to providing our audience with unbiased and informative content. Learn more here.
Understanding Street Motorcycle Jackets
Let’s dive into what makes these jackets more than just apparel. They’re purpose-built to keep you safe while you chase that adrenaline rush. Picture this: durable materials like leather or tough textiles, fortified with armor strategically placed at key impact zones—the shoulders, elbows, and back. It’s like having a bodyguard for your upper half!
Yet, safety isn’t the only player here. These jackets are a blend of protection and comfort. Imagine riding in the scorching sun or an unexpected downpour. Ventilation systems and adaptable designs keep you cool when it’s hot and warm when it’s chilly. And hey, who says safety can’t look sleek? Stylish designs and aesthetics cater to your individual taste, complementing your riding persona.
Functionality and Purpose
You’ve heard it said: a motorcycle jacket is more than just a fashion statement. It’s your loyal companion on the asphalt journey. But what exactly makes these jackets tick?
Essential Components for Safety
1. Materials and Construction
Imagine the toughest, most resilient materials crafted into a second skin. That’s what these jackets are made of—be it the classic toughness of leather or the versatility of modern textiles. It’s not just about style; it’s about durability.
2. Protective Features: Armor and Padding
It’s like having a guardian angel on your shoulders—literally. Armor strategically placed at crucial impact points—shoulders, elbows, and back—acts as a shield against the unexpected. When safety calls, these jackets answer loud and clear.
Balancing Safety with Comfort and Style
1. Ventilation and Climate Adaptability
Picture this: the sun beating down or a sudden shift in weather. These jackets come prepared. Ventilation systems and adaptable designs ensure you stay cool when it’s blazing hot and warm when the temperature drops. Safety doesn’t mean sacrificing comfort.
2. Design and Aesthetics
Who says safety gear can’t look sleek? From classic designs to modern aesthetics, these jackets cater to your personal taste. It’s not just about staying safe; it’s about doing it in style.
Factors Influencing Jacket Selection
1. Rider’s Needs and Preferences
Are you a speed demon or a casual commuter? Different strokes for different folks. Your choice of jacket should align with your riding habits and personal preferences. It’s about finding the perfect match for your riding style.
2. Weather Considerations
Sun, rain, or snow—Mother Nature has her moods. Your choice of jacket should adapt. Some are weatherproof, others have removable liners—pick one that suits your riding environment.
As you embark on the quest for the ideal street motorcycle jacket, remember—it’s more than just finding a piece of gear. It’s about finding your trusty partner, ensuring safety without compromising comfort or style. So, gear up, stay safe, and let the road unveil its adventures!
Exploring Key Features
So, what exactly goes into these jackets? Leather or textile—each has its own charm and practicality. Think classic toughness or versatile functionality. Then there’s the armor—protective inserts that absorb impact energy—critical in keeping you safe during a slide or spill.
What about functionality? Well, these jackets are like Swiss army knives. Some come with waterproofing to tackle rain, while others have adjustable cuffs or a multitude of pockets for your essentials—phone, keys, or that small snack for a pit stop.
A. Material Selection: Leather vs. Textile
1. Pros and Cons of Each Material
Leather: Pros:
- Classic Toughness: It’s the OG of motorcycle jacket materials, providing excellent abrasion resistance.
- Durability: With proper care, leather jackets can last a long time, molding to your body for a personalized fit.
- Style Icon: It exudes timeless coolness and offers a classic look.
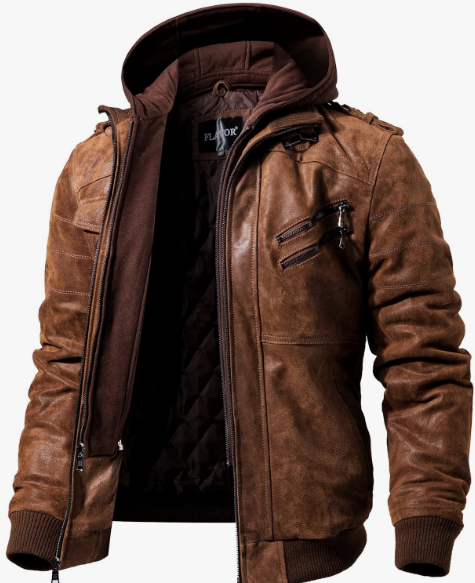
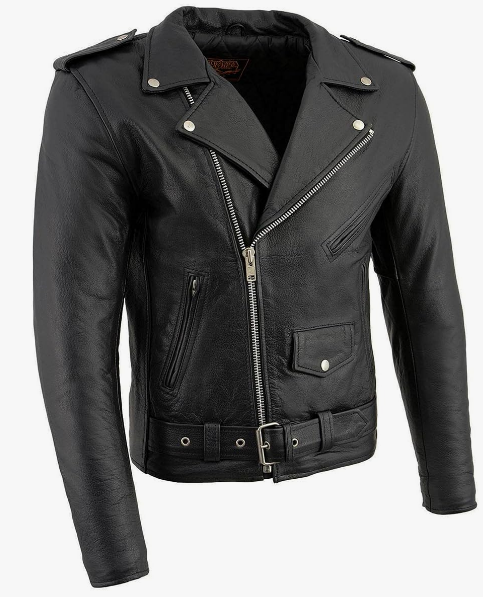
Cons:
- Weather Sensitivity: Not as adaptable to varying weather conditions, especially when wet.
- Maintenance: Requires specialized cleaning and conditioning to maintain its quality.
Textile: Pros:
- Versatility: Offers a variety of blends for different riding conditions, some being water-resistant or waterproof.
- Adaptability: Better in varying climates due to enhanced breathability and moisture-wicking properties.
- Ease of Care: Typically easier to clean and maintain than leather.
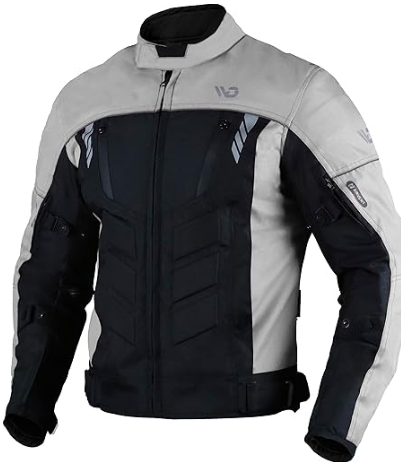
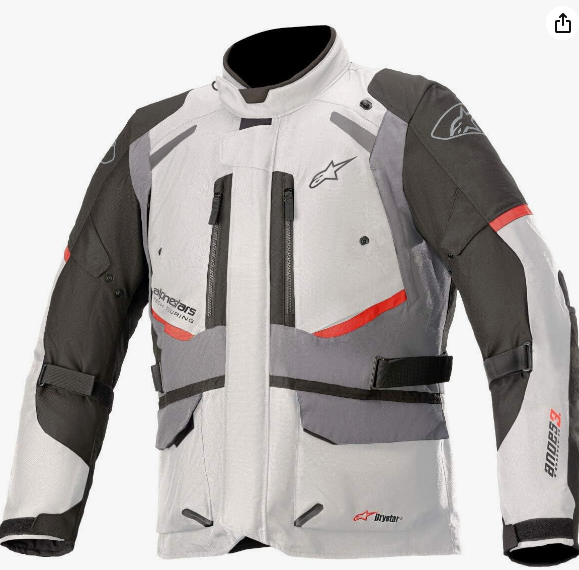
Cons:
- Abrasion Resistance: May not match the durability of leather in severe crashes.
- Aesthetic Preference: Some riders prefer the classic look of leather over textile.
B. Protective Elements: Armor and Padding
1. Impact Zones and their Significance
Imagine a superhero suit with strategic reinforcements. Motorcycle jackets feature armor in key impact zones—shoulders, elbows, and back. These zones bear the brunt during a crash, hence the need for protective padding to minimize injury.
2. Types of Armor and their Effectiveness
- Hard Armor: Typically made of materials like hard plastic or carbon fiber. Offers higher impact protection but may compromise comfort.
- Soft Armor: Made from materials like memory foam or gel. Provides flexibility and comfort while still offering decent protection.
C. Additional Functionalities
1. Weather Resistance and Adaptability
Picture this: unexpected rain showers or sweltering heat. Some jackets come equipped with weatherproofing or have removable liners, adapting to diverse weather conditions.
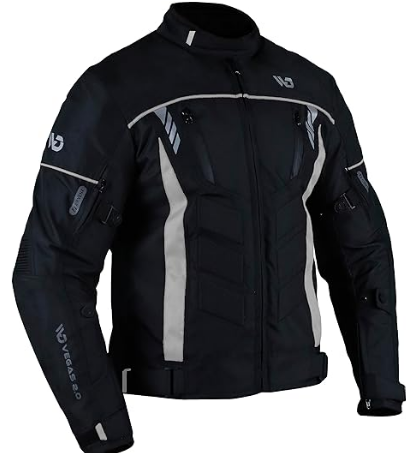
2. Comfort Features: Ventilation, Adjustability, and Pockets
Think of these jackets as Swiss army knives of comfort. Ventilation systems ensure airflow, keeping you cool on hot rides. Adjustable cuffs and waistbands offer a personalized fit, while multiple pockets provide convenient storage for your essentials.
The choice between leather and textile, understanding protective elements, and embracing additional functionalities boil down to personal preference and your riding environment. Ultimately, it’s about finding the balance between safety, comfort, and functionality as you hit the road!
Choosing the Right Jacket
Finding the one that suits you best involves more than just picking a design off the rack. Safety standards, personal preferences, and your riding environment—all play a role. After all, it’s not just about the jacket; it’s about your safety and comfort.
And the fit? It’s like finding the perfect dance partner! Ensuring it fits snugly without being restrictive is crucial. You want it to move with you, not against you, during those high-speed maneuvers.
Evaluating Safety Standards and Certifications
When choosing a street motorcycle jacket, safety standards and certifications are paramount. Look for jackets certified by organizations like CE (Conformité Européenne), which ensure the product meets specific safety standards. These certifications often indicate the level of protection the jacket provides.
Considering Personal Riding Style and Environment
Your riding style and environment play a crucial role in selecting the right jacket. Are you a weekend cruiser or an everyday commuter? The type of riding you do affects the features you need. Consider jackets with weatherproofing for rainy climates or those with enhanced ventilation for hot regions.
Importance of Proper Fit and Sizing
Ah, the fit! It’s not just about aesthetics; it’s a safety concern. A well-fitted jacket should feel snug but not constricting. Properly sized jackets allow for freedom of movement while ensuring armor stays in place during an impact. Remember, different brands might have varied sizing, so try before you buy!
Budget Considerations and Longevity
Budget plays a role, but it’s an investment in your safety and comfort. Quality jackets might have a higher upfront cost but often provide better protection and durability, potentially saving money in the long run. Consider the value—how long the jacket will last and the level of protection it offers.
When choosing your street motorcycle jacket, it’s about finding the right balance between safety certifications, personal preferences, fit, and budget. Prioritize safety without compromising on comfort and style to ensure a smooth and secure ride every time you hit the road!
Maintenance and Care
Once you’ve found your trusty sidekick, it’s essential to take care of it. Regular cleaning, proper storage, and inspecting for wear and tear are vital. Remember, it’s an investment in your safety and comfort.
Cleaning and Maintenance Tips
Maintaining your street motorcycle jacket ensures it remains a reliable shield. Here are some cleaning and maintenance tips:
- Regular Cleaning: Use a soft cloth or a brush to remove dirt and debris. For leather jackets, use a leather cleaner and conditioner as recommended. Textile jackets can usually be cleaned with mild soap and water, following manufacturer instructions.
- Avoid Harsh Chemicals: Refrain from using harsh chemicals or detergents that could damage the materials. Stick to products specifically designed for motorcycle gear.
- Drying: Hang your jacket in a well-ventilated area to air dry. Avoid direct sunlight or heat sources that might degrade the materials.
Storage Practices for Longevity
Proper storage is key to maintaining the integrity of your jacket:
- Hang or Store Flat: Hang your jacket on a sturdy hanger to maintain its shape. If hanging isn’t feasible, store it flat in a clean, dry place to avoid creasing or deformation.
- Avoid Moisture: Keep your jacket away from damp or humid areas. Moisture can lead to mold or mildew growth, damaging the fabric or leather.
- Ventilation: Allow for ventilation to prevent any lingering odors or trapped moisture. Consider using breathable storage bags if storing for an extended period.
Inspecting and Replacing Damaged Parts
Regular inspections help identify any potential issues or wear:
- Check Seams and Zippers: Inspect seams, zippers, and stitching for any signs of wear or damage. Repair or replace damaged parts promptly to maintain structural integrity.
- Inspect Armor and Padding: Ensure that armor and padding are intact and positioned correctly. Damaged or displaced armor should be replaced or adjusted as necessary for continued protection.
- Seek Professional Assistance: If you’re uncertain or notice significant damage, consider consulting a professional motorcycle gear technician or the manufacturer for guidance on repair or replacement options.
By adhering to these maintenance practices and conducting regular inspections, you’ll prolong the life of your street motorcycle jacket, ensuring it remains a reliable and protective gear for your rides.
Conclusion
Street motorcycle jackets aren’t just attire; they’re a rider’s companion on the journey. They’re safety, comfort, and style bundled together. So, whether you’re a speed enthusiast, a daily commuter, or an occasional rider, finding the right jacket is key to a fulfilling riding experience. Stay safe, stay stylish, and let the road be your canvas!
Unveiling the Importance and Benefits of Half Covers for Motorcycles
Picture this: cruising down an open road, wind in your face, the freedom of the ride—there’s nothing quite like it. But as much as we love hitting the streets on our motorcycles, keeping our prized possessions safe and sound is a priority. That’s where the unsung hero, the half cover, enters the scene.
Our website contains affiliate links to products. We may receive a small commission for purchases made through these links at no extra cost to you. However, this does not impact the integrity of our reviews and comparisons. We are committed to providing our audience with unbiased and informative content. Learn more here.
Understanding Half Covers
You might wonder, what exactly are these half covers and what sets them apart in the realm of motorcycle protection? Let’s dive in and uncover the intricacies.
What are Half Covers?
Half covers, in essence, are protective shields designed to encase the upper portion of your motorcycle while leaving the wheels exposed. Picture a tailored jacket for your bike, shielding the vital parts from the elements while allowing for a bit of breathing room.
They come in various shapes and sizes, crafted to fit snugly over different motorcycle models, providing essential protection from environmental factors without the bulkiness of a full cover.
Types and Varieties Available in the Market
In the market, you’ll find a diverse array of types and varieties of half covers designed to cater to different motorcycle models, weather conditions, and individual preferences. Here’s a breakdown of some common types and varieties available:
1. Universal Fit Half Covers:
Description: These covers are designed to fit various motorcycle models, offering a more generalized fit. They often come in adjustable sizes to accommodate different shapes and sizes of bikes.
Advantages: Universal fit covers are versatile and can be used across multiple motorcycle types, making them a convenient choice for riders with different bikes.
2. Model-Specific Half Covers:
Description: These covers are tailor-made for specific motorcycle models. They are meticulously designed to perfectly fit the contours and dimensions of a particular bike model, providing a snug and secure fit.
Advantages: Model-specific covers offer an exact fit, ensuring maximum coverage and protection for your bike. They often have features tailored to the specific model’s design.
3. Indoor Half Covers:
Description: Indoor covers focus on protecting motorcycles parked in garages or indoor spaces. They prioritize protection against dust, moisture, and minor scratches rather than extreme weather conditions.
Advantages: These covers are typically made from lighter materials and are ideal for indoor storage, preserving your bike’s condition and cleanliness.
4. Outdoor Half Covers:
Description: Outdoor covers are built to withstand harsh weather elements such as rain, UV rays, snow, and wind. They feature more durable and weather-resistant materials designed to provide comprehensive protection against outdoor elements.
Advantages: These covers are rugged and provide superior protection against various weather conditions, ensuring your bike remains shielded in outdoor environments.
5. All-Weather Half Covers: 
Description: These covers are versatile and designed to offer protection in both indoor and outdoor settings. They combine features of indoor and outdoor covers, providing a balance between durability and lightweight design.
Advantages: All-weather covers provide a comprehensive solution suitable for various situations, making them a versatile choice for riders looking for a cover adaptable to different environments.
6. Specialty Half Covers:
Description: Specialty half covers may offer unique features like reflective elements for added visibility, ventilation systems to prevent moisture buildup, built-in security options like locks or cables, or even heated covers for cold weather conditions.

Advantages: These specialized covers cater to specific needs, offering added functionality or convenience based on individual requirements or niche preferences.
When choosing a half cover, consider your usage scenarios, the prevailing weather conditions in your area, and the specific needs of your motorcycle to select the type or variety that best suits your requirements.
How Half Covers differ from Full Covers
The primary distinction lies in coverage. Unlike full covers that envelop the entire motorcycle, half covers provide partial protection, covering the upper body and leaving the wheels exposed. This design strikes a balance between safeguarding vital parts and allowing for ventilation and easier access.
Full covers are typically bulkier and cover the entirety of the bike, offering comprehensive protection but often sacrificing ease of installation and portability.
Materials and Durability: Exploring options
When it comes to half covers, materials play a crucial role in their effectiveness. They come in a range of materials, including polyester blends, nylon, and even weather-resistant fabrics like PVC or polyurethane-coated materials.
Durability varies based on the material used. While lighter materials offer ease of handling and portability, heavier-duty options provide increased resilience against harsh weather conditions and wear and tear.
Understanding these distinctions helps in choosing the right half cover tailored to your motorcycle’s needs and your usage patterns, ensuring optimal protection while aligning with your lifestyle and preferences.
The Role of Half Covers in Motorcycle Protection
When it comes to safeguarding your beloved motorcycle, half covers stand as stalwart defenders against various threats lurking in the environment. Let’s delve deeper into their pivotal role in ensuring your bike stays in pristine condition.
A. Shielding from Environmental Elements:
- Weather protection (rain, sun, snow): Picture this—a sudden downpour or scorching sun rays beating down on your bike. Half covers act as a shield against these harsh weather elements. They form a protective barrier, preventing rain from seeping into delicate components, while also shielding against the sun’s damaging UV rays. Be it a sunny day or a snowy one, these covers offer a layer of defense, keeping your bike safe from the unpredictable forces of nature.
- Dust and debris prevention: Ever returned to your bike, only to find it covered in a thin layer of dust or plagued by tiny debris? Half covers swoop in as the guardians that fend off these nuisances. By draping over the critical sections of your motorcycle, they hinder dust settlement and keep pesky debris at bay, ensuring your ride remains immaculate.
B. Preventing Wear and Tear:
- UV protection for paint and materials: Sunlight, while offering a scenic backdrop for rides, can wreak havoc on your bike’s paint and materials. Half covers act as a barrier against harmful UV rays, safeguarding the vibrant paint job and preventing premature fading or discoloration.
- Shielding against scratches and minor damages: Parking your motorcycle amidst various elements exposes it to potential scratches and minor damages. These covers provide an extra layer of defense, minimizing the chances of scratches from accidental bumps or small debris, preserving the flawless appearance of your ride.
In essence, half covers aren’t just mere layers; they’re shields that fend off environmental assaults and shield your motorcycle from wear and tear. By investing in a quality half cover, you’re investing in the longevity and pristine condition of your two-wheeled companion.
Advantages of Using Half Covers
Half covers aren’t just another accessory; they are the unsung heroes in the realm of motorcycle protection, offering a myriad of advantages that cater to both convenience and longevity.
A. Portability and Convenience:
- Ease of installation and removal: Picture this—you’re on a road trip, and a sudden downpour threatens your bike. With a half cover in tow, you don’t need to fuss over complex installation procedures. They’re designed for hassle-free setup, allowing you to shield your motorcycle in a matter of minutes. Removal is just as swift, ensuring you’re back on the road without unnecessary delays.
- Compactness for travel and storage: The beauty of half covers lies in their compact design. They fold neatly into a compact size, making them easy to carry on your rides. Whether you’re commuting daily or embarking on a long-distance adventure, their space-saving nature ensures they snugly fit in your saddlebag or storage compartment, ready to deploy whenever needed.
B. Cost-effectiveness compared to Full Covers:
Opting for a half cover doesn’t just offer protection; it’s also a savvy investment. They provide substantial coverage at a fraction of the cost compared to full covers. This cost-effectiveness doesn’t compromise on quality; rather, it provides an economical solution without sacrificing essential protective features.
C. Increased Longevity and Maintenance Benefits:
Using a half cover isn’t just about shielding your motorcycle from the elements; it’s a strategy for longevity and reduced maintenance. By preventing exposure to harsh weather conditions, UV rays, dust, and scratches, these covers contribute significantly to your bike’s durability. They act as a proactive shield, reducing the wear and tear your motorcycle would otherwise face if left exposed to the elements.
Moreover, the reduced exposure means less frequent cleaning and maintenance sessions, saving you time and effort while keeping your bike looking pristine for longer periods.
In essence, half covers redefine convenience, offering an affordable yet effective solution to protect your motorcycle while adding to its longevity and reducing the maintenance workload—all in a compact, user-friendly package.
Factors to Consider When Choosing a Half Cover
Selecting the right half cover for your motorcycle involves more than just picking a random option off the shelf. Several crucial factors come into play, ensuring your chosen cover aligns perfectly with your bike’s needs and your specific usage scenarios.
A. Motorcycle Size and Fit
One size does not fit all! Ensure the half cover you opt for is tailored to your motorcycle’s size and shape. Consider the dimensions and proportions of your bike—cruisers, sports bikes, and touring models have unique structures. Look for covers specifically designed for your bike’s make and model to ensure a snug and secure fit.
B. Weather Conditions in Your Region
Climate matters! Assess the prevailing weather in your area. Are you in a region prone to heavy rainfall, scorching sun, or freezing temperatures? Choose a half cover that can withstand the prevalent weather conditions. For rainy areas, waterproof covers are essential; for sun-drenched regions, UV-resistant materials provide optimal protection against sun damage.
C. Material and Durability
Material makes a difference! Half covers come in various materials, each with its own set of advantages. From lightweight polyester blends to heavy-duty PVC or nylon, the choice impacts durability and performance. Consider the durability of the material against wear and tear, its resilience in harsh weather, and its breathability to prevent moisture buildup.
D. Additional Features: Ventilation, Security Locks, etc.
Enhancements matter too! Some half covers offer additional features that can elevate your protection game. Ventilation systems ensure air circulation, preventing moisture buildup and condensation. Security locks add an extra layer of protection against theft or unauthorized access. Reflective elements enhance visibility during low-light conditions, adding safety to the protective function.
Evaluate these factors based on your specific needs, preferences, and intended usage of the half cover. Finding the perfect match ensures not just adequate protection but also convenience and peace of mind for both you and your cherished motorcycle.
See The Range Here
Proper Maintenance and Care for Half Covers
Just like your motorcycle needs regular upkeep, your half cover requires some TLC to ensure it continues to provide optimal protection. Here’s a guide on maintaining and caring for your half cover to keep it in top-notch condition.
A. Cleaning and Storage Tips
- Regular Cleaning Routine: Start by regularly cleaning your half cover to prevent dirt buildup. Use a mild detergent and lukewarm water to gently wash away dirt and grime. Avoid harsh chemicals that could damage the fabric or coating.
- Thorough Drying: After cleaning, ensure the cover is completely dry before storing it. Hang it in a well-ventilated area or under the sun to air-dry. Avoid storing it while damp to prevent mold or mildew growth.
- Proper Storage: Fold the cover neatly to avoid creases or wrinkles that could weaken the fabric over time. Store it in a dry, cool place away from direct sunlight to prevent fading or deterioration of the material.
B. Avoiding Common Mistakes in Maintenance
- Neglecting Cleaning: Ignoring regular cleaning can lead to the accumulation of dirt, which might cause damage to the cover’s material over time. Clean your cover after prolonged use or if it’s exposed to particularly harsh conditions.
- Using Harsh Cleaning Agents: Avoid using abrasive cleaners or strong chemicals that could degrade the fabric or its water-resistant properties. Stick to mild detergents or cleaners specifically recommended for the cover material.
- Improper Storage: Don’t stuff or cram the cover into a tight space, as this can cause creases and weaken the material. Additionally, storing it in a damp or humid environment can lead to mold or mildew growth, compromising its integrity.
- Overlooking Repairs: Address any tears, rips, or damages promptly. Ignoring these issues can exacerbate the damage and compromise the cover’s ability to protect your motorcycle effectively.
By following these simple cleaning and storage practices while avoiding common maintenance pitfalls, you’ll prolong the lifespan of your half cover and ensure it remains a reliable guardian for your motorcycle against the elements. Regular care not only preserves the cover but also safeguards your bike’s longevity and appearance.
Conclusion
In a nutshell, half covers might seem like a small accessory, but their impact is monumental. They’re the unsung heroes that protect our rides, ensuring they stay in top shape for miles to come.
So, the next time you hit the road, consider slipping on a half cover—it’s more than just a protective layer; it’s peace of mind for your beloved motorcycle.
Unlocking the Magic of ‘Mechanic in a Bottle’: Your Quick-Fix Motorcycle Solution?
Are you one of those drivers who’ve glanced under the hood and thought, “If only I had a ‘Mechanic in a Bottle’ to solve these car issues?” We’ve all been there, facing those pesky automotive troubles that seem to pop up at the most inconvenient times. In these moments, the promise of a quick solution can be enticing. But, before you pour in that miracle potion, let’s take a closer look. 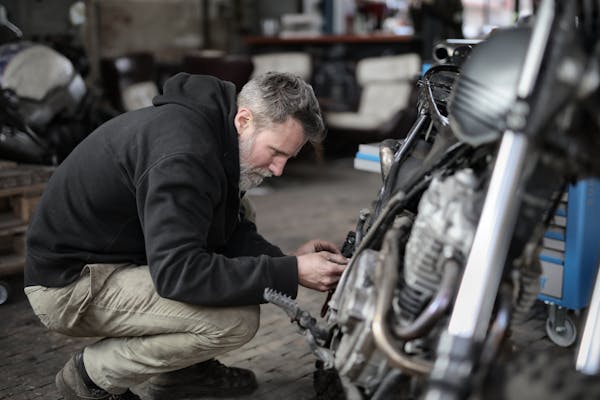 Our website contains affiliate links to products. We may receive a small commission for purchases made through these links at no extra cost to you. However, this does not impact the integrity of our reviews and comparisons. We are committed to providing our audience with unbiased and informative content. Learn more here.
Understanding the “Mechanic in a Bottle”
Picture this: a magical elixir claiming to fix a variety of car issues—rough-running engines, poor fuel efficiency, and more. That’s the allure of products bearing the name “Mechanic in a Bottle.” They promise a shortcut, a swift resolution to common car woes without the hefty mechanic bill.
Dive into the Product Line
The “Mechanic in a Bottle” series is a lineup of specially formulated additives tailored to cater to various car issues. From engine performance enhancers to fuel system cleaners and oil stabilizers, this product line boasts an array of solutions that aim to be a quick remedy for common vehicular troubles.
Claims and Promises
What’s the buzz all about? These additives tout an impressive repertoire of claims and promises. Picture this: smoother engine operation, increased fuel efficiency, reduced emissions, and even an elixir-like ability to rejuvenate older engines. It’s like a superhero cape for your vehicle, promising to combat wear and tear, revitalizing its performance and prolonging its lifespan.
Addressing a Spectrum of Issues
The allure of “Mechanic in a Bottle” lies in its versatility. It’s the Swiss Army knife of automotive care, targeting an extensive spectrum of issues. From tackling rough idling and stuttering engines to addressing fuel system varnish buildup and lubricating vital components, these additives purport to resolve a myriad of pesky problems that afflict cars.
Imagine pouring in a solution that claims to clear clogged injectors or revitalizes aging engine seals. The goal? To offer a one-stop-shop solution that caters to your car’s needs without the hassle of multiple products or expensive professional intervention.
In essence, the “Mechanic in a Bottle” series paints a picture of convenience—a magical potion promising to sprinkle vitality and efficiency into your vehicle’s inner workings. But, like all magic, it’s crucial to decipher the real enchantment amidst the mystique and consider its efficacy and limitations before expecting a miracle.
Exploring the Appeal
Let’s get real. Who wouldn’t want a hassle-free remedy for their car’s hiccup? The appeal of these additives lies in their convenience and cost-effectiveness. They seem like a lifeline, especially when facing minor issues or wanting to avoid the complexities of a professional mechanic’s visit.
Intent Behind Seeking These Products
Ever found yourself in the throes of a car hiccup and wished for a wizard’s wand to magically resolve the issue? That’s the allure of seeking products like “Mechanic in a Bottle.” The intent is rooted in the desire for a swift solution to common vehicular woes without the complexities or expenses of a mechanic’s intervention. It’s about taking matters into one’s own hands, seeking a quick remedy, and hoping to revive a car’s performance without professional help.
Convenience and Cost-effectiveness
Imagine the convenience—a simple bottle promising to be the panacea for various car problems. It’s like having a toolbox in a bottle, easily accessible whenever your vehicle hits a rough patch. Moreover, these additives often come at a fraction of the cost of professional mechanical services. It’s the allure of affordability paired with the convenience of a quick fix that attracts many drivers.
In a world where time is precious and expenses need to be managed, the promise of a low-cost solution that can potentially save a trip to the mechanic’s garage is undeniably tempting.
Motivations Behind Choosing Quick-Fix Solutions
Why opt for a quick-fix solution instead of seeking professional mechanical assistance? Time, convenience, and perceived simplicity play a pivotal role. For minor issues or routine maintenance, drivers often prefer a DIY approach, hoping to save time and money.
There’s also the fear of the unknown. Car issues can sometimes feel daunting, and the prospect of a mechanic unveiling complex problems and high repair costs can be daunting. Hence, the allure of a seemingly straightforward solution—an easy-to-use additive that promises to tackle the issue without the intimidating technical jargon or hefty bills.
Choosing a quick-fix solution reflects a desire for immediate results and a sense of empowerment—a belief that one can take charge of their car’s well-being without relying solely on professional expertise. However, it’s crucial to balance this self-sufficiency with an understanding of the limitations of such quick fixes for more significant mechanical issues.
Effectiveness and Limitations
But, hold on. Do they actually work? Reviews and user experiences offer mixed opinions. While some swear by the miraculous results, others have a less magical tale to tell. These additives might work wonders for specific issues but might not dig deep enough for more significant mechanical troubles.
Real-World Effectiveness from User Experiences and Reviews
The realm of automotive additives like “Mechanic in a Bottle” is a mixed bag of experiences and opinions. Delving into user reviews unveils a spectrum of outcomes. Some drivers sing praises about these miracle bottles, attributing smoother engine performance, improved fuel efficiency, and reduced emissions to their usage. These proponents highlight how these additives seemed to breathe new life into their aging vehicles, resolving minor issues and enhancing overall performance.
However, amidst the success stories, there are voices cautioning against unrealistic expectations. Some users report minimal to no noticeable changes after using these additives. It’s a reminder that while these products might work wonders for certain issues, their effectiveness might vary depending on the specific problem and the vehicle’s condition.
Limitations in Resolving Complex or Underlying Mechanical Issues
While these additives excel in addressing surface-level concerns like rough idling or minor fuel system issues, they might fall short when it comes to complex or underlying mechanical problems. Car troubles often have multifaceted causes, and additives alone might not be equipped to handle intricate issues such as internal engine damage or severe malfunctions.
For instance, expecting an additive to mend a misfiring engine due to serious internal component failure might be setting unrealistic expectations. It’s essential to recognize the boundary these products have in tackling intricate mechanical intricacies.
Understanding the Product’s Scope and Limitations
Amidst the allure of a quick fix, it’s crucial to grasp the boundaries of these additives. While they might offer immediate relief for specific issues, they aren’t a substitute for regular maintenance or professional intervention when needed.
Understanding the product’s scope entails discerning its suitable applications. These additives shine in preventive maintenance and addressing minor issues but might not be the solution for critical mechanical faults. It’s akin to using a band-aid when stitches are necessary; they serve a purpose but might not be the ultimate fix.
Hence, it’s crucial to approach these additives with realistic expectations, viewing them as supplementary to proper car care rather than a standalone solution. Recognizing their limitations ensures a balanced approach to vehicle maintenance, combining quick-fix solutions with professional mechanical expertise when required.
Considerations and Precautions
Before you go all-in on these potions, a word of caution: tread carefully. It’s essential to use automotive additives responsibly, following manufacturer recommendations. Remember, these products might not be the cure-all for severe car problems.
Responsible Usage of Automotive Additives
When diving into the world of automotive additives like “Mechanic in a Bottle,” responsible usage is key. Start by carefully reading and understanding the product’s instructions and guidelines. Ensure the vehicle’s compatibility with the additive and follow recommended dosage and application procedures diligently.
Avoid overuse or misuse of these additives, as excessive application might lead to adverse effects on the vehicle’s systems. Consider a conservative approach, especially if it’s your first time using a particular product. Remember, these additives are meant to complement regular maintenance, not replace it.
Importance of Following Manufacturer Recommendations
One of the golden rules of using automotive additives is to heed the manufacturer’s recommendations. They’re not mere suggestions but guidelines tailored to optimize the product’s effectiveness and safety. Deviating from these guidelines might not only render the additive less effective but could potentially harm your vehicle.
Whether it’s the frequency of application, the recommended concentration, or specific usage instructions, adhering to these guidelines ensures you’re making the most out of the additive while safeguarding your car’s well-being.
Caution Against Sole Reliance on Additives for Severe Issues
As enticing as these additives might seem, a word of caution: they aren’t a cure-all, especially for severe or critical car issues. While they shine in addressing minor concerns or providing temporary relief, they might not have the prowess to tackle serious mechanical faults.
For major issues such as engine knocking, severe misfires, or transmission problems, relying solely on additives could delay proper diagnosis and repairs by a certified mechanic. Treating significant problems with quick-fix solutions might exacerbate the underlying issue, leading to more extensive and expensive repairs in the long run.
Therefore, it’s crucial to recognize the boundary these additives have in addressing severe issues and advocate for seeking professional mechanical assistance when faced with complex or critical car problems. Combining the benefits of additives with the expertise of a skilled mechanic ensures a comprehensive and effective approach to maintaining your vehicle’s health and performance.
In Conclusion
So, is the “Mechanic in a Bottle” your car’s knight in shining armor? It can be, but with a few asterisks. While these additives offer convenience, they’re not a substitute for proper car care. Think of them as a helping hand, not the entire toolkit.
Ultimately, maintaining your vehicle is a bit like self-care—consistent effort pays off. Use these additives wisely, but don’t skip out on regular check-ups by a certified mechanic. It’s the balance between quick fixes and professional expertise that keeps your wheels turning smoothly in the long run.
The Ultimate Guide to Men’s Motorcycle Gloves: Your Perfect Riding Companion
Hey there, fellow riders! If you’ve ever felt the exhilaration of hitting the open road on your motorcycle, you know the importance of safety and comfort. One crucial piece of gear that often gets overlooked but is absolutely essential for any rider is a pair of quality motorcycle gloves. In this comprehensive guide, we’ll dive into everything you need to know about choosing the perfect men’s motorcycle gloves to enhance your riding experience.

Our website contains affiliate links to products. We may receive a small commission for purchases made through these links at no extra cost to you. However, this does not impact the integrity of our reviews and comparisons. We are committed to providing our audience with unbiased and informative content. Learn more here.
Importance of Motorcycle Gloves: Your Trusty Sidekicks on the Road
Let’s delve deeper into why motorcycle gloves aren’t just another piece of gear, but rather an essential component of your riding ensemble. These gloves aren’t just about style; they’re your reliable companions for a safe and enjoyable journey. Here’s a list outlining the importance of motorcycle gloves along with brief descriptions:
- Protection from Injuries: Motorcycle gloves act as a protective barrier against abrasions, cuts, and impact injuries during falls or collisions. They shield your hands from potential road hazards, reducing the risk of severe injuries.
- Enhanced Grip and Control: Providing a secure grip on the handlebars, gloves enhance your control over the motorcycle. They ensure a steady hold even in adverse weather conditions, improving maneuverability and overall safety.
- Comfort for Long Rides: Comfortable gloves prevent hand fatigue and blisters, allowing for extended periods of riding without discomfort. Properly fitted gloves also offer breathability, reducing sweat and enhancing overall comfort.
- Weather Adaptability: Offering weather-specific features, gloves shield your hands from harsh weather elements. Insulated gloves keep hands warm in cold conditions, while ventilated gloves maintain airflow during hot weather, ensuring comfort regardless of climate.
- Protection for Fingers and Knuckles: Armored knuckles and strategic padding in gloves provide added protection to vulnerable areas, reducing the risk of injuries to fingers and knuckles in case of accidents.
- Safety Measure: Motorcycle gloves are a critical safety measure, serving as a preventive tool to minimize the severity of hand injuries during unforeseen incidents, ultimately safeguarding riders’ hands and fingers.
- Riding Confidence: Wearing gloves instills confidence in riders, knowing that their hands are protected. This confidence allows riders to focus on the road ahead, enhancing overall riding experience and safety.
- Durability and Longevity: High-quality motorcycle gloves are durable and long-lasting, providing reliable protection over time. Investing in quality gloves ensures they remain a consistent safety accessory for extended periods.
Remember, the importance of motorcycle gloves extends beyond mere accessories; they are essential safety gear that significantly contributes to a rider’s safety, comfort, and overall riding experience.
Safety First: Understanding Protection in Motorcycle Gloves
Riding a motorcycle is an exhilarating experience, but ensuring your safety is paramount. Motorcycle gloves aren’t just an accessory; they’re your guardians on the road. Here’s a deeper dive into why they’re crucial for your safety:
Importance of Protection in Motorcycle Gloves
When it comes to riding, protection is non-negotiable. Motorcycle gloves offer a crucial layer of defense for your hands, shielding them from potential injuries during accidents or falls. They’re your first line of defense against abrasions, cuts, and impacts, ensuring that your hands remain as protected as possible in various riding scenarios.
Materials for Safety (Leather, Textiles, Armor)
The materials used in motorcycle gloves are the pillars of their protective abilities. Leather, the classic choice, offers durability and exceptional abrasion resistance, serving as a stalwart shield for your hands. Textiles, such as Kevlar or reinforced fabrics, bring versatility and flexibility, ensuring protection without compromising comfort. Additionally, armor inserts made from materials like carbon fiber or specialized polymers reinforce critical areas like knuckles and palms, elevating the gloves’ protective capabilities to a whole new level.
Let’s explore and discuss the various materials used for safety in motorcycle gloves: leather, textiles, and armor.
- Leather: Durability and Abrasion Resistance: Leather is a timeless and classic material for motorcycle gloves. It’s revered for its exceptional durability and high abrasion resistance, making it a preferred choice for riders seeking reliable protection. Leather gloves offer robust shielding against road rash and abrasions in case of accidents or falls. Additionally, they tend to mold and conform to the hands over time, providing a personalized fit and enhancing comfort while maintaining their tough exterior.

leather gloves
- Textiles: Versatility and Flexibility: Textile materials, such as Kevlar, Cordura, or reinforced fabrics, offer a different set of advantages in motorcycle gloves. They bring versatility, flexibility, and adaptability to varying riding conditions. Textile gloves are lightweight, allowing for increased mobility and dexterity, making them popular among riders seeking a balance between protection and comfort. Moreover, they often come with enhanced breathability, making them suitable for different weather conditions.

- Armor: Enhanced Impact Protection: Armor inserts or protective elements within gloves are like the guardians of your hands. They’re strategically placed at key impact zones like knuckles, palms, and fingers. Constructed from materials such as carbon fiber, rigid plastics, or specialized impact-absorbing polymers, these armor pieces significantly enhance impact protection. Armored knuckles, for example, act as a shield against direct impacts, while padding or inserts disperse and absorb the force of impacts, reducing the risk of injuries to vulnerable areas.

Discussion:
Each of these materials offers distinct advantages, catering to different preferences and riding needs. Leather excels in durability and traditional toughness, providing excellent protection against abrasions. Conversely, textiles bring versatility and flexibility to the table, allowing for increased mobility and adaptability to varying riding conditions. They often offer a lighter and more breathable alternative to leather.
Armor inserts, integrated strategically within gloves, significantly elevate the protective capabilities. They enhance impact resistance, distributing and absorbing forces during accidents or collisions, minimizing the risk of severe injuries to hands and fingers.
Many modern motorcycle gloves combine these materials for a blend of protection, comfort, and functionality. For instance, gloves may feature leather for durability in critical areas, textiles for flexibility and breathability, and armor inserts for enhanced impact protection at key zones. Ultimately, the choice of material often depends on the rider’s preferences, riding style, and the level of protection they seek.
Understanding the strengths and features of each material helps riders make informed choices when selecting gloves tailored to their specific riding needs and safety requirements.
Impact Resistance: Armored Knuckles and Padding
Ever wondered how gloves withstand impacts? Armored knuckles are like the sturdy shields for your hands, specifically designed to absorb and disperse impact forces. Crafted from resilient materials, they act as the frontline defenders against direct hits, safeguarding your knuckles from potential injuries. Moreover, strategically placed padding within the gloves isn’t just for comfort – it’s your hidden ally in reducing the impact’s severity. These pads work tirelessly to absorb shocks, dispersing the force across your hands and minimizing potential harm during accidents or collisions.
Impact resistance in motorcycle gloves, particularly through armored knuckles and padding, refers to the gloves’ ability to mitigate and absorb the impact forces experienced during accidents, collisions, or falls while riding.
- Armored Knuckles: Armored knuckles are specially designed protective elements integrated into the glove’s structure, primarily covering the knuckle area. These components are crafted from robust materials such as carbon fiber, rigid plastics, or specialized impact-absorbing polymers. The purpose of armored knuckles is to provide a fortified shield against direct impacts.When an impact occurs, whether from a fall or collision, the armored knuckles absorb and distribute the force across a broader surface area. By doing so, they help reduce the concentration of impact on the knuckles, safeguarding them against injuries, fractures, or severe bruising.
- Padding: Padding within motorcycle gloves is strategically placed in areas vulnerable to impact, such as the palms, fingers, and sides of the hand. These padded sections serve as additional shock absorbers, working in tandem with the armor to disperse impact forces more evenly across the hand. The padding material is often a specialized foam or gel designed to absorb and cushion impacts. Upon impact, these padded areas compress, absorbing a significant portion of the force before it reaches the hand. This helps reduce the severity of impact-related injuries by minimizing the transmission of force to the hand’s delicate structures.
The combination of armored knuckles and strategically placed padding within motorcycle gloves significantly enhances their ability to resist and mitigate impact forces. These components work in concert to offer a higher level of protection to the rider’s hands and fingers during accidents or collisions, ultimately reducing the risk of severe injuries and improving overall safety while riding.
CE Certification:
The CE certification is a recognized European standard that signifies a product’s compliance with specific safety, health, and environmental protection requirements within the European Economic Area (EEA). When it comes to motorcycle gloves, CE certification indicates that the gloves have undergone rigorous testing and have met or exceeded the safety standards set by the European Union.
For motorcycle gloves to attain CE certification, they must adhere to various criteria related to:
- Protective Performance: This evaluates the gloves’ ability to withstand abrasion, tear, impact, and cut resistance, ensuring they offer adequate protection to the rider’s hands during potential accidents or falls.
- Ergonomics and Fit: CE certification also considers factors such as comfort, dexterity, and the glove’s ability to allow for ease of movement without compromising safety.
- Chemical and Harmful Substance Restrictions: It ensures that materials used in the gloves do not contain harmful substances beyond permissible limits, ensuring the safety of the rider’s skin upon prolonged contact.
- Product Information and Labeling: CE-certified gloves must provide clear and accurate labeling indicating their compliance, performance levels, and other essential information for consumers.
CE certification is not mandatory in all regions, but many riders worldwide consider it as a mark of quality and safety when choosing motorcycle gloves. However, it’s essential to note that other regions may have their own certification standards that guarantee similar levels of safety and quality.
Apart from CE certification, other standards or certifications may exist in different regions or countries, such as the American National Standards Institute (ANSI) or Australian Standards, each ensuring that motorcycle gloves meet specific safety and performance criteria set within their respective jurisdictions.
For riders, seeking gloves with recognized certifications like CE can provide confidence in the product’s quality and safety standards, offering an additional layer of assurance when selecting protective gear for riding activities.
Comfort Matters: Finding the Perfect Fit in Motorcycle Gloves
Comfort isn’t just a luxury; it’s a necessity, especially when it comes to motorcycle gloves. Here’s why finding the perfect fit is crucial:
Importance of Comfort for Long Rides
Picture yourself on an extended road trip, cruising through beautiful landscapes, feeling the wind against your skin. Now, imagine enduring discomfort in your hands throughout that journey – not the ideal scenario, right? Comfort is paramount, particularly on long rides. Well-fitted motorcycle gloves prevent hand fatigue, blisters, and discomfort, allowing you to focus on the joy of the ride rather than hand strain.
Choosing the Right Size
Selecting the correct glove size is more than just picking “small,” “medium,” or “large.” Gloves that are too tight can restrict movement and cause discomfort, while those too loose might compromise grip and control. The right-sized gloves should fit snugly but not constrictively, offering flexibility and allowing for natural movement while ensuring your fingers reach the ends without excess space.
Dexterity and Grip for Control
Ever tried handling intricate controls or making precise maneuvers with bulky or ill-fitting gloves? It’s like trying to thread a needle with oven mitts on! Motorcycle gloves should provide optimal dexterity and grip. A well-fitted pair enables easy manipulation of controls, such as throttle, brakes, and clutch, without sacrificing comfort. The right gloves enhance your tactile sensation, ensuring a solid grip on the handlebars, giving you the confidence to maneuver confidently through varying riding conditions.
The Ultimate Goal: Comfortable Confidence
In essence, the perfect fit in motorcycle gloves isn’t just about comfort; it’s about comfort leading to confidence. Comfortable gloves empower you to focus entirely on the ride, enhancing your overall riding experience. They’re your allies, providing the balance between protection and functionality, ensuring that your hands stay comfortable and nimble throughout your entire journey.
Weather Adaptability: Gloves for Every Climate
When it comes to motorcycle riding, weather can be unpredictable. Having the right gloves for different weather conditions is essential for a comfortable and safe riding experience:
Gloves for Different Weather Conditions (Cold, Hot, Wet)
Riding in different climates demands versatile gear. Cold weather requires gloves with insulation to keep your hands warm, while hot weather demands ventilated and breathable gloves to prevent sweaty palms. For wet conditions, waterproof gloves keep your hands dry and maintain grip even in rainy or humid weather.
Insulation and Thermal Linings
In colder climates, gloves with insulation and thermal linings are your best bet. These linings, often made of materials like Thinsulate or fleece, trap warmth and prevent heat loss, keeping your hands cozy even in freezing temperatures. Insulated gloves offer protection against the biting cold, ensuring your hands stay comfortable and dexterous during winter rides.
Ventilated Gloves for Hot Weather Riding
When the sun is scorching, ventilated gloves become your go-to option. These gloves are designed with breathable materials, mesh panels, or perforations that allow airflow, preventing your hands from becoming sweaty and uncomfortable. Ventilated gloves promote air circulation, keeping your hands cool and dry even in sweltering conditions.
Waterproofing and Windproofing
Riding in wet or windy weather calls for gloves that are waterproof and windproof. Waterproof gloves, often made with materials like Gore-Tex or specialized coatings, repel water and keep your hands dry, maintaining grip and comfort even in rain or wet conditions. Windproof gloves, on the other hand, block chilling winds, preventing the cold air from reaching your hands and causing discomfort.
 All Natural Leather Conditioner to Protect Winter Gloves
Adapting to Mother Nature
The key to a comfortable ride in diverse weather lies in choosing gloves that adapt to Mother Nature’s whims. Whether it’s insulation for the cold, ventilation for the heat, waterproofing for the rain, or windproofing against chilly gusts, having weather-adaptable gloves ensures you’re ready to face any climate with comfort and confidence.
Brand Recommendations and Reviews: Choosing the Right Gloves
Popular Brands Known for Quality and Durability
- Alpinestars: Renowned for their innovative designs and exceptional durability, Alpinestars offers a wide range of motorcycle gloves catering to various riding styles, from racing to touring. Their gloves often feature high-quality materials and cutting-edge protective technology.
- Dainese: Recognized for their craftsmanship and attention to detail, Dainese gloves combine style with robust protection. Their gloves often boast innovative features, ergonomic designs, and superior abrasion resistance.
- Rev’it!: A brand known for its focus on safety and comfort, Rev’it! produces gloves designed for both performance and protection. They integrate advanced materials and technologies into their gloves, providing riders with reliable gear for various riding conditions.
- Racer Gloves: Racer Gloves USA offers a range of gloves emphasizing both quality and comfort. Known for their excellent fit and craftsmanship, their gloves are tailored for diverse riding styles, including racing, touring, and adventure riding.
Reviews and Testimonials from Riders
Rider reviews and testimonials serve as invaluable insights into the real-world performance of motorcycle gloves. They provide firsthand accounts of comfort, durability, and overall satisfaction with specific brands or models. Riders often share their experiences, discussing factors like fit, protection, breathability, and durability, which can greatly aid others in making informed decisions.
Importance of Reviews:
- Performance Validation: Reviews from fellow riders offer authentic evaluations of gloves in various riding conditions, validating their performance claims made by manufacturers.
- Real-life Experiences: Testimonials share real-life experiences, shedding light on the long-term durability, comfort, and protective capabilities of gloves, which can’t always be discerned from product descriptions alone.
- Fit and Comfort Insights: Riders often detail the fit and comfort of gloves, providing valuable information about sizing accuracy and comfort levels during extended rides.
- Decision-Making Aid: Reviews help potential buyers by presenting a broader perspective, allowing them to weigh the pros and cons before investing in a particular brand or model.
Seeking Advice from Riders:
When in doubt, seeking advice from forums, social media groups, or rider communities can be beneficial. Engaging with experienced riders or seeking recommendations based on specific riding styles or conditions can provide tailored insights, helping in the selection of gloves that align with individual preferences and needs.
Conclusion
And there you have it, riders! Choosing the perfect men’s motorcycle gloves isn’t just about picking any pair off the shelf. It’s about finding the ideal balance between safety, comfort, style, and functionality. We hope this guide helps you find the gloves that not only protect your hands but also elevate your riding experience to new heights. Stay safe, and enjoy the ride!
Sparkling Irons: The Ultimate Guide to Cleaning Your Steam Iron Reservoir
Hey there! Are you tired of your trusty steam iron not performing its best? The secret might be hiding in its reservoir! Maintaining a clean steam iron reservoir is key to ensuring those crisp, wrinkle-free clothes we all love. In this guide, we’ll walk you through the easy-peasy steps to get your iron’s reservoir sparkling clean.
Our website contains affiliate links to products. We may receive a small commission for purchases made through these links at no extra cost to you. However, this does not impact the integrity of our reviews and comparisons. We are committed to providing our audience with unbiased and informative content. Learn more here.
Understanding the Steam Iron Reservoir:
Ever wondered what makes your iron deliver that burst of steam? Well, it’s the reservoir—a magical chamber that holds water, creating the steam that banishes wrinkles. But when this reservoir gets gunked up, it’s trouble. From spitting out brown water to leaving stains on your clothes, a dirty reservoir can be a real hassle.
Exploring the Steam Iron Reservoir’s Function:
Picture this: you’re on a mission to tackle the mountain of laundry staring back at you. Enter the hero of the hour—the steam iron! But behind its sleek exterior lies the not-so-secret weapon: the reservoir. This little chamber holds the water that transforms into steam, zapping away those stubborn wrinkles on your clothes.
Think of the reservoir as the powerhouse for that burst of steam. When you fill it up, water gradually evaporates and turns into steam when you press that magical button. This steam is the secret sauce that relaxes the fabric fibers, making ironing a breeze and leaving your clothes looking fresh and wrinkle-free.
Unveiling Common Issues from a Dirty Reservoir:
Now, let’s talk about what happens when that reservoir gets a bit neglected. You might notice your iron suddenly spitting out water that’s not exactly crystal clear. That’s when things start to get a little dicey. A dirty reservoir can lead to mineral deposits building up inside, which then hitch a ride on your clothes, leaving unsightly stains or splotches.
Ever experienced your iron dragging along the fabric instead of gliding smoothly? That’s another red flag that your reservoir might need some love. Mineral buildup can clog the steam vents, causing the iron to misbehave and leaving you in a battle against those relentless wrinkles.
And let’s not forget the horror of discovering your favorite white shirt has brownish streaks after ironing—yikes! That’s often due to mineral deposits escaping from a neglected reservoir, deciding to make an unwelcome appearance on your freshly pressed clothes.
In essence, a dirty reservoir doesn’t just mess with your iron’s performance but can also wreak havoc on your beloved wardrobe. But fear not! With a bit of TLC and our trusty cleaning tips, we’ll have that reservoir sparkling clean in no time, ready to tackle your laundry pile like a champ.
Preparing for Cleaning:
Before we get into the nitty-gritty, let’s gather our cleaning superheroes! You’ll need some vinegar, water, cotton swabs, and a touch of patience. And hey, safety first! Make sure your iron is unplugged and cool before diving into the cleaning process.
- Gathering Necessary Materials:
First things first, raid your kitchen for a few cleaning superheroes. You’ll need vinegar, the unsung hero of battling mineral deposits, and water. Mix these two in a ratio that’ll make your iron’s reservoir sing with joy. Cotton swabs will be your trusty sidekicks to reach those nooks and crannies where dirt hides.
So, grab that vinegar bottle (white vinegar works wonders!), fill a cup with water, and make sure you’ve got those cotton swabs on standby. Once you’ve assembled your cleaning dream team, you’re halfway to a squeaky-clean iron reservoir!
- Safety Precautions Before Cleaning:
Before we embark on this cleaning adventure, a quick safety check is in order. Safety first, folks! Ensure your iron is unplugged and, most importantly, cooled down. We’re talking about giving it enough time to chill—no one needs accidental steam burns!
It’s also a good idea to check the manufacturer’s instructions. Sometimes they sprinkle in a few pearls of wisdom specific to your iron model. And hey, if you’re ever unsure about anything, it’s never a bad idea to give the instruction manual a glance.
Oh, and here’s a top tip: find a comfy and well-lit spot to perform the cleaning magic. Trust me, a good workspace can make all the difference in making this cleaning gig a breeze.
Alright, with the materials in place and safety boxes checked, you’re all set to take on that reservoir gunk and give your iron the TLC it deserves! Ready, set, clean!
Step-by-Step Cleaning Process:
Here’s where the magic happens! First, bid farewell to any leftover water in the reservoir and let it cool down. Then, whip up a solution of vinegar and water, our secret weapon against mineral deposits. Pour it in, let it sit, and watch those deposits vanish like they were never there. Rinse thoroughly and dry completely, and voila! Your reservoir is as good as new.
- Emptying the Reservoir and Allowing it to Cool:
First things first, bid farewell to any leftover water in the reservoir. Pour it out like you’re saying goodbye to yesterday’s worries. Oh, and remember, safety’s our bestie! Make sure your iron has cooled down completely. No rushing here—patience is key.
- Using Vinegar Solution to Remove Mineral Deposits:
Now, here’s where the vinegar and water duo steps into the spotlight. Mix them up in a ratio that’ll make your reservoir shine brighter than a diamond. Pro tip: equal parts water and vinegar make for a mighty cleaning team.
Once your solution is ready to rumble, pour it into the reservoir. Let it kick back and relax for a bit—about 30 minutes should do the trick. This magic potion will break down those stubborn mineral deposits, leaving your reservoir feeling fresh and rejuvenated.
- Rinsing and Flushing the Reservoir:
Time to bid adieu to the vinegar solution! Use clean water to give your reservoir a nice rinse. Pour it in, swirl it around, and then pour it out. Repeat this dance until that vinegar scent takes a bow and leaves the stage. Trust me, you’ll want to make sure all traces of vinegar are out of the picture.
To ensure an Oscar-worthy performance, tilt and swish the iron around to make sure you’ve flushed out every last drop of the solution. Think of it as a farewell party for that pesky residue—show it the door!
- Drying the Reservoir Completely:
Last but not least, give that reservoir a chance to dry off completely. No rushing this final step! Let it air dry or grab a trusty cloth to give it a pat down—just make sure it’s bone dry before the iron gets back to its wrinkle-busting duties.
And there you have it, folks! With these simple steps, your iron’s reservoir will be squeaky clean and ready to take on any wrinkle in its path. Cue the applause for your cleaning prowess!
Maintenance and Preventive Care:
Like any superhero, your iron needs regular maintenance. We’ll chat about how often to clean your reservoir and even spill the beans on some alternative cleaning methods. Plus, a few tips to keep your iron in top-notch condition for longer.
- Regularity of Cleaning and Recommended Frequency:
Ah, the golden rule of iron maintenance—consistency is key! Aim to clean your iron’s reservoir regularly to keep it happy and humming. But how often, you ask? Well, it depends on how often you’re best friends with your iron. If you’re a frequent iron wielder, consider giving the reservoir a clean every month or so. For occasional ironers, a quarterly cleaning should do the trick.
Remember, prevention is better than cure! A little bit of regular TLC can save you from dealing with stubborn build-up down the road.
- Alternative Cleaning Methods and Products:
Got some tricks up your sleeve? There are other ways to pamper your iron besides the classic vinegar solution. Lemon juice is like the cool cousin of vinegar—it works wonders in breaking down those mineral deposits. Just squeeze some fresh lemon juice into water, pour it into the reservoir, and let it work its magic.
And hey, if you’re feeling adventurous, there are specialized cleaning products out there designed explicitly for iron cleaning. They’re like the superheroes swooping in to save the day when vinegar needs a sidekick.
- Suggestions for Extending the Steam Iron’s Lifespan:
Let’s spill the beans on how to keep that iron by your side for years to come! Always empty the reservoir after use. It’s like tucking it in for a good night’s sleep—prevents any pesky mineral buildup while it rests.
Here’s another gem: use distilled or filtered water instead of tap water. Tap water might contain minerals that can leave deposits behind, causing trouble in paradise. And when storing your iron, keep it in an upright position to prevent any water leakage and potential damage.
Oh, and one more thing—give those steam vents a little love! Use a cotton swab dipped in vinegar or lemon juice to gently clean the vents. This ensures a clear passage for the steam, making your iron’s performance top-notch.
With these maintenance tips up your sleeve, your iron will be your loyal companion, ready to take on any wrinkled garment that comes its way!
Conclusion:
And there you have it, folks! A clean steam iron reservoir equals a happy iron and wrinkle-free clothes. With these simple steps, you’ll be the hero of laundry day. So, grab your vinegar, give that reservoir some TLC, and get ready to strut your stuff in freshly pressed attire!
If all else fails you can always get a new Iron here.
Safeguarding Adventures: The Essential Guide to Youth Dirt Bike Goggles
Picture this: the thrill of speeding through off-road trails, the wind rushing past, and the joy of conquering dirt tracks. For young riders, this exhilarating experience comes with the responsibility of staying safe. Youth dirt bike goggles stand out as a crucial protective accessory among the must-have gears for off-road biking.
Our website contains affiliate links to products. We may receive a small commission for purchases made through these links at no extra cost to you. However, this does not impact the integrity of our reviews and comparisons. We are committed to providing our audience with unbiased and informative content. Learn more here.
Understanding Youth Dirt Bike Goggles:
When it comes to off-road biking, safety is non-negotiable. Youth dirt bike goggles are not just about style; they’re about safeguarding those young, adventurous eyes from the elements. For our budding bikers, finding the right pair of goggles involves a few key considerations tailored to their specific needs.
The Role of Goggles in Off-Road Biking Safety
When young riders embark on off-road biking adventures, safety becomes a top priority. Goggles are not just an accessory; they are a fundamental piece of protective gear that shields the eyes from flying debris, dust, mud, and other environmental elements encountered during exhilarating rides. They serve as a crucial barrier, safeguarding against potential eye injuries and ensuring clear vision throughout the ride, contributing significantly to the overall safety of the young bikers.
Specific Needs for Youth Riders:
- Size and Fit Considerations:
For youth riders, finding goggles that fit snugly and comfortably is paramount. Youth dirt bike goggles are designed with smaller faces in mind, ensuring a proper fit that stays securely in place during bumpy rides. An ill-fitting pair could cause discomfort, distractions, or even compromise safety. Therefore, selecting goggles tailored to the specific dimensions of young riders’ faces is crucial for optimal protection and comfort.
- Material Durability and Impact Resistance:
Beyond fit, the durability of materials used in youth dirt bike goggles plays a pivotal role in their protective capabilities. These goggles are constructed from robust materials that withstand the rigors of off-road biking. Impact-resistant lenses and durable frames are essential components, offering resilience against potential collisions with branches, rocks, or other debris. Ensuring that the goggles can endure these challenges is crucial for maintaining their protective function and keeping young riders safe throughout their adventures.
Key Features and Functions:
Let’s delve into the essential features these goggles offer. Anti-fogging technology ensures clear vision despite challenging weather conditions, while UV protection shields delicate eyes from harmful sun rays. Additionally, lens options and visibility play a vital role, offering versatility in various terrains.
- Anti-Fogging Technology:
One of the critical features of quality youth dirt bike goggles is their anti-fogging capability. Riding through varying weather conditions, from chilly mornings to warmer afternoons, can lead to fogging on the lens, impairing visibility. Goggles equipped with anti-fogging technology employ specialized coatings or ventilation systems that mitigate moisture buildup, ensuring clear vision regardless of the riding environment.
- UV Protection:
Young riders spend extended periods exposed to the sun while biking. Thus, having UV protection integrated into the goggles’ lenses is crucial. This feature shields their eyes from harmful UV rays, safeguarding against potential long-term damage caused by prolonged sun exposure during their biking adventures.
- Lens Options and Visibility:
Versatility in lens options is a significant aspect when considering youth dirt bike goggles. Some goggles come with interchangeable lenses or varying tints suitable for different lighting conditions. Enhanced visibility in various terrains – from bright, sunlit tracks to shaded forest trails – ensures optimum vision, allowing young riders to adapt seamlessly to changing environments.
Additional Functionalities for Enhanced Safety:
- Strap Design and Adjustability:
The strap design and adjustability of youth dirt bike goggles are vital for a secure and comfortable fit. Goggles with adjustable straps allow young riders to customize the fit according to their head size and helmet preferences, preventing slippage during high-speed maneuvers and ensuring the goggles stay firmly in place throughout their adventurous rides.
- Compatibility with Helmets:
An often-overlooked yet crucial aspect is the compatibility of the goggles with helmets commonly used by young riders. Goggles designed to integrate seamlessly with various helmet models offer enhanced safety. This compatibility ensures a snug fit between the goggles and the helmet, minimizing gaps that could expose the eyes to potential hazards, and contributes to an overall safer biking experience for young enthusiasts.
Choosing the Right Goggles for Young Riders:

Navigating the world of youth dirt bike goggles involves more than just picking a stylish pair. It’s about choosing reliable brands known for quality and durability. Balancing budget with value and heeding advice from reviews and recommendations helps in making an informed decision.
- Brand Comparison and Reputation: When selecting goggles for young riders, considering the brand’s reputation and comparing different manufacturers becomes crucial. Established brands often have a track record of producing quality protective gear, including youth dirt bike goggles. They invest in research, ensuring safety standards, and often offer warranties or customer support, providing peace of mind to parents and riders alike. Exploring brands known for their commitment to durability, safety, and innovation can guide the selection process.
- Considering Budget and Value: While prioritizing safety, it’s essential to balance the budget without compromising on the quality and features of the goggles. Assessing the price range within which various brands offer their goggles allows for a more informed decision-making process. Sometimes, higher-priced options may offer additional features or superior durability, but this doesn’t necessarily mean that more affordable options lack in quality. Evaluating the value provided in terms of safety features, durability, and long-term use aligns with both budget constraints and the need for reliable protective gear.
- Reviews and Recommendations: Reviews and recommendations from fellow riders, parents, or reputable sources can be invaluable when choosing youth dirt bike goggles. Real-world experiences shared through reviews offer insights into the goggles’ performance, durability, comfort, and overall suitability for young riders. Additionally, seeking recommendations from experienced riders, biking communities, or consulting with biking experts can provide valuable guidance in selecting goggles that meet both safety requirements and the specific needs of young adventurers.
Maintenance and Care Tips:
Once the perfect pair is acquired, proper care ensures their longevity. Regular cleaning and appropriate storage significantly extend the lifespan of these goggles, ensuring sustained protection for every biking adventure.
- Cleaning and Storage Guidelines: Proper cleaning and storage practices significantly contribute to the longevity and effectiveness of youth dirt bike goggles. Cleaning the goggles after each use, especially if they’ve been exposed to dirt, mud, or sweat, is essential. Using a mild soap or goggle-specific cleaning solutions along with a soft cloth helps remove debris without damaging the lenses or the protective coatings. Rinse thoroughly and allow them to air dry completely before storing.
Storing the goggles in a protective case or pouch, specifically designed for goggles, shields them from potential scratches or damage when not in use. Avoiding exposure to extreme temperatures or direct sunlight while storing ensures the integrity of the materials and prevents any distortions to the lenses, preserving their functionality.
- Prolonging Lifespan for Continued Protection: To ensure continued protection and effectiveness, certain practices help extend the lifespan of youth dirt bike goggles. Regularly inspecting the goggles for any signs of wear, such as scratches on the lens or worn-out straps, allows for timely replacements or repairs. Addressing these issues promptly maintains the goggles’ protective capabilities.
Avoiding harsh chemicals or abrasive cleaning materials during maintenance prevents damage to the lenses or coatings. Additionally, using protective lens covers or tear-offs during rides in particularly dusty or muddy conditions adds an extra layer of defense against scratches and debris accumulation on the primary lens.
Lastly, periodically checking the foam padding and straps for any deterioration and replacing them as needed ensures a snug and comfortable fit, essential for both safety and riding enjoyment. By adhering to these care practices, riders can maximize the lifespan of their goggles, ensuring continued protection for many thrilling biking adventures ahead.
Conclusion:
As young adventurers gear up for off-road escapades, let’s emphasize the importance of proper eyewear. Youth dirt bike goggles aren’t just an accessory; they’re a safety essential, safeguarding the eyes and allowing riders to focus on the thrill of their biking experiences. So, choose wisely, ride safely, and let the adventures roll on!
Safeguarding Adventures: A Guide to Youth Dirt Bike Goggles
Picture this: the roar of the engine, the thrill of navigating rough terrains, and the rush of wind against your face. Off-road biking brings a unique sense of excitement, but amidst the thrill, safety should always be a top priority. And that’s where the unsung hero of every young rider’s gear comes into play – the youth dirt bike goggles.
Our website contains affiliate links to products. We may receive a small commission for purchases made through these links at no extra cost to you. However, this does not impact the integrity of our reviews and comparisons. We are committed to providing our audience with unbiased and informative content. Learn more here.
Understanding Youth Dirt Bike Goggles
When it comes to gearing up for the exhilarating world of off-road biking, the spotlight often shines on the flashy helmets and sturdy boots. Yet, nestled among these essential gears, youth dirt bike goggles quietly play a vital role in ensuring a safe and enjoyable riding experience for young enthusiasts.
- Safety as a Foremost Priority
Safety isn’t just a checkbox; it’s the cornerstone of every ride. Youth dirt bike goggles stand as the first line of defense against the challenges posed by rugged terrains.
- Protection Against Debris and Elements
Imagine cruising down an unpaved trail with dust swirling or small rocks kicked up by the wheels. These goggles shield tender eyes from flying debris, safeguarding them against potential harm.
- Impact on Eye Safety during Riding
Beyond just protecting from physical elements, these goggles reduce the risk of eye strain caused by wind, preventing discomfort or potential distractions that could compromise safety while riding.
- Factors Influencing Optimal Performance
Optimal performance isn’t just about keeping up with the adventure; it’s about ensuring that young riders can focus solely on the thrill without any gear-related hassles.
- Proper Fit and Comfort
A comfortable fit is more than just avoiding discomfort; it’s about enhancing focus and ensuring that the goggles stay securely in place throughout the ride. Goggles tailored for youth riders offer adjustable straps and padding designed to provide comfort without compromising on snugness.
- Durability and Material Quality
Off-road biking isn’t a walk in the park; it’s an adventure filled with rough terrains and unpredictable conditions. Goggles crafted from durable materials and boasting quality construction ensure longevity, withstanding the demands of various environments without succumbing to wear and tear.
Youth dirt bike goggles, often underestimated, are the unsung heroes of every young rider’s gear. They’re not just about vision; they’re about safety, comfort, and reliability, ensuring that every moment spent on the trail is an adventure to cherish.
Exploring Features and Specifications

Amidst the vibrant array of youth dirt bike goggles available, it’s crucial to delve deeper into the specific features tailored to meet the unique needs of young riders, ensuring both comfort and functionality.
- Design Features Catered to Youth Riders
- Sizing and Fit Considerations
Youth riders come in various shapes and sizes, and so do their faces! Goggles designed explicitly for young enthusiasts consider these nuances, offering a range of sizes and adaptable features to guarantee a snug fit. Adjustable straps and frame contours ensure a personalized fit that stays in place throughout every twist and turn on the trail.
- Comfortable Padding and Strap Adjustments
Long rides demand comfort. These goggles are equipped with soft, moisture-wicking padding around the frame, preventing discomfort or chafing during extended wear. Moreover, easy-to-adjust straps enable riders to fine-tune the fit for maximum comfort without compromising on security.
- Lens Technology and Functionalities
- Anti-Scratch Coatings
Off-road biking often means encountering gritty conditions that could spell disaster for delicate lenses. Goggles equipped with anti-scratch coatings add an extra layer of resilience, ensuring that the lenses stay clear and free from scratches, preserving optimal vision for every ride.
There’s nothing more frustrating than fogged-up lenses obstructing the view during a thrilling ride. Goggles incorporating anti-fog treatments prevent condensation buildup, keeping the vision crystal clear, regardless of temperature or humidity changes.
- Different Tint Options for Varying Light Conditions
Nature throws diverse lighting conditions at riders, from glaring sunlight to shadowy trails. Goggles featuring different tint options cater to these variations, offering lenses with varying levels of darkness to optimize visibility, enhancing clarity without compromising protection.
In the realm of youth dirt bike goggles, these features aren’t just luxuries; they’re necessities that elevate the riding experience. The blend of design elements tailored for young riders and advanced lens technologies ensures that every ride is not just a journey but a visual treat through varied terrains and conditions.
Choosing the Right Pair
Selecting the perfect youth dirt bike goggles involves a careful consideration of various factors, ensuring that they align seamlessly with the young rider’s needs, preferences, and the overall riding experience.
- Assessing Individual Needs and Preferences
Understanding the individual needs and preferences of the young rider is paramount. Consider the type of terrain they ride on, the climate of their usual biking spots, and any specific features they prioritize. Some may prefer a particular style or color, while others may prioritize functionality. Assessing these preferences helps narrow down the options to find the most suitable pair.
- Evaluating Budgetary Considerations
Budget plays a crucial role in any purchase decision. While quality and safety should never be compromised, there are various options available across different price ranges. Evaluate the budgetary constraints while seeking a balance between quality, features, and affordability. Often, there are goggles that offer excellent value without breaking the bank.
- Reviewing Brand Reputation and User Feedback
Brand reputation speaks volumes about the quality and reliability of the product. Opting for well-established brands known for their expertise in producing reliable protective gear can provide assurance. Additionally, diving into user feedback and reviews helps gain insight into real-life experiences. Checking out what other riders, especially parents of young riders, have to say about specific goggles aids in making an informed decision.
Choosing the right pair of youth dirt bike goggles is not merely about picking a product off the shelf. It’s a process that involves understanding the unique requirements of the young rider, aligning those needs with the available options, and making a well-informed decision that combines safety, performance, and personal preferences. By considering these aspects, one can ensure that the goggles chosen aren’t just a piece of gear; they’re a companion for countless thrilling adventures, safeguarding eyes and enhancing the riding experience.
Ensuring Safety and Performance
Safeguarding the safety and performance of youth dirt bike goggles extends beyond just the initial purchase. It involves a commitment to maintenance, care, and promoting a culture of proper usage to guarantee optimal safety benefits for young riders.
- Importance of Regular Maintenance and Care
Maintaining the quality and functionality of youth dirt bike goggles requires consistent attention and care. Regularly inspect the goggles for any signs of wear and tear, ensuring that straps, padding, and lenses are in top-notch condition before every ride. Cleaning the lenses with specialized solutions or mild soap and water, as recommended by the manufacturer, helps preserve clarity and visibility. Storing goggles in a protective case when not in use shields them from scratches or damage, further prolonging their lifespan.
- Encouraging Proper Usage for Optimal Safety Benefits
Proper usage of goggles is as vital as their quality. Encouraging young riders to wear their goggles every time they hit the trails establishes a habit of safety consciousness. Emphasize that goggles aren’t just an accessory but a critical protective gear, essential for eye safety amidst the thrill of off-road biking. Educate them about the potential risks of riding without goggles and how this protective gear shields their eyes from debris, wind, and other elements that could cause harm.
Additionally, ensuring that the goggles fit snugly and comfortably encourages consistent usage. Properly fitting goggles not only enhance safety but also contribute to the overall enjoyment of the ride, allowing young riders to focus solely on the adventure.
By prioritizing regular maintenance and instilling the habit of proper usage, young riders not only extend the longevity of their goggles but also maximize their safety benefits. It’s a commitment to preserving the integrity of this essential protective gear, ensuring that every off-road biking escapade remains thrilling, safe, and visually unobstructed for the young adventurers.
Conclusion
So, dear young adventurers and concerned parents alike, remember that off-road biking is not just about the adrenaline rush; it’s about enjoying it safely. Youth dirt bike goggles aren’t just accessories; they’re guardians of vision, ensuring every ride is a safe and memorable experience.
Equip your young riders with the best – goggles that fit perfectly, provide clarity, and keep the adventure alive while safeguarding their precious eyes. Because when it comes to off-road biking, seeing clearly means riding safely. Now, let the adventures begin – safely and with clear vision!
Riding in Style and Safety: Choosing Your Perfect Motorcycle Helmet
Revving up your motorcycle for an adventure on the open road brings an unmatched thrill. But amidst the excitement, safety should always be a top priority. One of the key pieces of gear every rider needs is a reliable helmet. It’s not just an accessory; it’s your shield against the unexpected. So, let’s dive into the world of motorcycle helmets, exploring how to find the ideal one that blends safety, comfort, and style seamlessly.

Our website contains affiliate links to products. We may receive a small commission for purchases made through these links at no extra cost to you. However, this does not impact the integrity of our reviews and comparisons. We are committed to providing our audience with unbiased and informative content. Learn more here.
Understanding the Purpose Behind Motorcycle Helmets
Picture this: the wind rushing past, the freedom of the ride, and the assurance that your head is well-protected. That’s what a good motorcycle helmet provides. It’s not just about meeting regulations; it’s about safeguarding yourself from potential head injuries. Certified helmets undergo rigorous tests to ensure they meet safety standards, giving you peace of mind during your adventures.
Safety as the foremost priority cannot be overstated when it comes to motorcycle helmets. These protective headgears serve as the first line of defense for riders against the unpredictable elements on the road. They’re not merely an accessory; they’re a shield that stands between a rider’s head and potential injury.
Imagine the impact of a fall or collision while riding a motorcycle. In such instances, a high-quality helmet plays a pivotal role in mitigating severe head trauma. Head injuries can be catastrophic and life-altering, but the right helmet significantly reduces the risk and severity of such outcomes.
The critical role of helmets in preventing head injuries lies in their design and construction. These helmets are engineered with sturdy outer shells, impact-absorbing liners, and chin straps to ensure they stay securely in place during an accident. They work as a shock absorber, dispersing the force of impact and safeguarding the skull and brain from damage.
Furthermore, the importance of meeting safety standards cannot be emphasized enough. Helmets undergo rigorous testing procedures to comply with specific certifications and regulations. These standards vary across regions but commonly include tests for impact resistance, penetration resistance, and retention system effectiveness.
Certified helmets are subjected to various simulations of potential accidents and extreme conditions to ensure they meet these stringent safety benchmarks. These tests validate their ability to protect the rider’s head under real-life scenarios, providing an assurance of quality and reliability.
By adhering to these safety standards, helmets not only provide a sense of security for riders but also contribute significantly to reducing the risk of severe head injuries or fatalities in motorcycle accidents.
In summary, motorcycle helmets are not just a mandatory accessory; they are a vital safety tool designed to shield riders from the dangers of the road. Their construction, adherence to safety standards, and pivotal role in preventing head injuries make them an indispensable piece of gear for every motorcycle enthusiast.
Different helmet types:
When it comes to choosing the right motorcycle helmet, the market offers a diverse array of options, each tailored to cater to specific riding styles, preferences, and safety needs. Understanding the various types of helmets available can significantly impact a rider’s comfort and protection on the road.
- Full-face Helmets: Full-face helmets are the fortress of motorcycle headgear. They provide the most comprehensive coverage, encompassing the entire head, including the face and chin. With a sturdy outer shell and a visor that shields the eyes from wind, debris, and sunlight, these helmets offer maximum protection. Their design minimizes wind noise and offers excellent aerodynamics, making them ideal for high-speed rides. Additionally, full-face helmets often feature superior ventilation systems to keep riders cool during long journeys.
- Open-face Helmets: Open-face helmets, also known as three-quarter helmets, cover the head but leave the face exposed. They offer a sense of freedom and better visibility, making them popular among urban commuters and cruiser riders. While they provide adequate protection to the skull, chin, and ears, they lack the full-face coverage and chin protection found in other helmet types. However, their design allows for increased airflow and a more open riding experience.
- Modular Helmets: Modular helmets combine the features of full-face and open-face helmets, providing versatility for riders who desire both styles. They feature a hinged or flip-up chin bar that can be raised, transforming them from a full-face helmet into an open-face one. This flexibility allows riders to easily switch between full coverage and increased visibility, making modular helmets suitable for various riding conditions. However, it’s crucial to ensure the chin bar locks securely in place for optimal safety.
- Off-road Helmets: Off-road or motocross helmets are specifically designed for riders who venture off the beaten path. These helmets prioritize ventilation and lightweight construction, making them ideal for intense off-road riding. They feature elongated chin bars, large visors to shield against mud and debris, and enhanced airflow to keep riders cool in challenging terrains. The peak visor helps deflect roost, branches, and other obstacles encountered during off-road adventures.
Tailoring the choice of helmet depends on individual preferences, riding style, and safety requirements. For instance, full-face helmets excel in providing maximum protection for high-speed rides, while open-face helmets offer a more open and casual riding experience. Modular helmets suit those seeking a blend of both styles, allowing flexibility on the road. Meanwhile, off-road helmets cater specifically to the demands of adventurous off-road riding, ensuring comfort and protection in rugged environments.
Understanding these distinctions empowers riders to make informed choices, ensuring they find the helmet that best aligns with their riding needs while prioritizing safety and comfort on every journey.
Fit and Comfort: Importance of Proper Sizing and Finding the Right Fit
Ensuring a helmet fits snugly and comfortably is paramount for every rider. A helmet that doesn’t fit correctly not only compromises safety but can also cause discomfort, distracting from the joy of the ride. Proper sizing involves measuring the circumference of the head to determine the right helmet size. Manufacturers offer size charts to guide riders in choosing the appropriate size based on their head measurements. Trying on helmets in person and checking for a secure yet comfortable fit across the crown, cheeks, and chin is crucial. It should neither be too loose nor too tight, ensuring it stays in place during a ride while remaining comfortable for extended periods.
Material and Construction: Exploring Materials like Polycarbonate, Fiberglass, and Carbon Fiber
The choice of materials in helmet construction significantly impacts its performance and durability. Polycarbonate helmets offer a lightweight and budget-friendly option, providing decent protection against impacts. Fiberglass helmets strike a balance between weight and strength, offering better impact absorption than polycarbonate while remaining relatively lightweight. On the other hand, carbon fiber helmets excel in both strength and lightness, making them the premium choice among riders seeking top-notch performance. These materials undergo rigorous testing to meet safety standards, ensuring helmets effectively absorb and distribute impact forces in the event of a crash.
Ventilation and Noise Reduction: Factors Affecting Comfort During Long Rides
Ventilation systems play a pivotal role in maintaining comfort during rides. Helmets with well-designed ventilation channels allow airflow, preventing excessive heat buildup and keeping riders cool and dry. Strategically placed vents help in circulating air, reducing fogging and enhancing comfort, especially during warmer weather or extended journeys. Additionally, noise reduction features are crucial for a pleasant riding experience. Helmets with noise-reducing padding or designs that minimize wind noise contribute to reduced fatigue, enabling riders to stay focused and comfortable for prolonged rides.
Additional Features: Visors, Padding, and Communication Systems
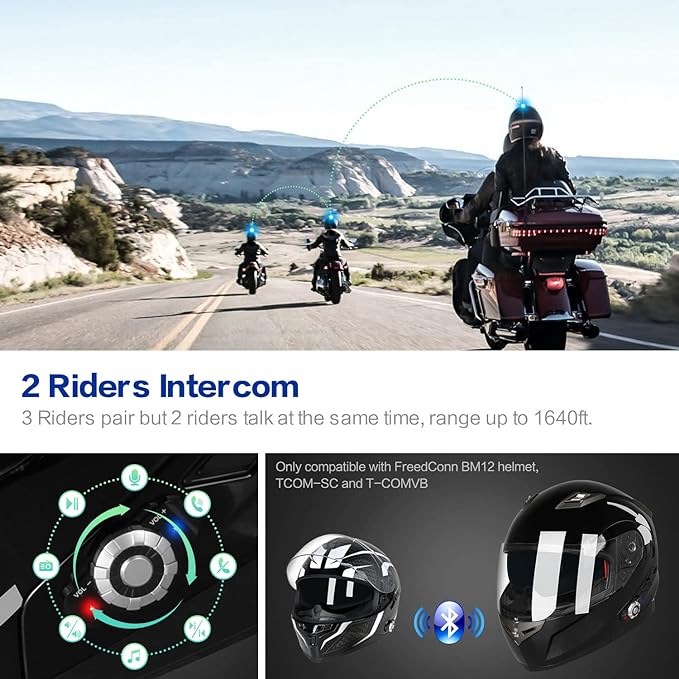
Visors serve multiple purposes beyond shielding the eyes from sunlight and debris. Anti-fog and anti-scratch coatings enhance visibility, ensuring clear sightlines even in challenging conditions. Quick-release mechanisms for visors offer convenience during changing light or weather conditions. Quality padding made of moisture-wicking materials enhances comfort and helps in sweat absorption, preventing discomfort during rides. Some helmets also accommodate communication systems, allowing riders to stay connected or communicate with fellow riders via integrated Bluetooth technology, enhancing both safety and convenience.
Understanding these facets empowers riders to prioritize comfort, safety, and functionality when selecting a motorcycle helmet. The right fit, quality materials, ventilation systems, and additional features all contribute to a more enjoyable and secure riding experience, ensuring that every journey is both safe and comfortable.
Factors to Consider When Choosing a Motorcycle Helmet
Finding the perfect helmet involves more than just picking the right size. It’s about comfort, materials, ventilation, and additional features. Ensuring a snug fit, choosing durable materials like fiberglass or carbon fiber, and considering ventilation to keep you cool during long rides are crucial aspects to weigh in.
Importance of Aesthetics: How Style Plays a Role in Choosing a Helmet
While safety is paramount when selecting a motorcycle helmet, style and aesthetics also hold significant importance. The appearance of a helmet isn’t merely about fashion; it’s about self-expression and aligning with the rider’s personality. Style plays a pivotal role in enhancing the overall riding experience, instilling confidence and a sense of identity while on the road. Aesthetics aren’t just superficial; they contribute to the rider’s comfort and enjoyment.
Reflecting Personal Taste: Discussing Color Options, Designs, and Customization
Color options and designs are avenues for riders to express their individuality and preferences. Some riders prefer classic and understated colors like black, white, or matte finishes, while others opt for vibrant hues or intricate graphics that reflect their personality or match their motorcycle’s aesthetics. Helmets come in an array of designs, from sleek and minimalist styles to bold graphics or patterns, catering to diverse tastes and preferences.
Moreover, customization options allow riders to tailor their helmets to their liking. Some manufacturers offer customization services, allowing riders to add personal touches such as custom paint jobs, decals, or even personalized graphics. This customization not only adds a unique touch but also creates a stronger bond between the rider and their gear.
Selecting a helmet that resonates with personal taste and style isn’t just about aesthetics; it can also influence the rider’s attitude and confidence while riding. Feeling comfortable and connected to their gear encourages a sense of ownership and pride, positively impacting the overall riding experience.
In essence, the aesthetics of a helmet go beyond mere looks; they’re an extension of the rider’s personality and individuality. Whether it’s through color choices, designs, or customization options, helmets serve as a canvas for riders to express themselves, creating a unique and personal connection that enhances their riding journey.
Style and Personal Preferences
Who says safety can’t be stylish? Helmets today aren’t just about protection; they’re also fashion statements. Whether you prefer bold colors, sleek designs, or customization options to match your personality, there’s a helmet out there that blends safety with your unique style.
The Search Process
Shopping for a helmet involves more than just browsing online. It’s about research, trying out options, and understanding what suits you best. Reading reviews, visiting stores to test the fit, and considering the pros and cons of online versus in-store purchases are all part of finding your perfect match.
Researching Brands and Reviews: Importance of Thorough Research Before Purchasing
Before investing in a motorcycle helmet, conducting thorough research is key to making an informed decision. Exploring different brands, their reputations, and the range of helmets they offer is crucial. Reading reviews from both experts and fellow riders provides valuable insights into the quality, performance, and durability of various helmet models. This research phase allows potential buyers to understand the features, safety certifications, and overall satisfaction levels associated with different brands, aiding in narrowing down options that align with their preferences and safety requirements.
Trying It Out: Visiting Physical Stores to Ensure Proper Fit and Comfort
While online research is invaluable, physically trying on helmets is essential to ensure a proper fit and maximum comfort. Visiting brick-and-mortar stores allows riders to assess the fitment firsthand, ensuring the helmet contours to their head shape comfortably. Trying on various sizes, adjusting straps, and feeling the weight and padding firsthand helps in determining which helmet provides the best fit and comfort. Additionally, experiencing the helmet in person provides insights into its ventilation, noise levels, and overall feel, enabling a more confident purchase decision.
Online vs. In-Store Shopping: Pros and Cons of Each Approach
Online Shopping: Pros:
- Convenience: Shopping from the comfort of home at any time.
- Extensive Options: Access to a wide range of brands and models.
- Comparative Research: Ability to compare prices and read reviews easily.
- Warehouse prices: save big time or get extra.
Cons:
- Fit Uncertainty: Inability to try the helmet for size and comfort before purchase.
- Return Process: Challenges associated with returns if the helmet doesn’t fit or meet expectations.
- Limited Sensory Experience: Lack of firsthand experience with the helmet’s feel and features.
In-Store Shopping: Pros:
- Fitting and Feel: Ability to try on helmets to ensure proper fit and comfort.
- Hands-on Experience: Evaluating ventilation, noise levels, and overall quality firsthand.
- Immediate Purchase: Instant availability for immediate use after purchase.
Cons:
- Limited Selection: Some stores might have a smaller variety of brands/models.
- Time-Consuming: Requires visiting physical stores, which may not always be convenient.
- Potential Bias: In-store staff might have preferences or biases towards certain brands.
Choosing between online and in-store shopping depends on individual preferences and circumstances. Online shopping offers convenience and access to a wide range of options but lacks the ability to try on helmets before purchasing. In contrast, in-store shopping allows for hands-on experiences but might have limitations in terms of selection and convenience.
In conclusion, a combination of thorough online research and in-store visits for fitting and evaluation provides a comprehensive approach to selecting the perfect motorcycle helmet, ensuring both comfort and safety for every rider.
Addressing Common Concerns and Misconceptions
Let’s bust some myths! Helmets aren’t uncomfortable, and they definitely don’t obstruct vision. Addressing common misconceptions helps riders embrace the protective gear more willingly, understanding its true value.
Helmet Myths Debunked: Addressing Misconceptions About Helmets
Misconceptions surrounding motorcycle helmets persist despite their proven effectiveness in preventing head injuries. It’s crucial to dispel these myths to promote a better understanding of the importance and benefits of wearing helmets.
“Helmets restrict vision and hearing.” Reality: Modern helmet designs ensure adequate visibility and hearing while riding. Helmets meet safety standards, providing sufficient peripheral vision and minimizing noise without compromising safety.
“Helmets increase the risk of neck injuries.” Reality: Properly designed helmets distribute impact forces, reducing the risk of head injuries. They are engineered to absorb and disperse impact energy, minimizing the strain on the neck during a crash.
“I’m a skilled rider; I don’t need a helmet.” Reality: Accidents can happen to anyone, regardless of skill level. Helmets protect against unforeseen incidents and can be a crucial lifesaving measure in case of a collision or fall.
“Helmets don’t significantly improve safety.” Reality: Statistics consistently show that wearing helmets dramatically reduces the severity of head injuries and the likelihood of fatalities in motorcycle accidents.
Overcoming Barriers to Wearing Helmets: Encouraging Riders to Prioritize Safety
Encouraging riders to prioritize safety and wear helmets involves addressing misconceptions and fostering a culture of responsible riding.
- Education and Awareness: Providing factual information about the efficacy of helmets in preventing head injuries is essential. Campaigns, safety seminars, and educational programs can help debunk myths and emphasize the life-saving benefits of wearing helmets.
- Lead by Example: Influential figures within riding communities, such as experienced riders, influencers, or leaders, can set positive examples by consistently wearing helmets. Their actions can influence others to follow suit and prioritize safety.
- Legislation and Enforcement: Strong helmet laws and their strict enforcement play a crucial role in encouraging helmet use. Strict enforcement not only promotes compliance but also underscores the seriousness of the safety measure.
- Community Support: Creating a supportive environment within riding communities, where wearing helmets is encouraged and normalized, fosters a culture where safety is valued and respected.
By debunking myths and addressing barriers to helmet use, riders can be empowered to make informed decisions regarding their safety. Prioritizing safety through education, leading by example, and supportive measures within communities can significantly increase helmet usage rates and, ultimately, save lives on the road.
The Investment in Safety and Style
Think of your helmet as an investment in your safety and comfort rather than just another expense. Balancing cost with quality ensures you get a helmet that’s durable and provides the protection you need.
Conclusion
Selecting the right motorcycle helmet involves considering safety, comfort, and personal style. It’s not just about finding any helmet; it’s about finding YOUR helmet—one that reflects who you are while ensuring you stay safe on every ride. Stay upright.